Kimono are a traditional Japanese form of clothing worn by both men and women. Kimono is a garment that is uniquely Japanese; no other people group has a style of dress like it. Today, it is a common sight to see Japanese and foreign visitors alike strolling through historic neighborhoods in Kyoto, Tokyo and other parts of Japan wearing rental kimono in an endless variety of styles and colors.
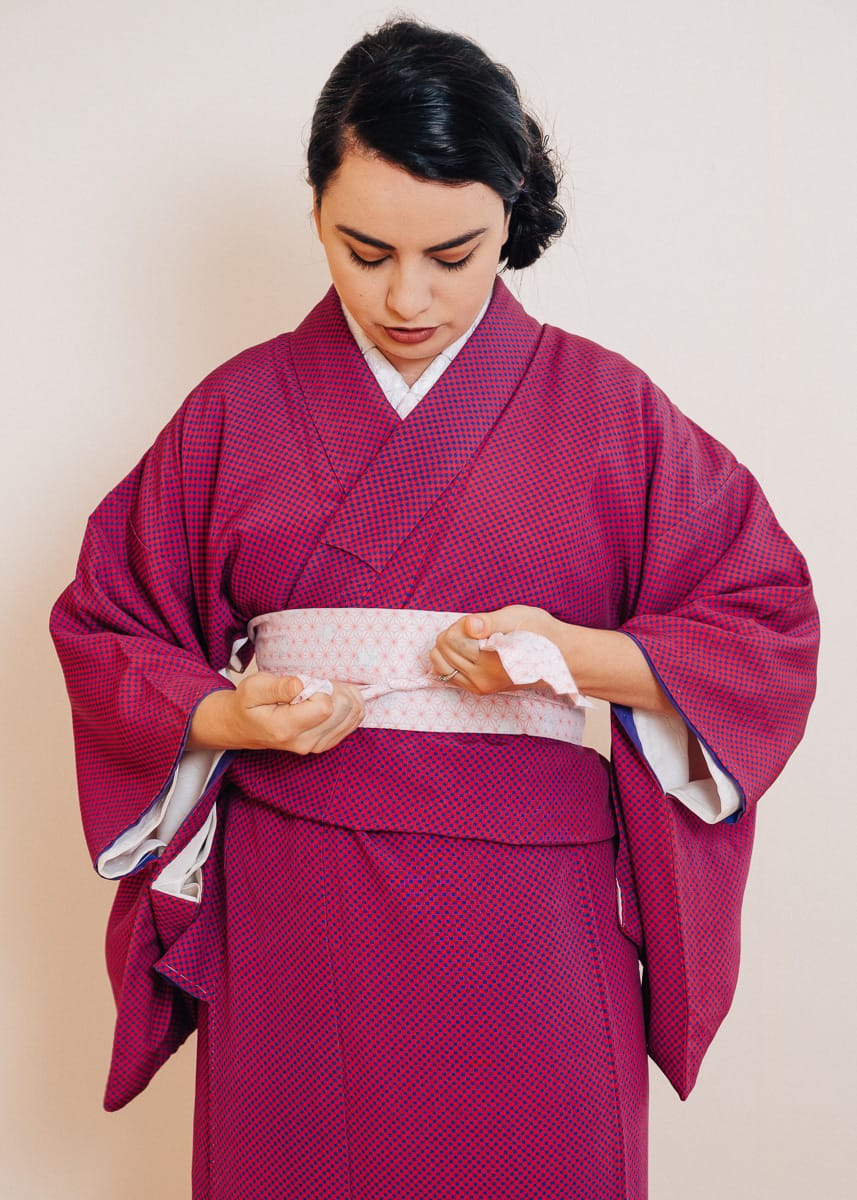
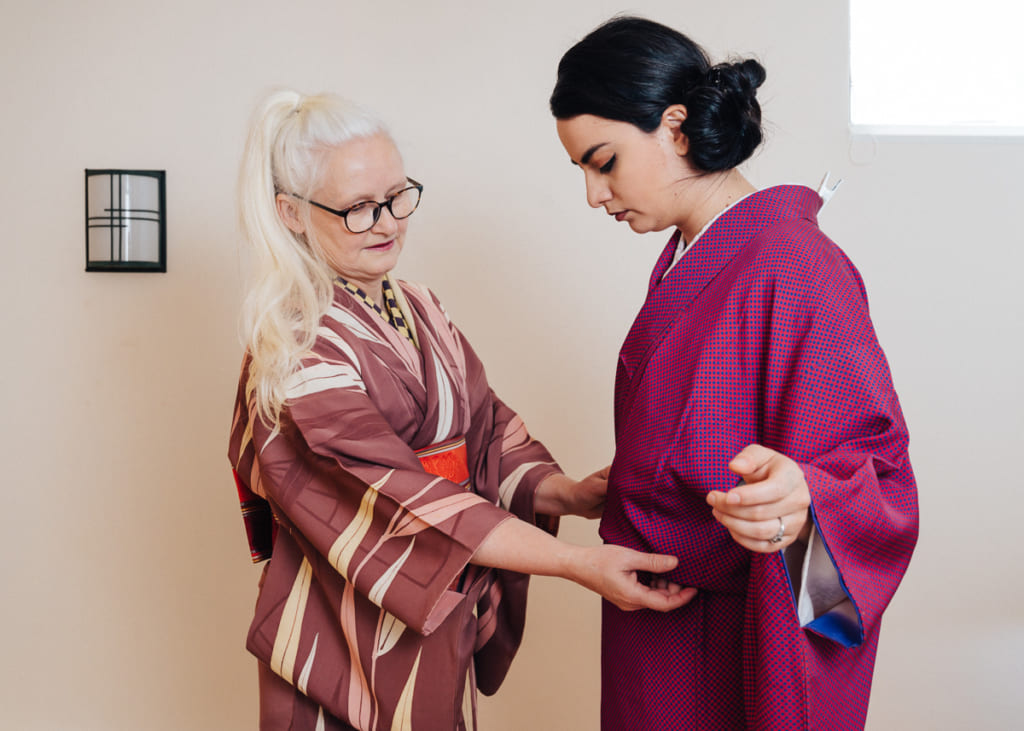
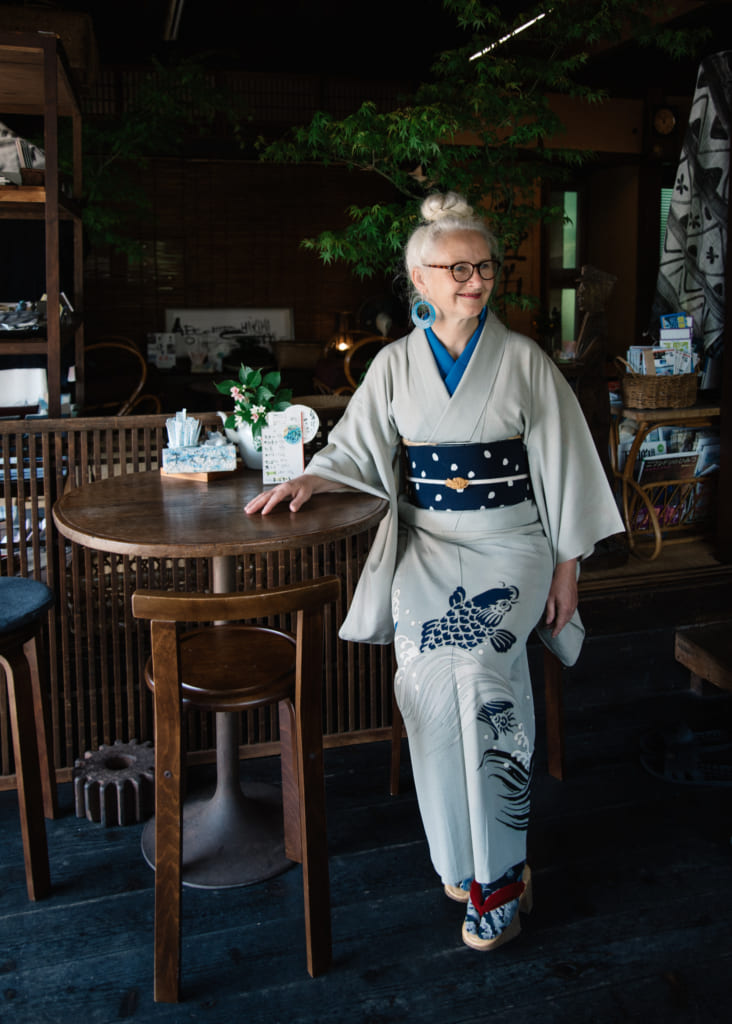
Though most people only rent kimono, used kimono are an inexpensive souvenir that can be found at many used kimono shops around Japan. The main deterrent to people purchasing kimono is not knowing how to put on a kimono when they get back home. We asked kimono expert Sheila Cliffe (Instagram @kimonosheila), a popular author of several kimono books, for tips on how to dress yourself in kimono. Together with kimono aficionado and model Nichole (Instagram @nfkimono), Sheila will help you select all of the items needed to wear women’s kimono properly, and show you how to dress in kimono by yourself.
What Do You Need To Wear a Kimono?
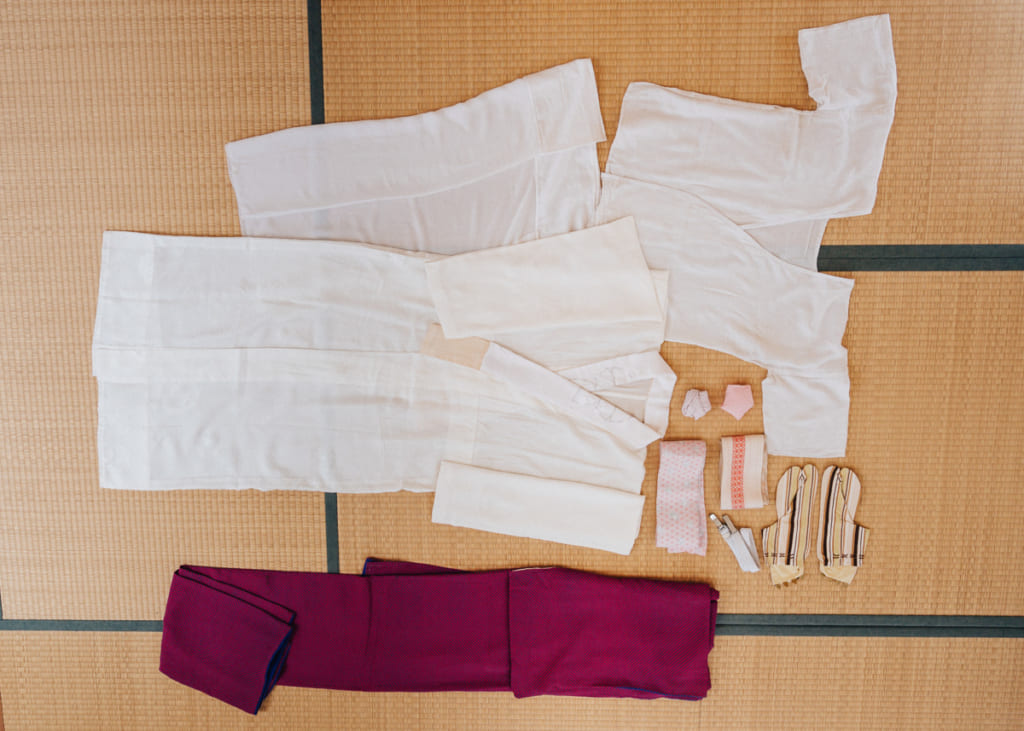
There are several garments and accessories necessary for wearing women’s kimono, some of which are necessary while others are optional. Sheila recommends the following pieces as essential to wearing kimono properly, starting with the layer of undergarments and working outward.
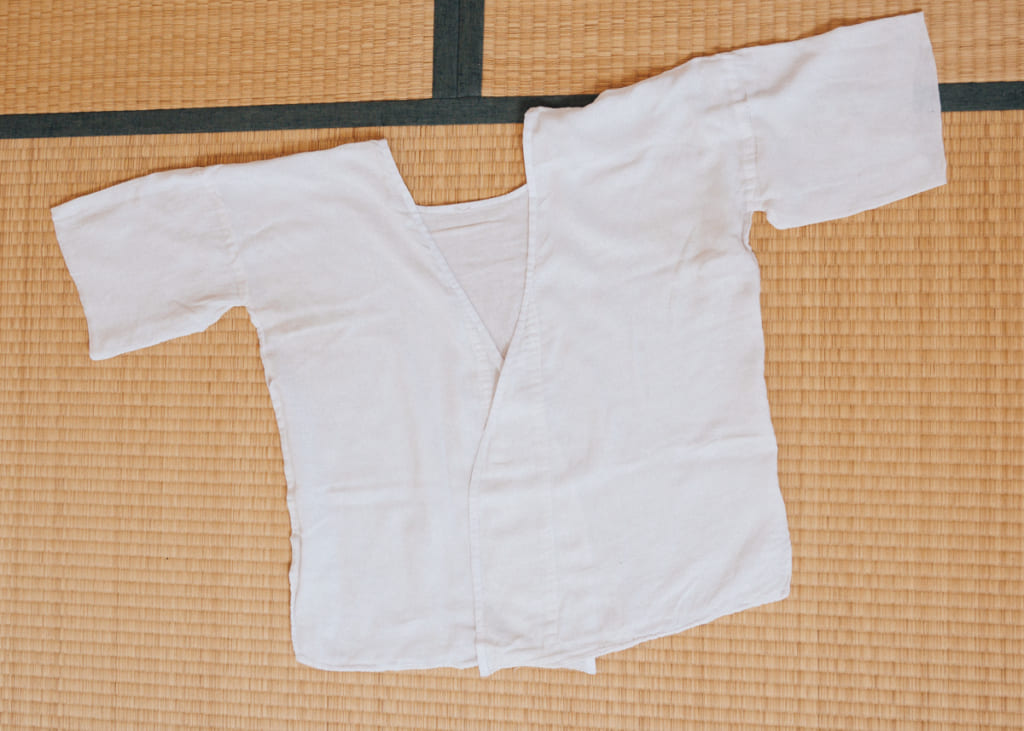
Susoyoke and Hadajuban
These are worn over your regular undergarments. If you have a kimono or sports bra that is flattening rather than uplifting, this is helpful. These are the first kimono specific articles of clothing. The susoyoke 裾除け is like a slip, though some women prefer a pair of long johns, which can make kimono more comfortable, particularly in warm weather. The hadajuban 肌襦袢 is like a thin camisole.
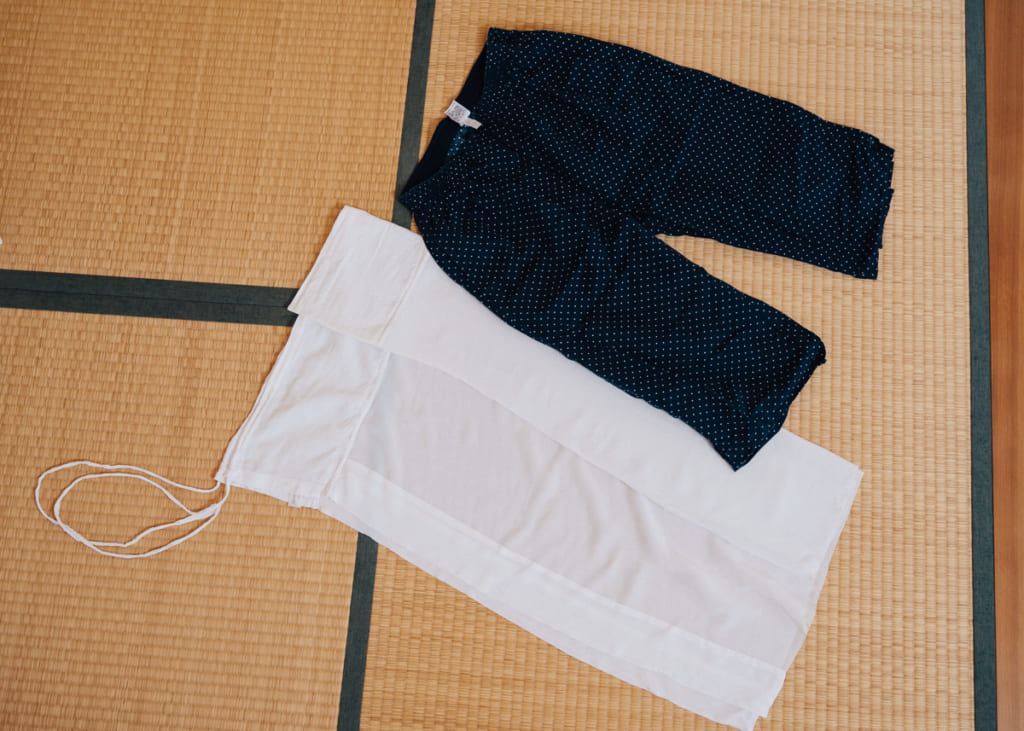
Nagajuban
The nagajuban 長襦袢 is a thin silk robe slightly shorter than the kimono, so the sleeves and hem cannot be seen underneath it. Only a strip of the collar of the nagajuban is exposed under the kimono. You can also sew on your own collars if you prefer a different pattern or color. Any strip of cloth 90cm x 15cm is fine. Along with the nagajuban, you should purchase an erishin, a strip of plastic that slips under the collar to keep it looking neat.
Koshi-himo

Koshi-himo 腰ひも are thin cotton sashes used to tie the nagajuban and kimono closed. You’ll need at least 2 of these, perhaps 3, but they are simple and inexpensive. A more specific accessory known as a korin belt can be used in place of a third koshi-himo to hold the kimono collar in place.
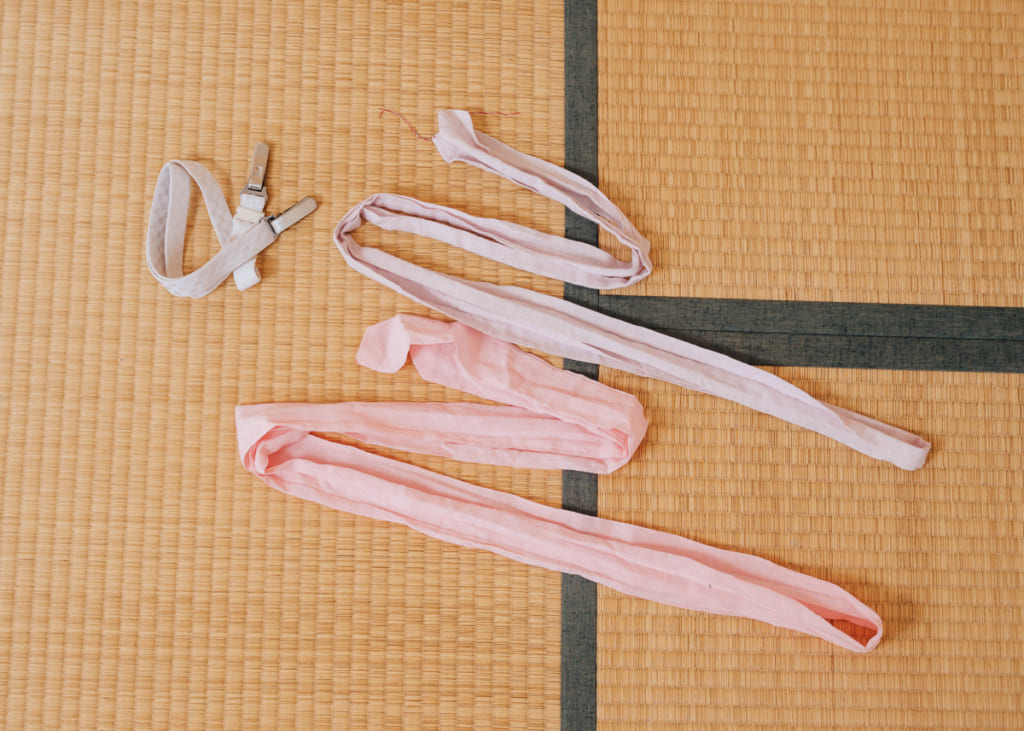
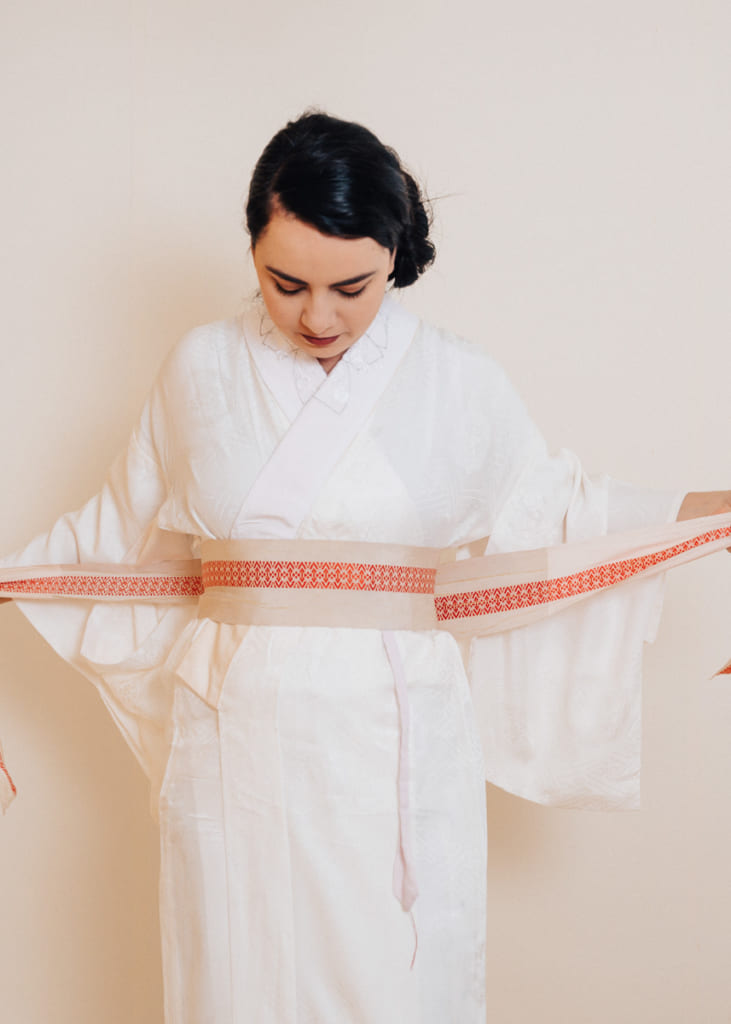
Date-jime
The date-jime 伊達締め is a wide sash which secures the nagajuban and ties the kimono to the body before putting on the obi. It helps to define the cylinder-like figure that is the ideal body shape for wearing kimono. You will need two of them, one on the nagajuban and one on the kimono.

Obi
The obi is the larger outer sash or belt tied around the kimono. It comes in a variety of styles and materials and is the primary accessory used to complement the kimono. Maru obi and Fukuro obi are more formal styles, often with metallic threads and elaborate embroidery. Nagoya obi were invented as obi of convenience, partially sewn together at one end to make tying easier. Hanhaba obi are half-width obi generally worn with yukata or casual types of kimono, and which do not necessitate any extra accessories.
There are endless styles of obi tying, some of which are incredibly complicated and others simple enough for even the first-timer to succeed at. Sheila and Nichole will demonstrate how to tie a hanhaba obi in a follow-up article.
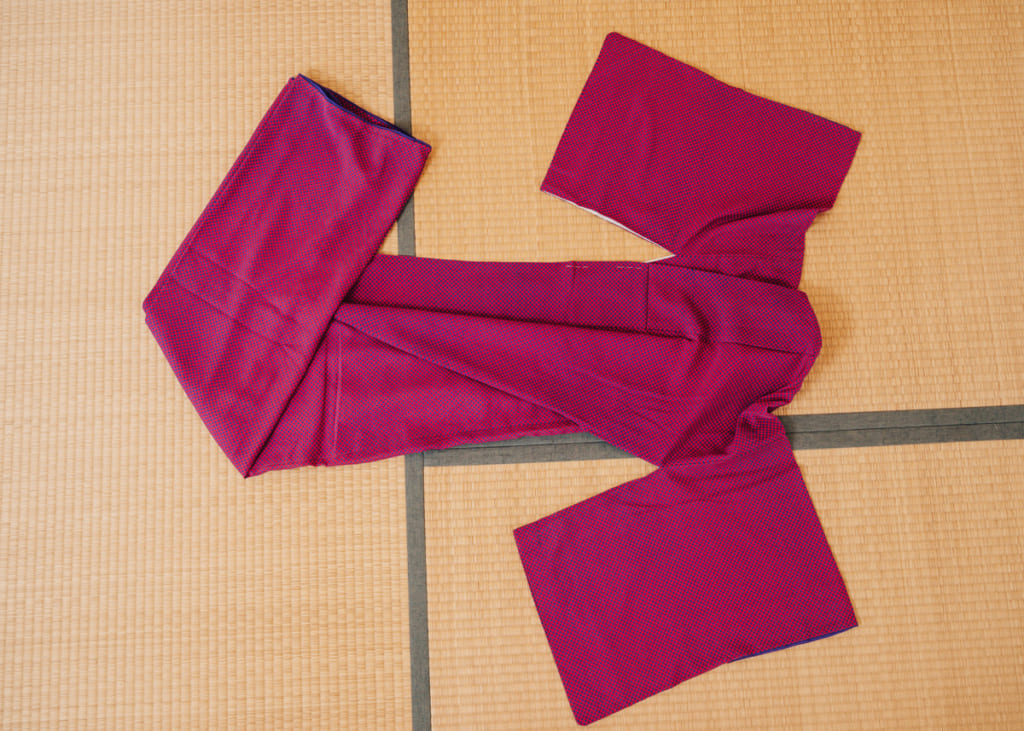
Kimono
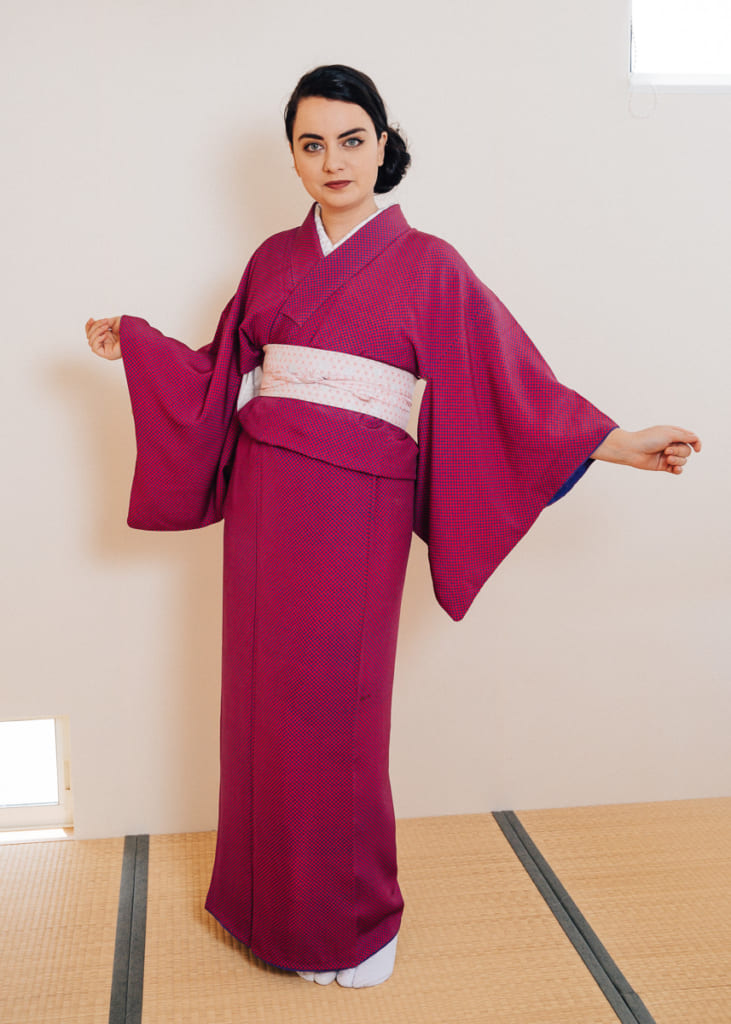
The kimono 着物 is the garment itself. It can be made of silk, linen, cotton, wool or polyester. There are many types of kimono, though the most recognizable is the furisode 振袖 with long sleeves that nearly touch the ground. Furisode are worn by unmarried women and are sometimes associated with maiko, the girls studying to become geisha. Due to the length of the sleeves, furisode are not the most practical kimono to wear, so Nichole chose a lovely yet casual pink and blue komon 小紋, perfect for a stroll around town.
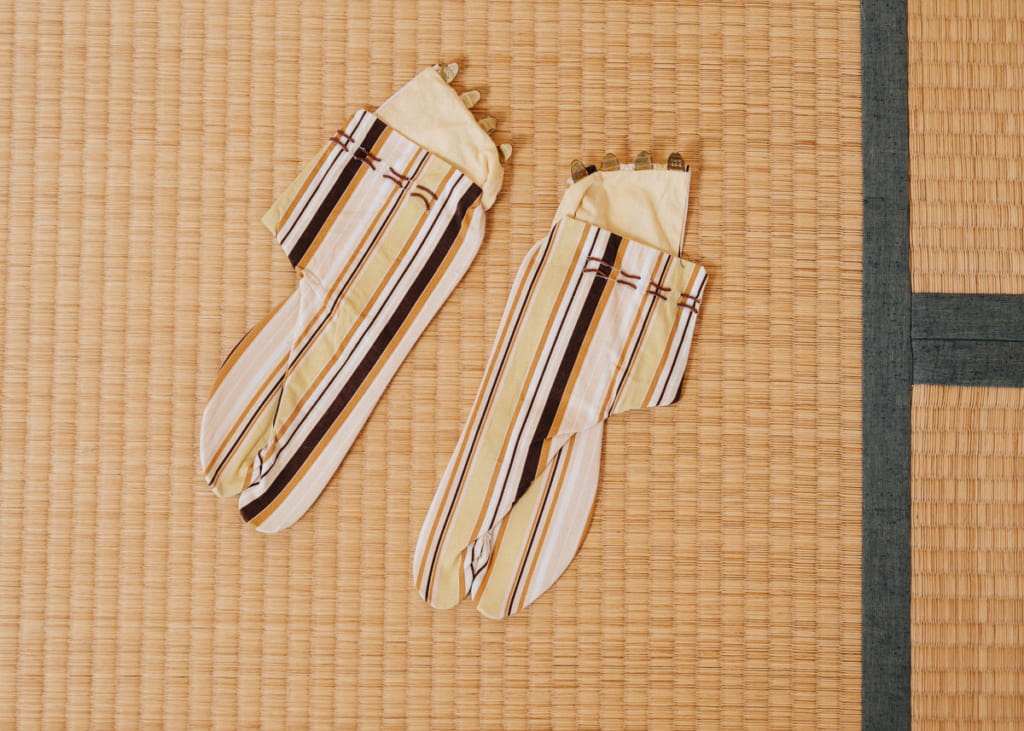
Tabi
Tabi 足袋 are split-toed, ankle-high socks designed to wear with traditional Japanese footwear. Tabi are traditionally white, but today, you can find them in many colors and patterns that can complement your kimono ensemble or personal style.
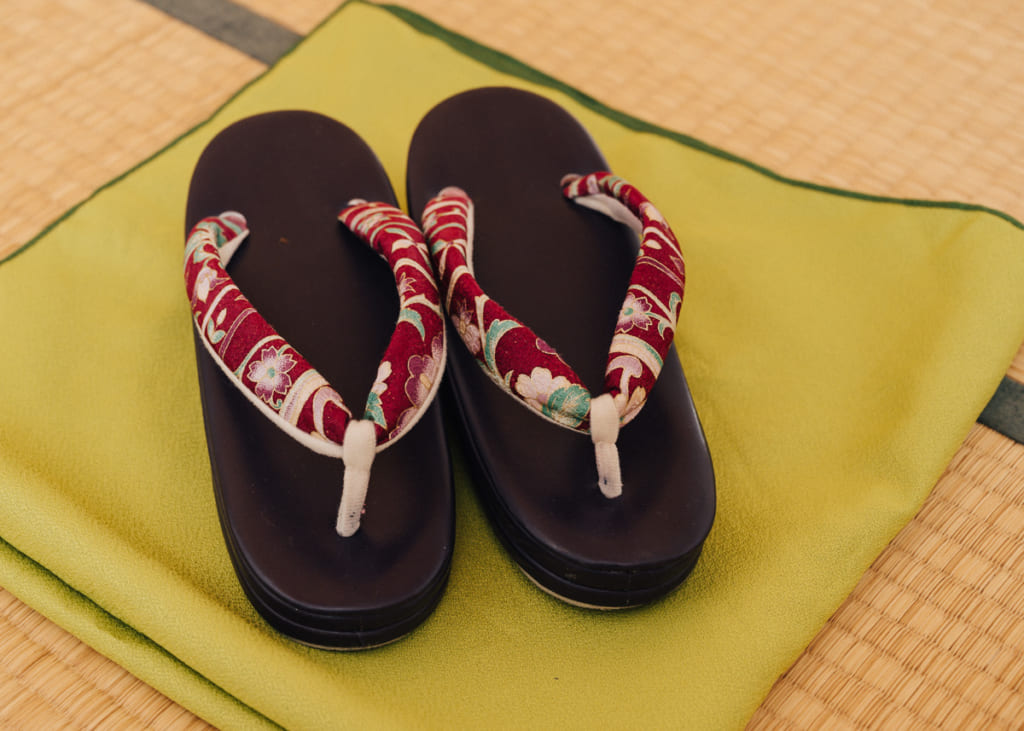
Zori and Geta
Zori 草履 and geta 下駄 are traditional types of Japanese footwear. Zori are flatter, and modern styles are made of synthetic materials that create endless options for colors and patterns. Zori are considered more formal footwear than geta. Geta are made of wood and make the familiar “clip-clop” sound as you walk in them. Some are rectangular in shape, while others are more elegantly cut in the silhouette of a foot.
How To Wear a Kimono
Dressing in kimono might take some practice, but following these five steps will help you get started in experiencing dressing in kimono by yourself. It is assumed you will already be wearing undergarments when you begin; a sports bra and women’s briefs are a good basis.
Step 1: Put on the tabi
This is an often-overlooked first step, but putting on tabi socks after getting dressed in kimono can be tricky. At the very least, it increases the chances that something will slip out of place as you bend and twist to get your tabi socks on!
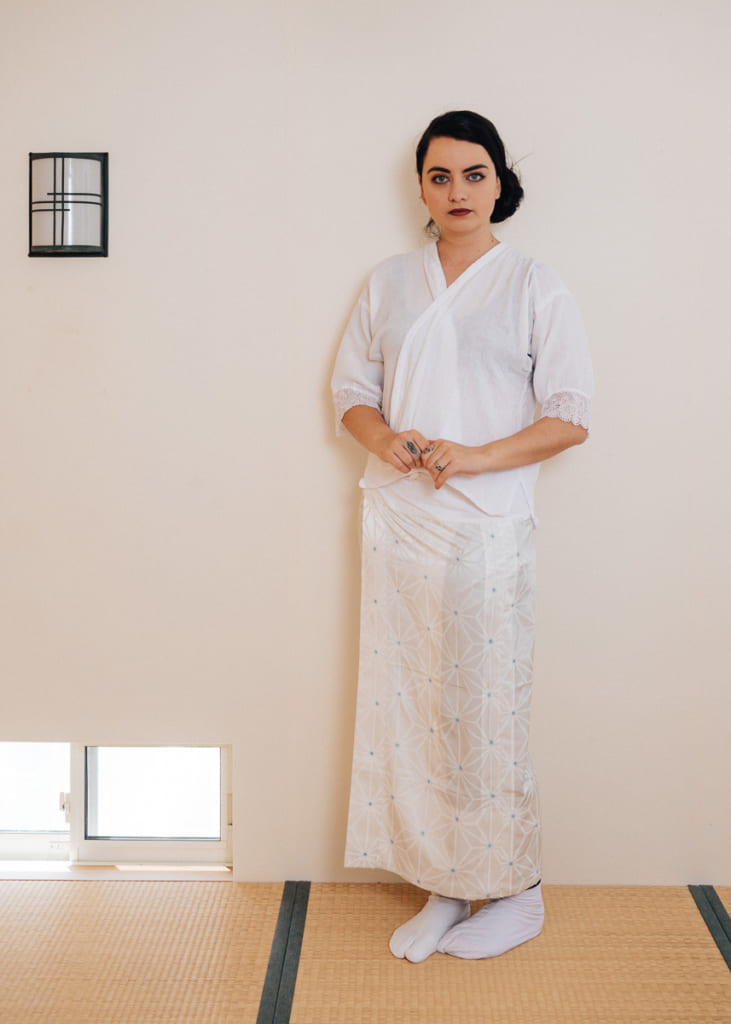
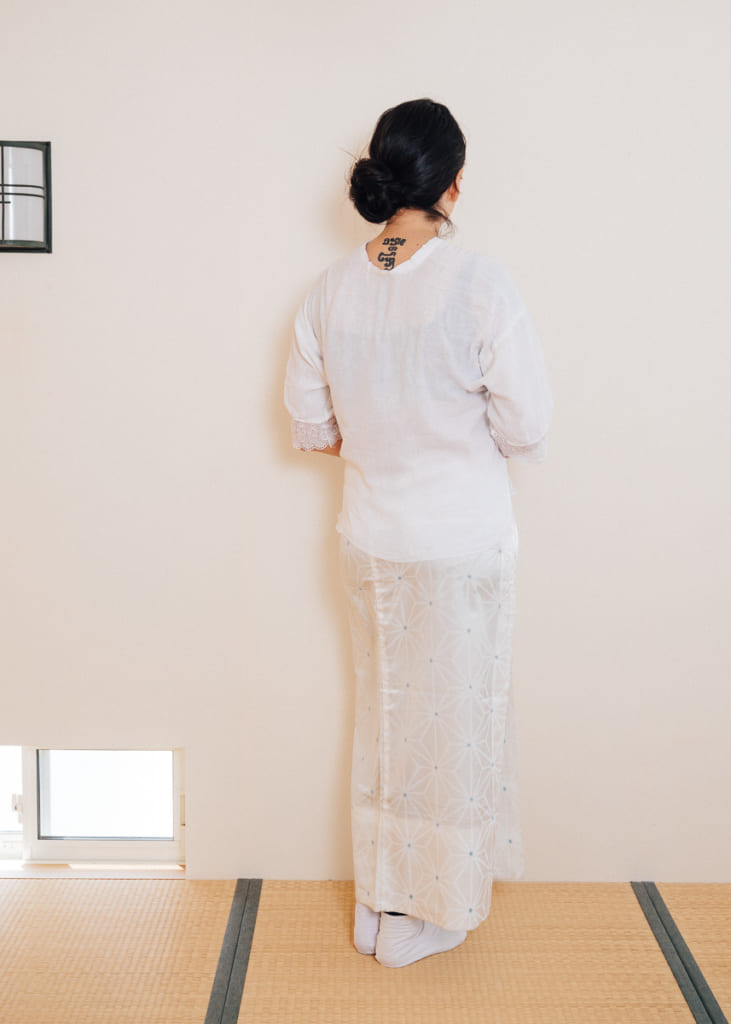
Step 2: Put on the traditional undergarments
Put on the susoyoke (or long johns, if you prefer) first, then the hadajuban. Make sure the hadajuban is centered on your torso and pull it down on the back hem to expose the back of your neck. Do not tuck the hadajuban into the susoyoke or long johns.
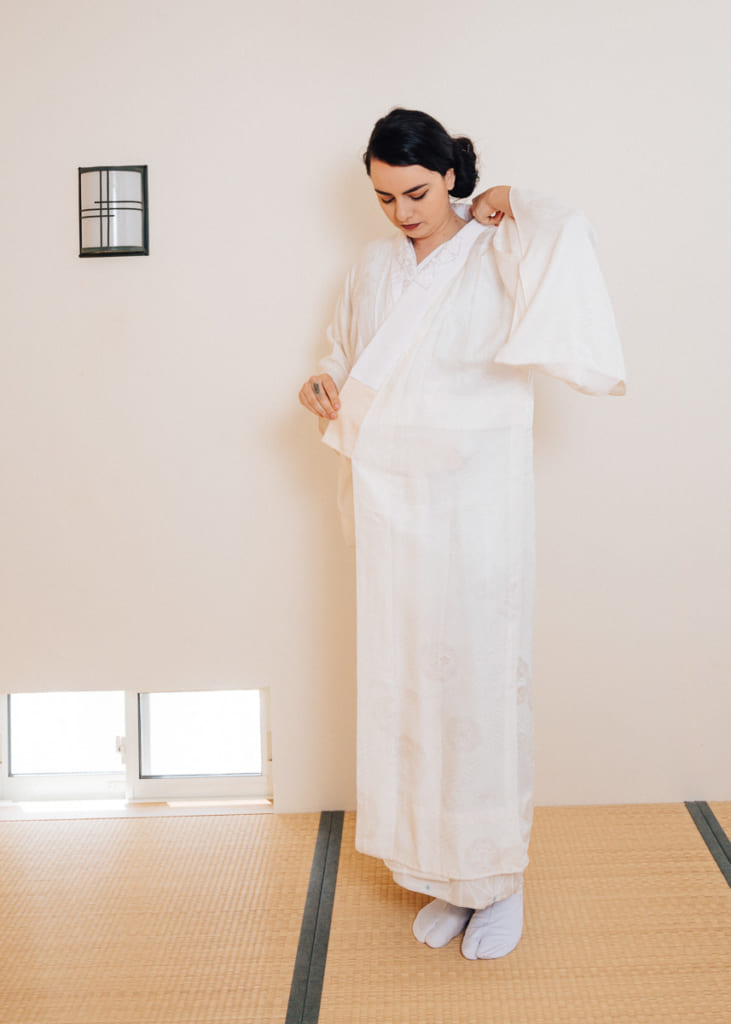
Step 3: Put on the nagajuban
You need to have an erishin, which slides under the collar to keep it stiff and wrinkle-free. If you don’t have one, you can use rolled up and flattened washi paper to push into your collar. Center your nagajuban on your body, leaving a space the width of your fist between the collar and the back of your neck. Take one of the koshi-himo and tie the nagajuban to your body, just below the bust, then take one of the date-jime and tie it over the koshi-himo, securing it. Pull any excess material of the nagajuban to the side seams to hide it.
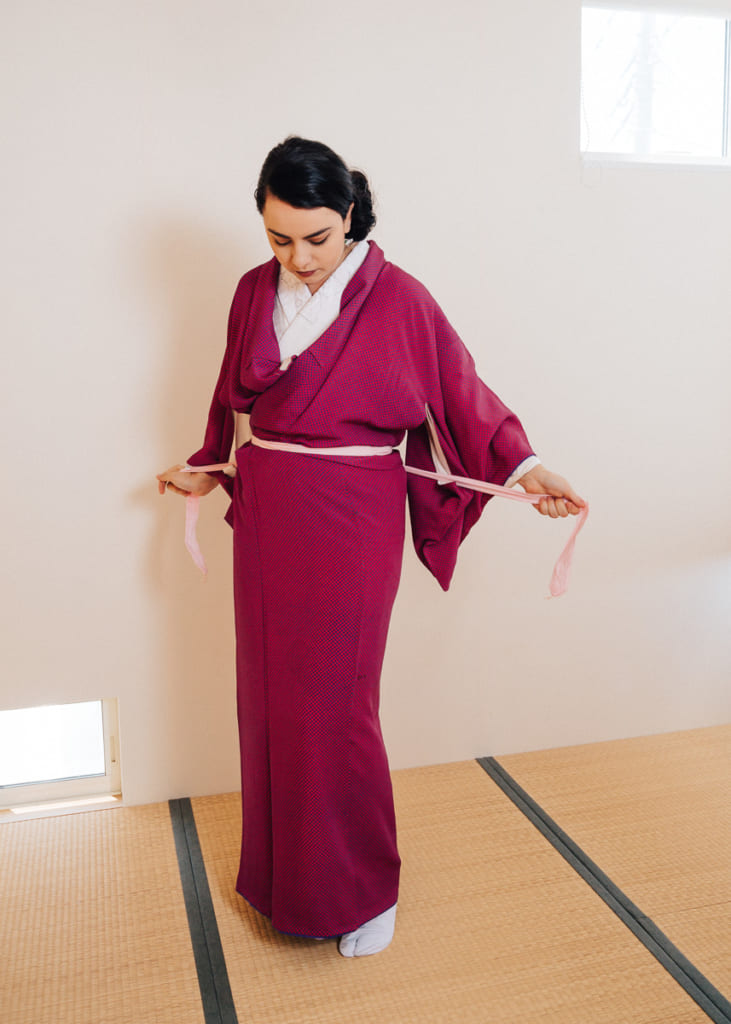
Step 4: Put on the kimono
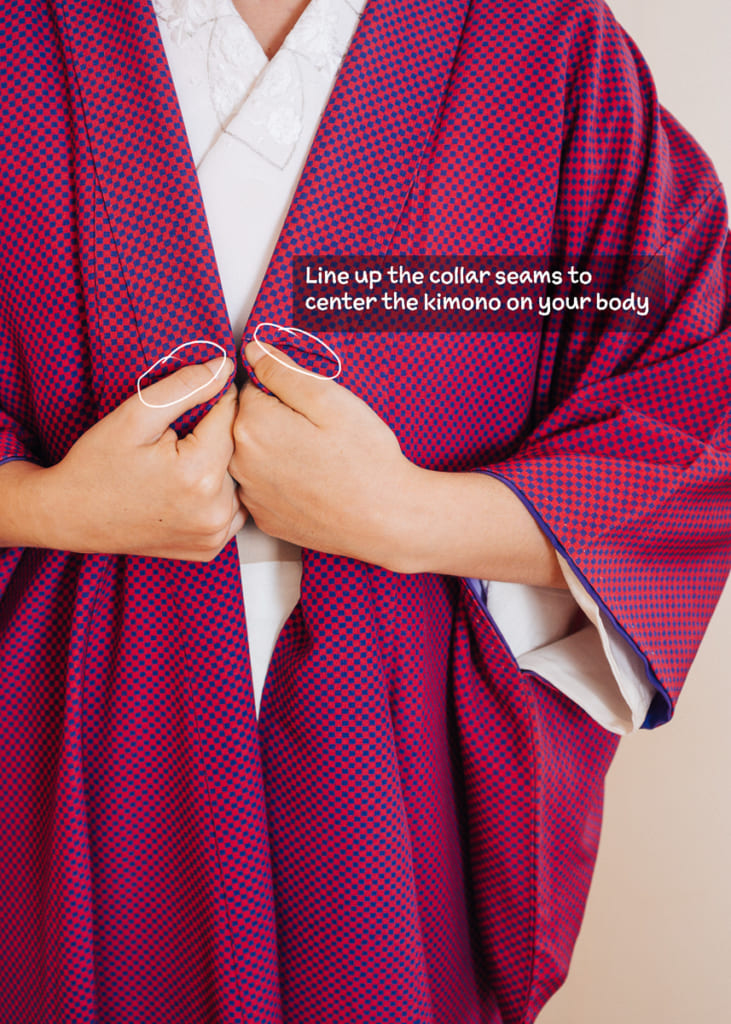
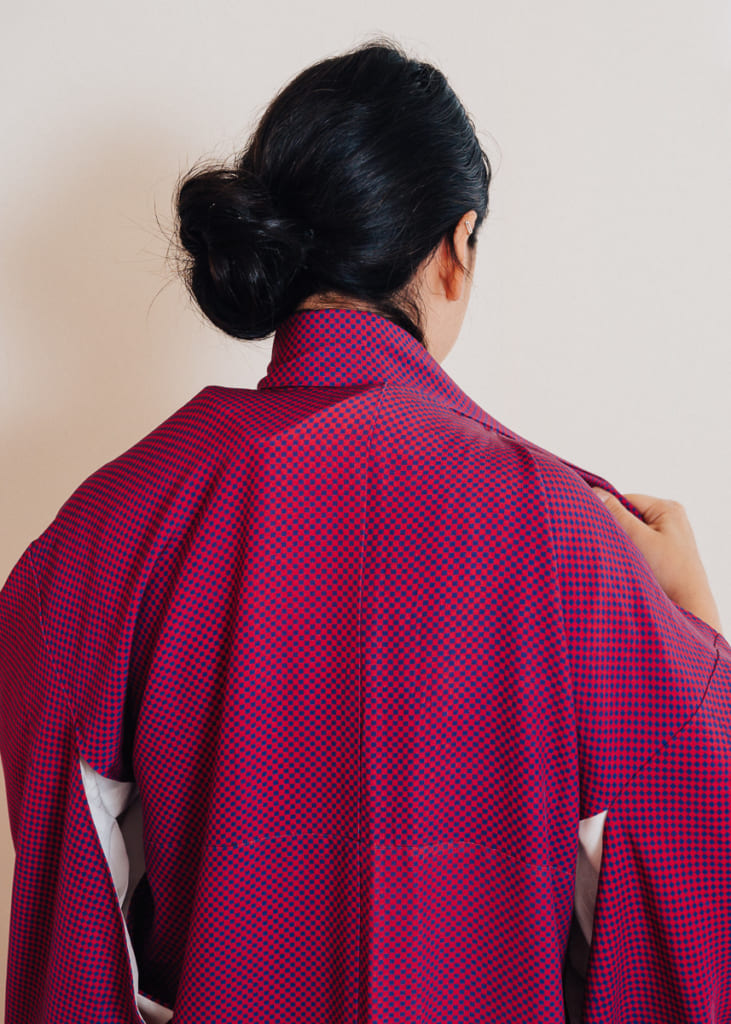
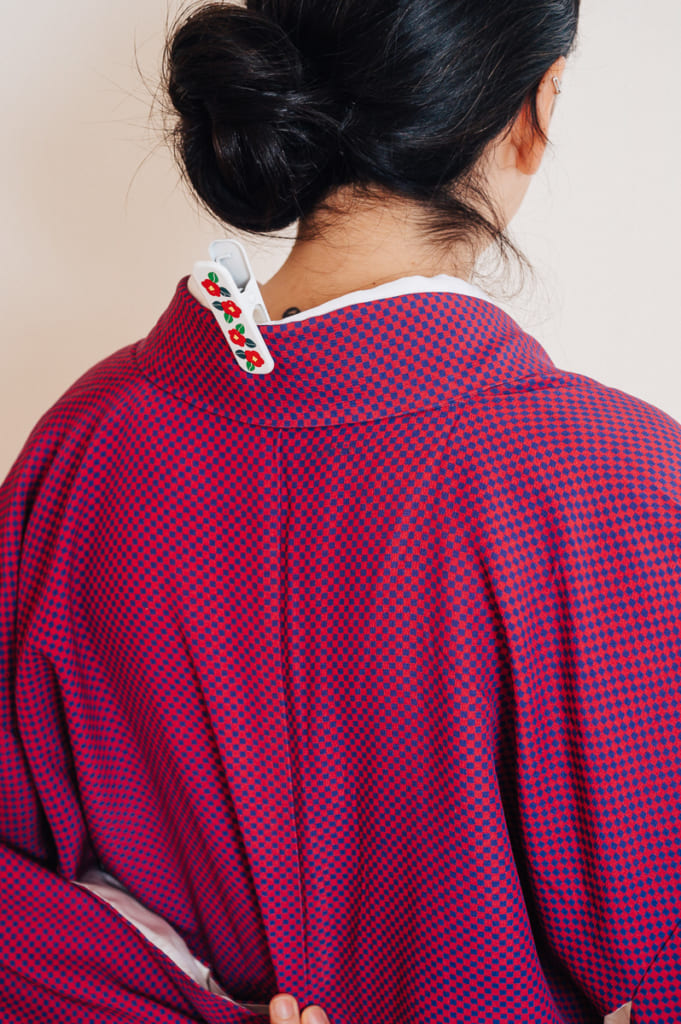
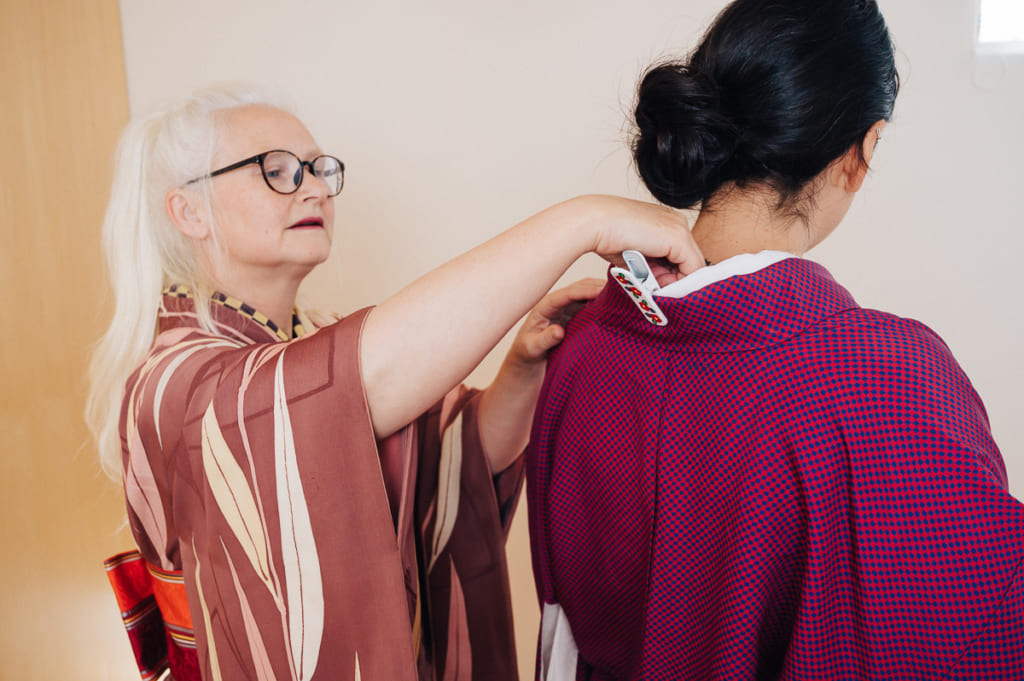
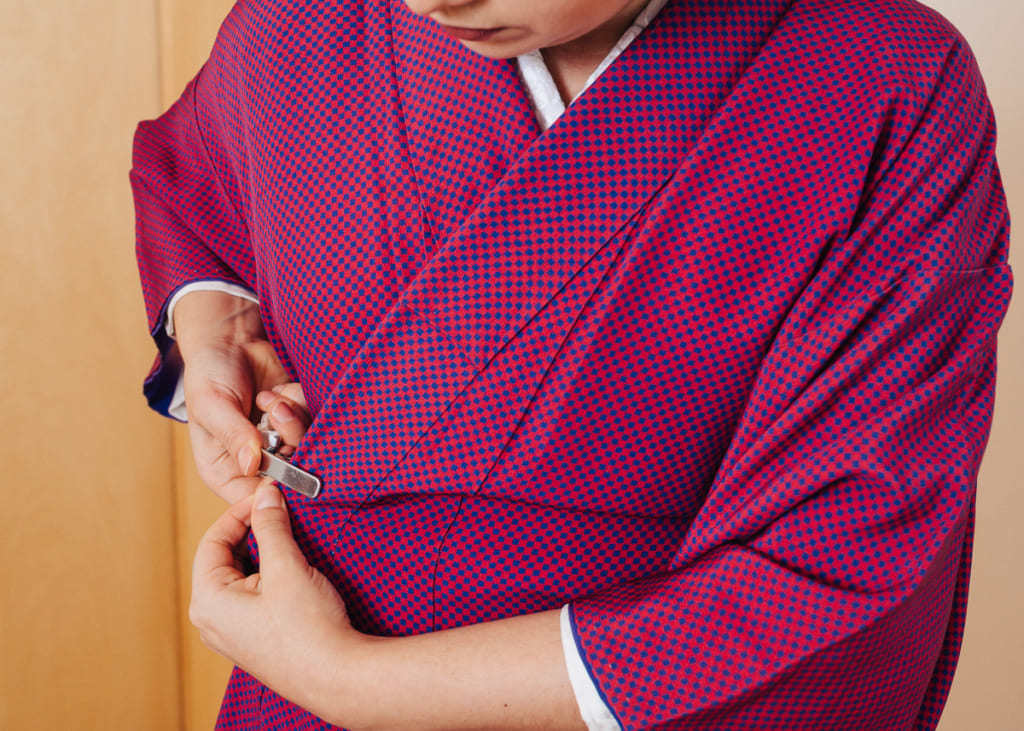
Center the kimono on your body by matching the lower seams of the collar to each other in front of your body. If one seam is higher than the other, the kimono is not centered. Don’t pull it too tight, but align it with the back of the nagajuban collar. The two collars should be the same height at the back but the nagajuban collar should show by one or two cm at the front. You can use a clip or clothespin to hold the kimono and collar in place at the center back.
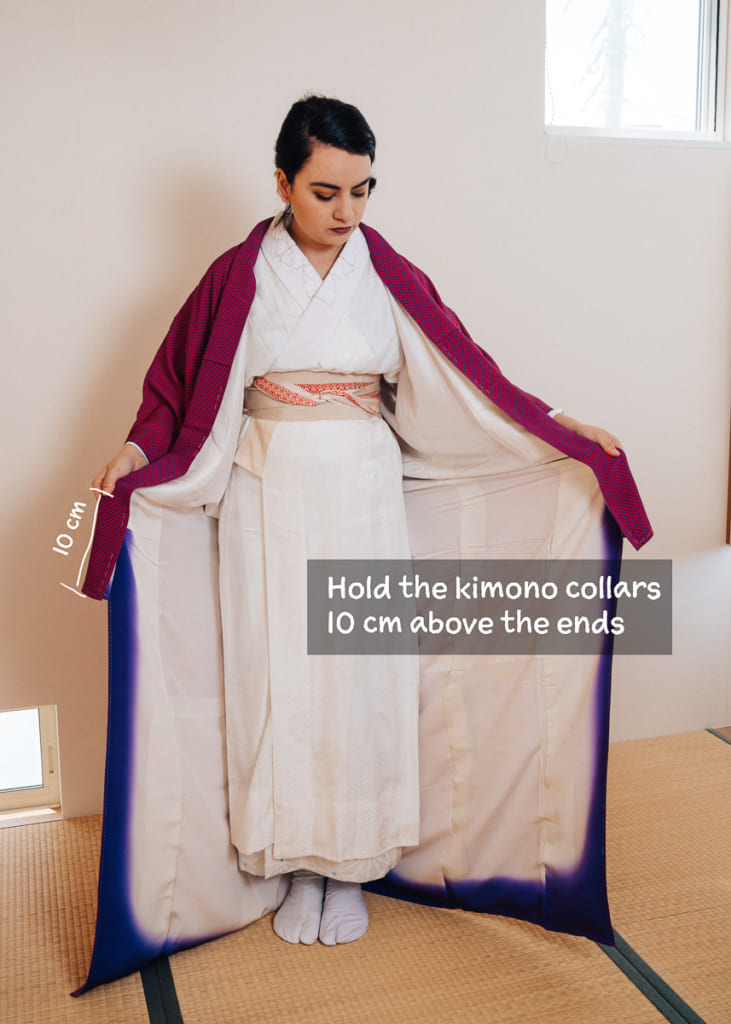
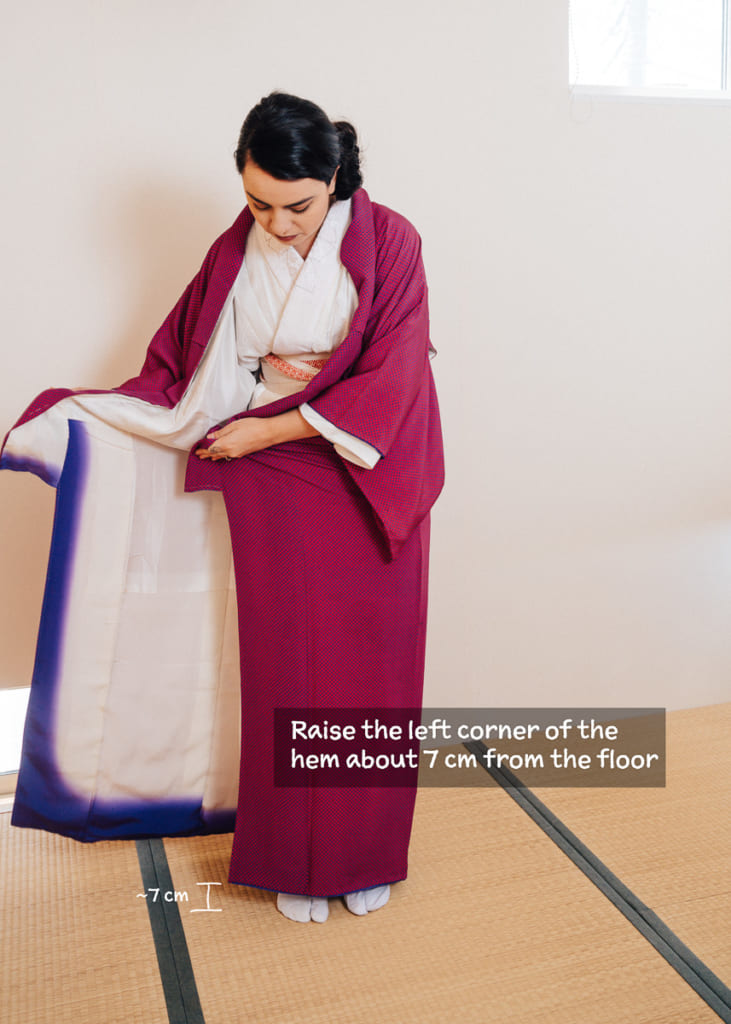
Before performing the next step, make sure your second koshi-himo is easy to reach or already in hand. Grab the kimono about 10cm from the bottom of the collar on both sides, and hoist the bottom hem of the kimono just above the top of your feet. This is your starting point. With the collar in your left hand, wrap the kimono around your legs, pulling the left edge of the kimono around to the right side of your body. The left edge should end up about 7cm higher than the point above your feet. This is just for measuring. After measuring, keep your arm at that height and unwrap yourself. Next, wrap the right side of the kimono around to the left side of your body, this time raising the right edge of the kimono 10-15cm above the top of your feet. Hold it there and re-wrap the left edge of the kimono over the top. Because the right side was lifted higher than the left and is now under the left side, it will not be visible, which is how it is supposed to look.
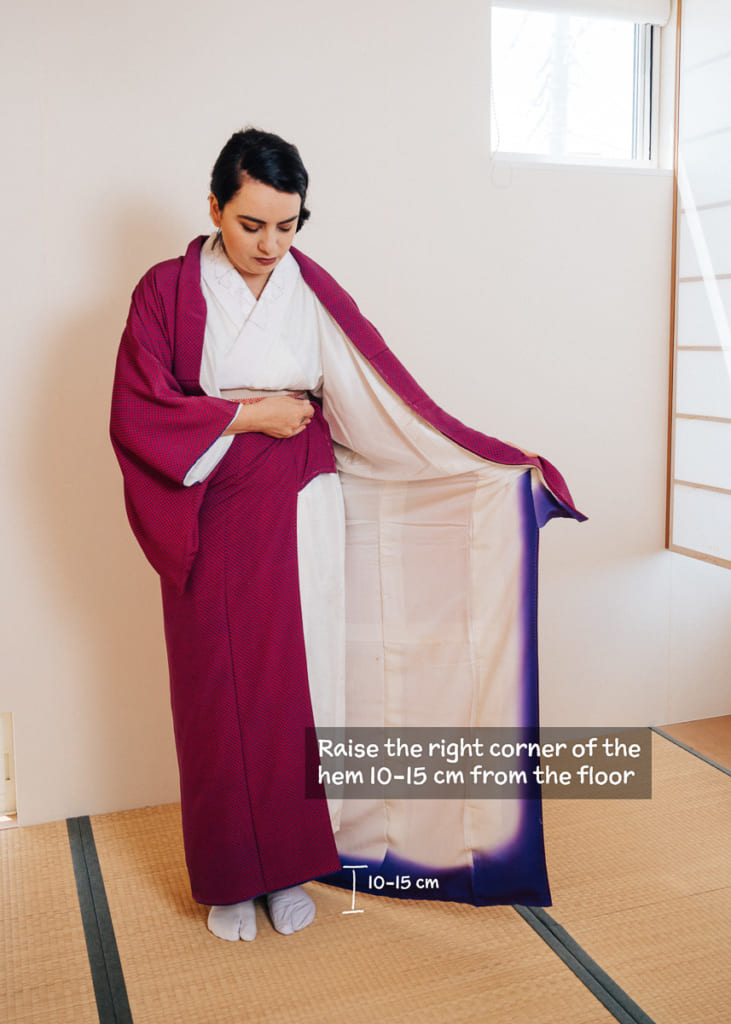
It is crucial that you wrap the left side of the kimono over the right, because the opposite way is only used to dress dead bodies for funerals! (There are some mistakes you can get away with while wearing kimono, but this is not one of them).
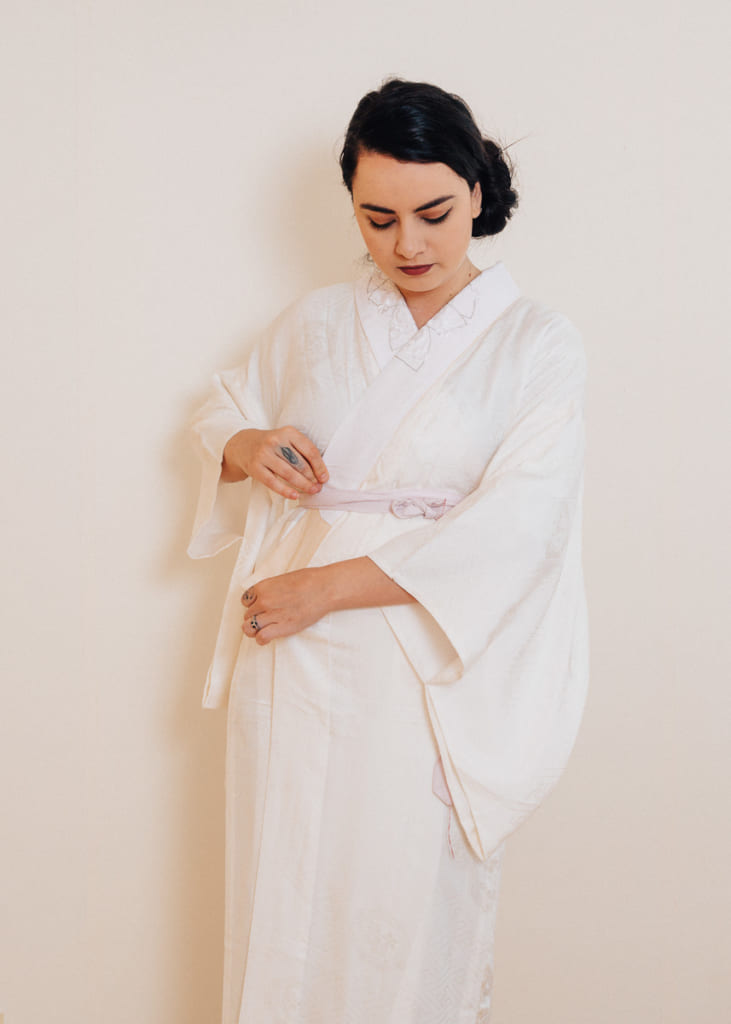
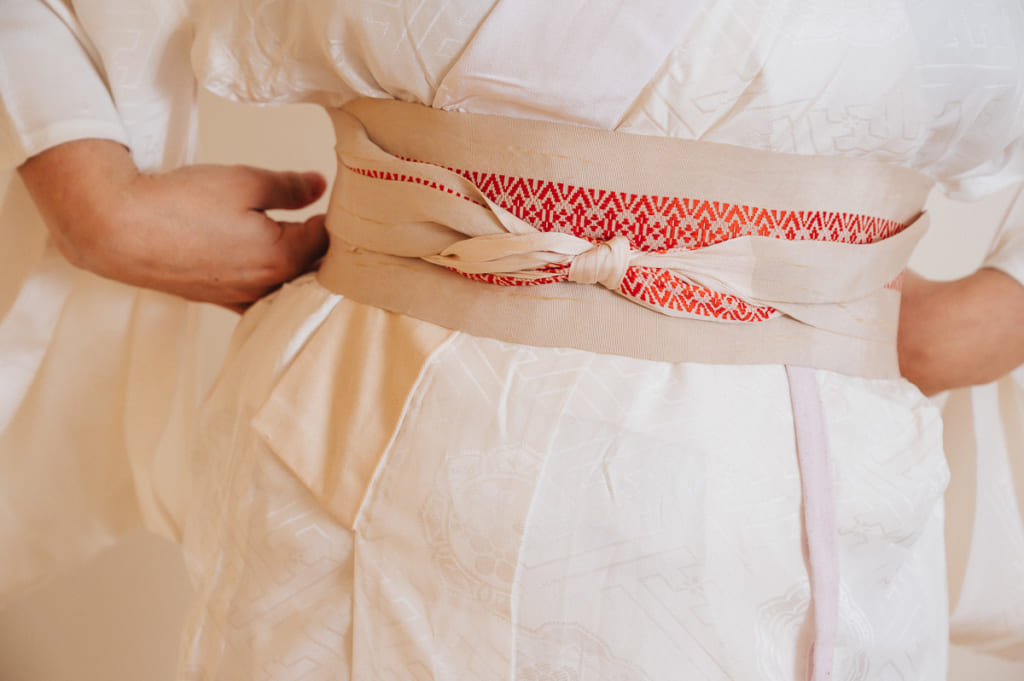
Step 5: Tie the kimono in place
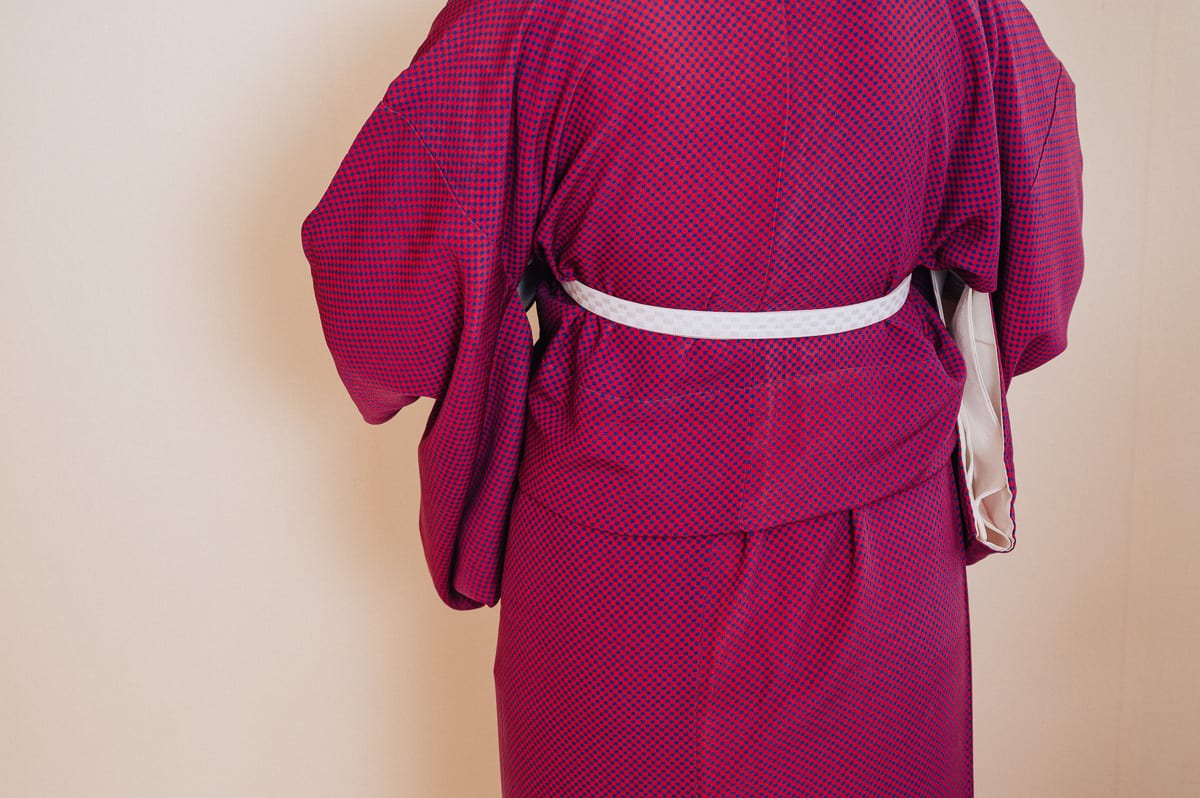
Now that you have everything in place, make sure your koshi-himo is handy because you have to tie it down. Tie the kimono right over your belly button, and tie it well, because this is the primary sash holding the whole thing together. Tuck the excess length of the koshi-himo into itself, so it doesn’t hang down anywhere.
All of the excess kimono material should be above the koshi-himo, which you can now fold down over the sash to give the kimono a flat and neat look. It is perfectly normal to have this excess material, which will be mostly hidden under the obi later. During this step, you might have to readjust the collar to ensure you have the fist-sized gap between the collar and your neck.
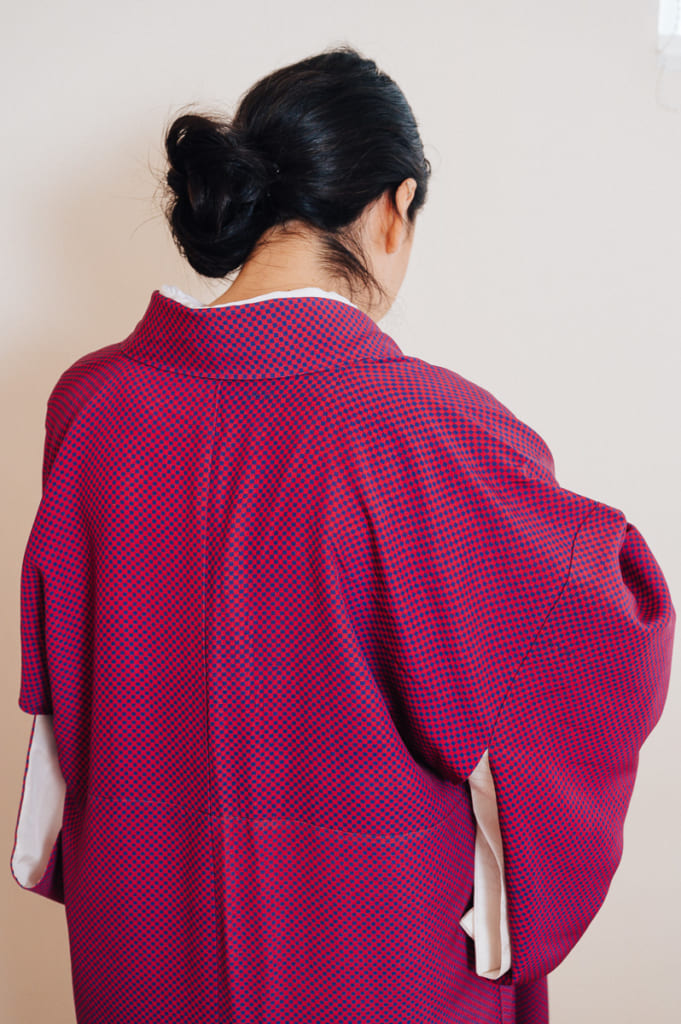
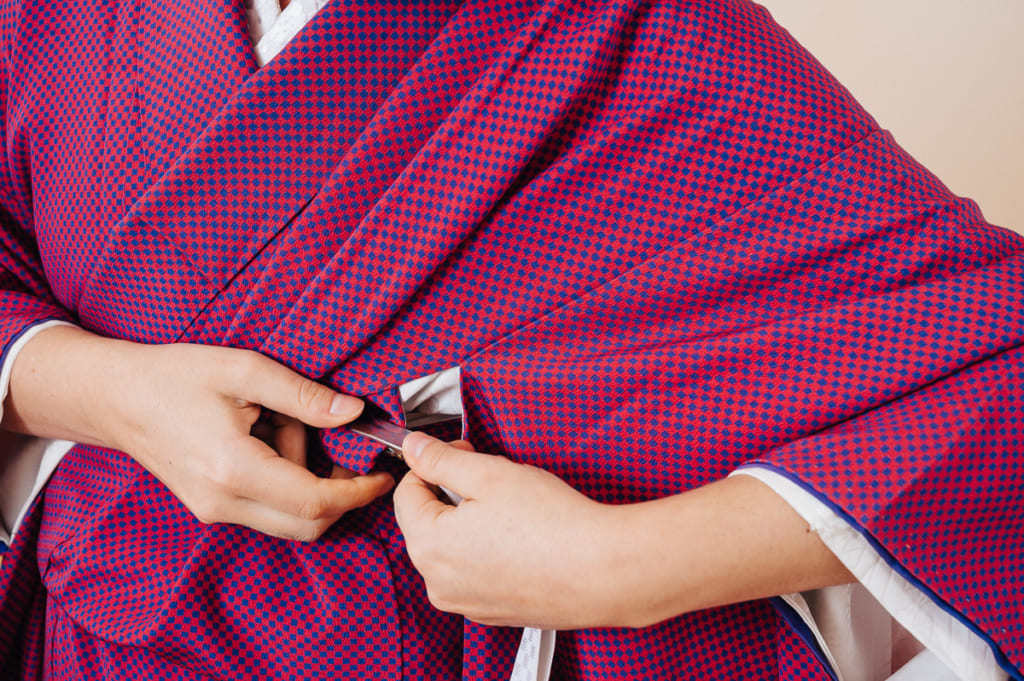
Step 6: Arrange the collars
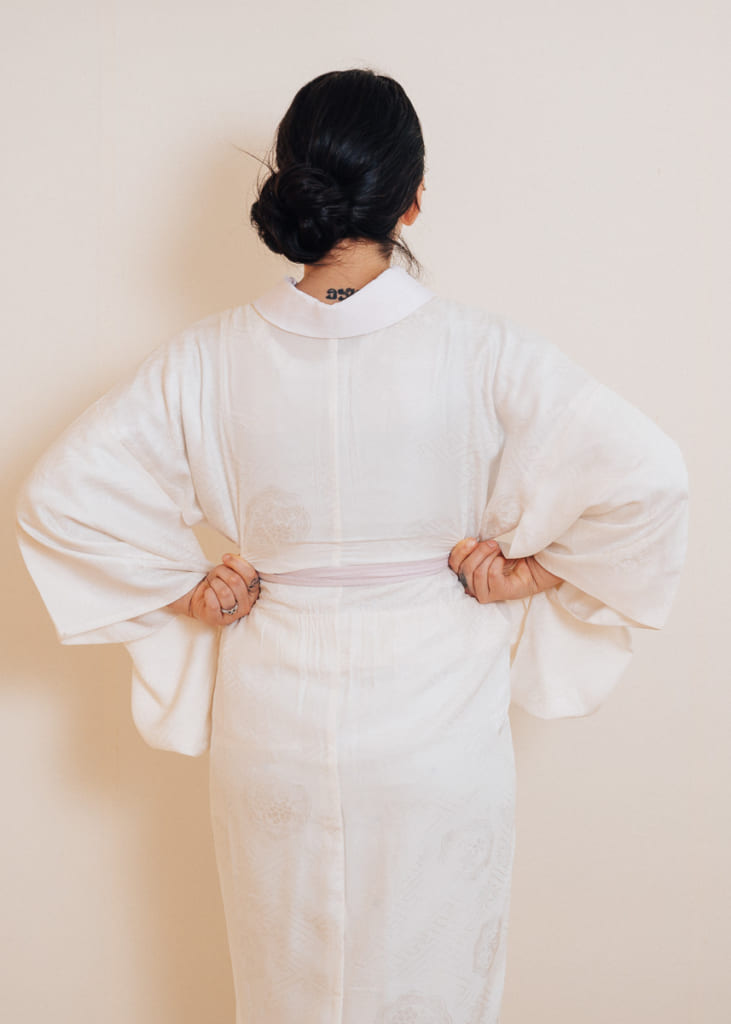
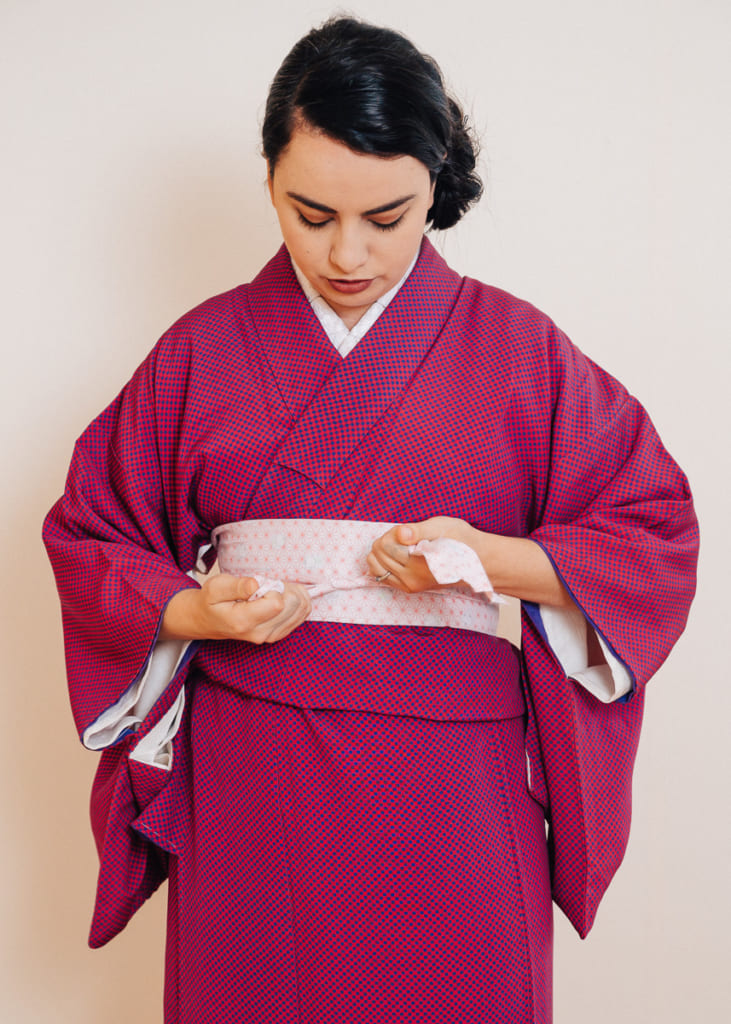
After the excess material is neatly folded over the koshi-himo sash, you need to arrange your kimono collars. This can be done using the third koshi-himo or the korin belt. If you use a belt, clip it to the right side of the kimono, through the hole under your left arm. Pull it around your back and clip the other end to the left front collar on your right side, adjusting the collars so they are symmetrical with about 2 cm of the nagajuban collar showing.
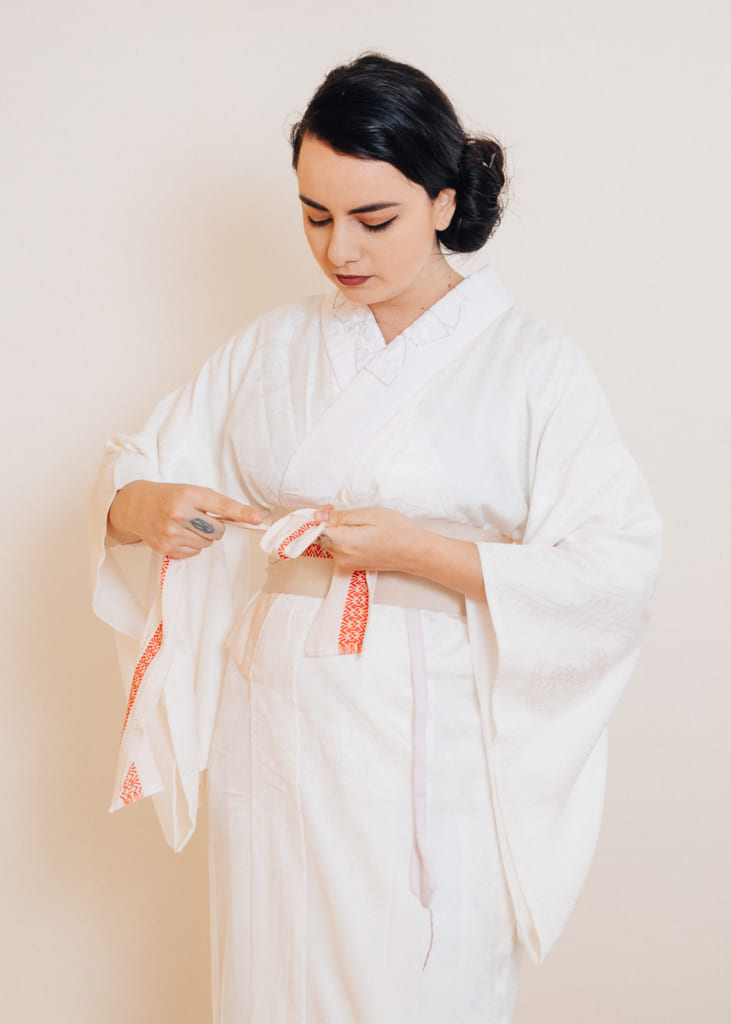
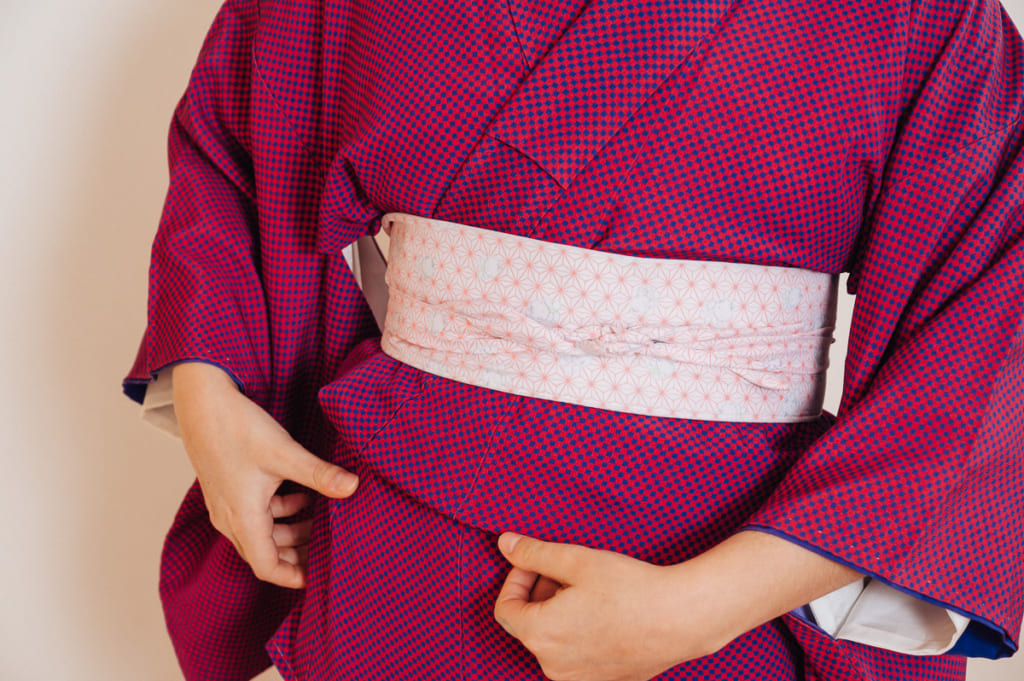
Pull all the creases at the back towards the side seams. If you are using a koshi-himo, arrange the collars to be symmetrical and then put the middle of the tie at the center of your chest, draw it back with both hands, cross it at the back and return it to the front. Tie it in the center. Again, move any creases in the back to the side seams. Tie your second date-jime over the koshi-himo in the same fashion, again just below the bustline. Tuck in the ends of the sash so it looks neat, and you are finished putting on the kimono and ready for the next step, putting on an obi sash!
So there you have it, a step-by-step guide to how to wear a kimono by yourself. Don’t be discouraged if you have trouble at first; keep practicing and it will become faster and more natural to you. Before long, you’ll have the confidence to wear your kimono out for the world to admire you in!
In our next articles, Sheila and Nichole will demonstrate how to tie several types of obi, from super simple and casual to formal and elegant.


really nice please make a video on how to make a kimono as id love to make one
Hi Kathleen, I did record some raw video but I have to edit it into a finished product. Once I get that done, we’ll post a link here for you. Thanks for reading our article!