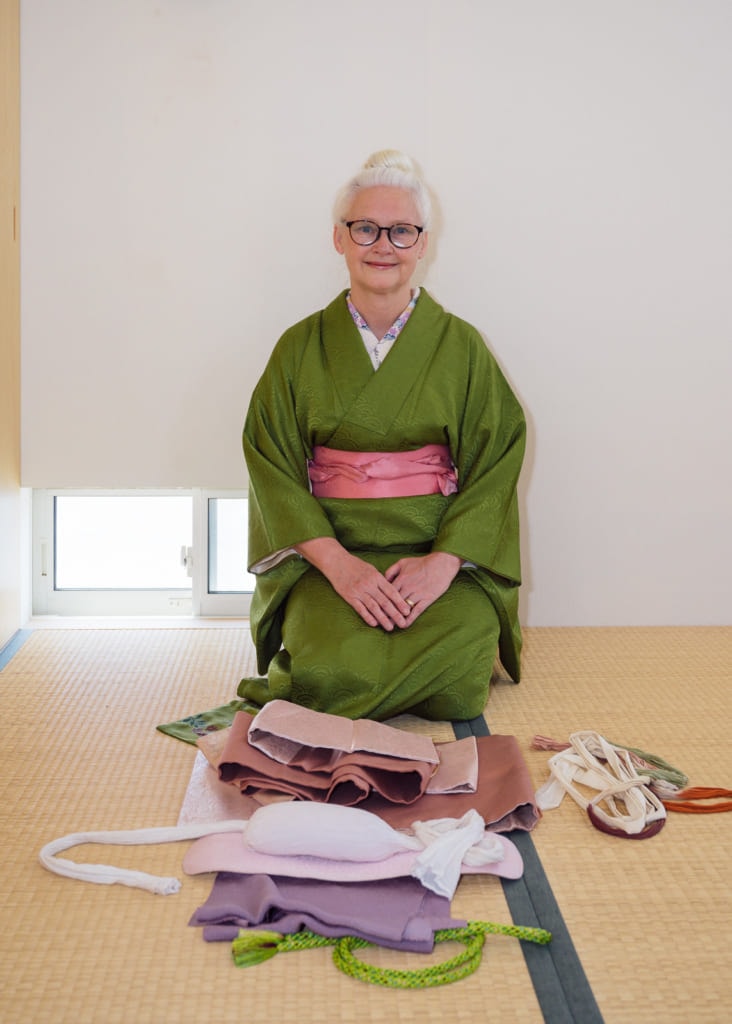
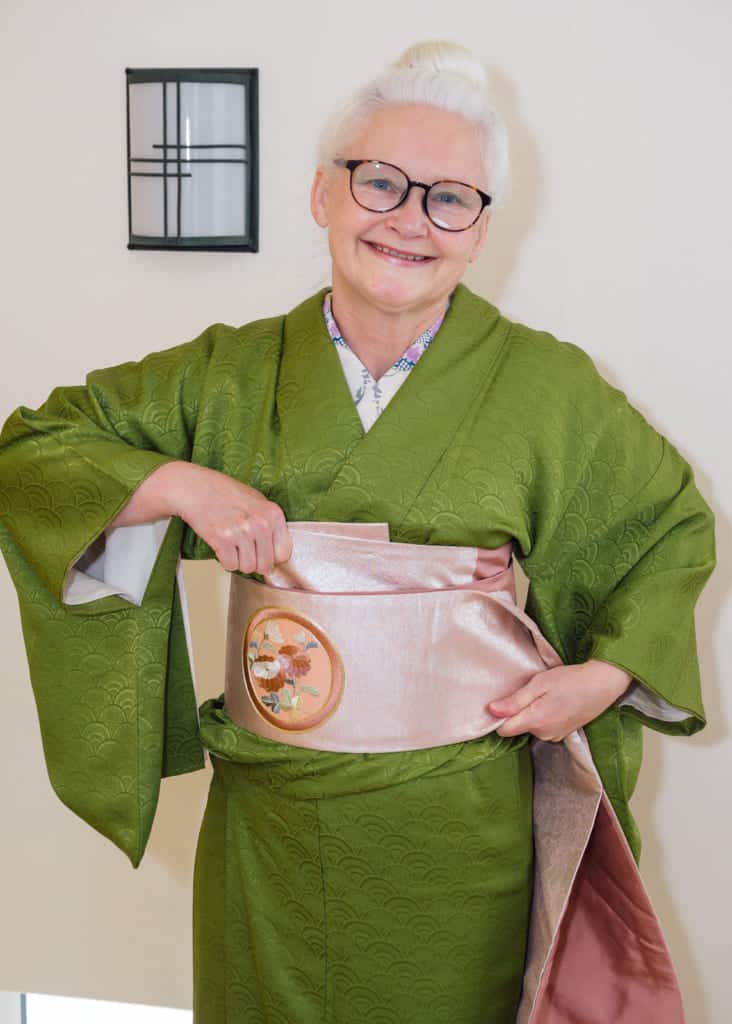
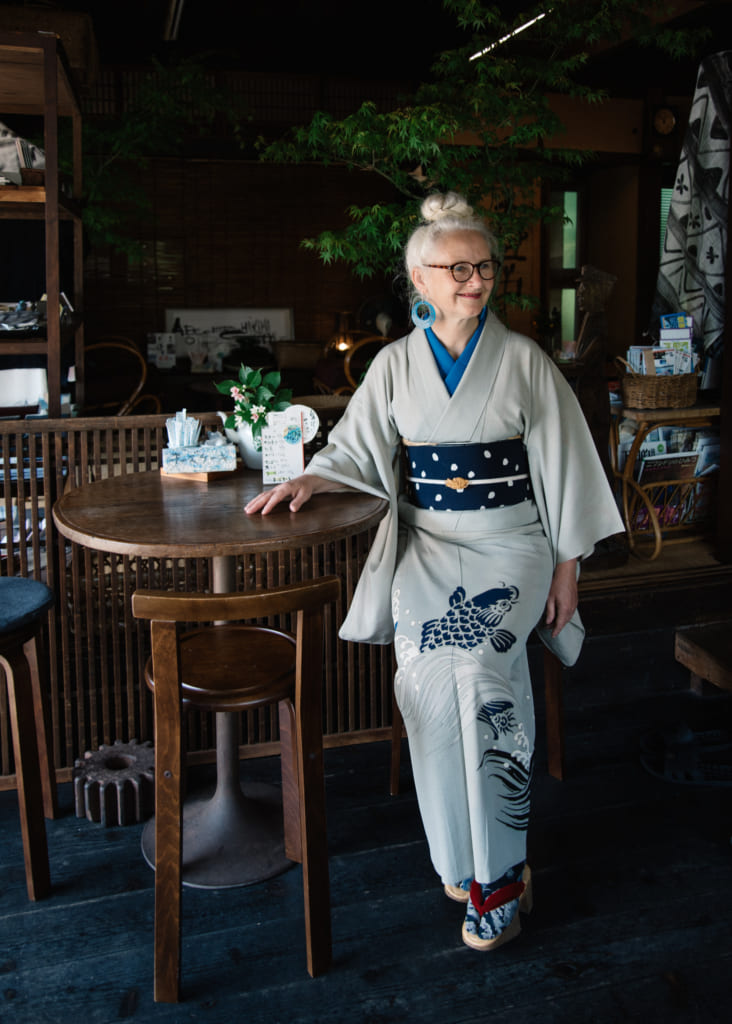
Wearing a Japanese kimono is an experience many visitors to Japan enjoy. For a small fee, women (and men) can be dressed in kimono by a professional and stroll around picturesque neighborhoods taking photos for their memories. When visitors find out how inexpensive it is to purchase a used kimono and accessories, they might also decide to purchase a souvenir to take home.
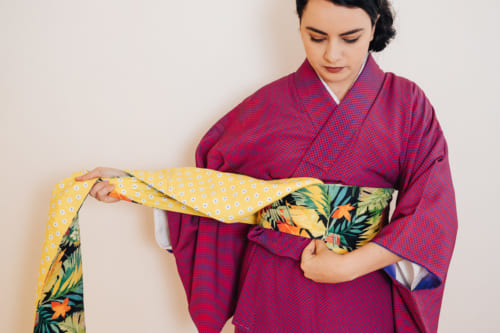
If you are one of those women who brought a lovely kimono and obi home with you from Japan, chances are you need to learn how to put them on. We asked kimono expert Sheila Cliffe for advice on how to dress yourself in kimono, how to tie a simple obi, and how to tie the more formal and complicated Nagoya obi. In this article, Sheila takes us step-by-step through the process, and we also have a video to watch if you need more help.
Accessories Required
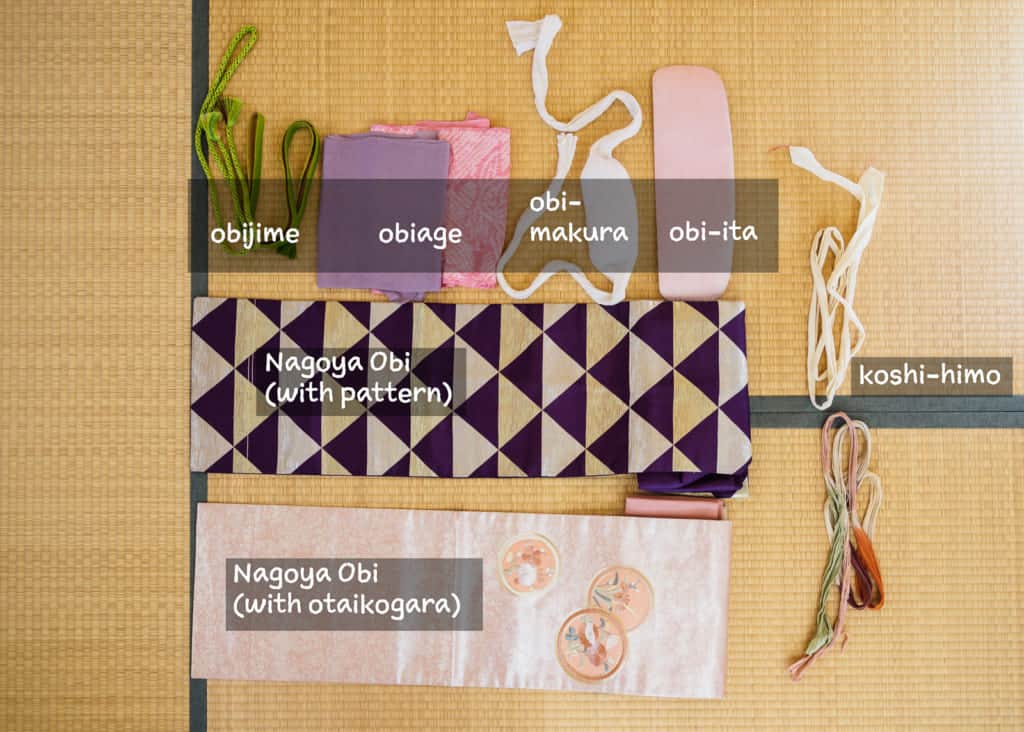
There are certain accessories that are needed in order for you to tie a Nagoya obi properly. Hopefully, the shop where you purchased your obi explained these items and included them in your purchase, but if not, you may be able to find them in online kimono shops or buy them on your next visit to Japan.
Nagoya Obi 名古屋帯
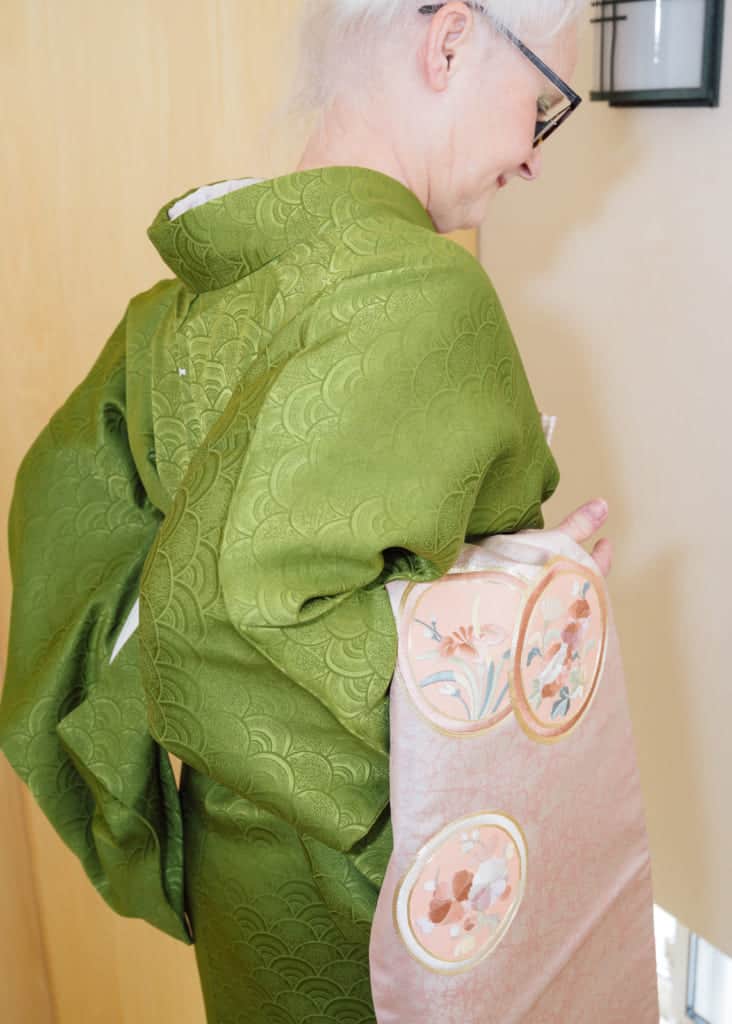
To tie a Nagoya obi, you obviously need to have a Nagoya obi. These obi are common for everyday use. They are between a casual half width obi, and a full formal obi that is over 4 meters long. They are usually around 3.6 meters long and are often pre-folded and sewn together at one end, a sort of convenience for women who were wearing this type of obi daily. The narrow end of the obi wraps around the waist while the wider end is used to create the bow.
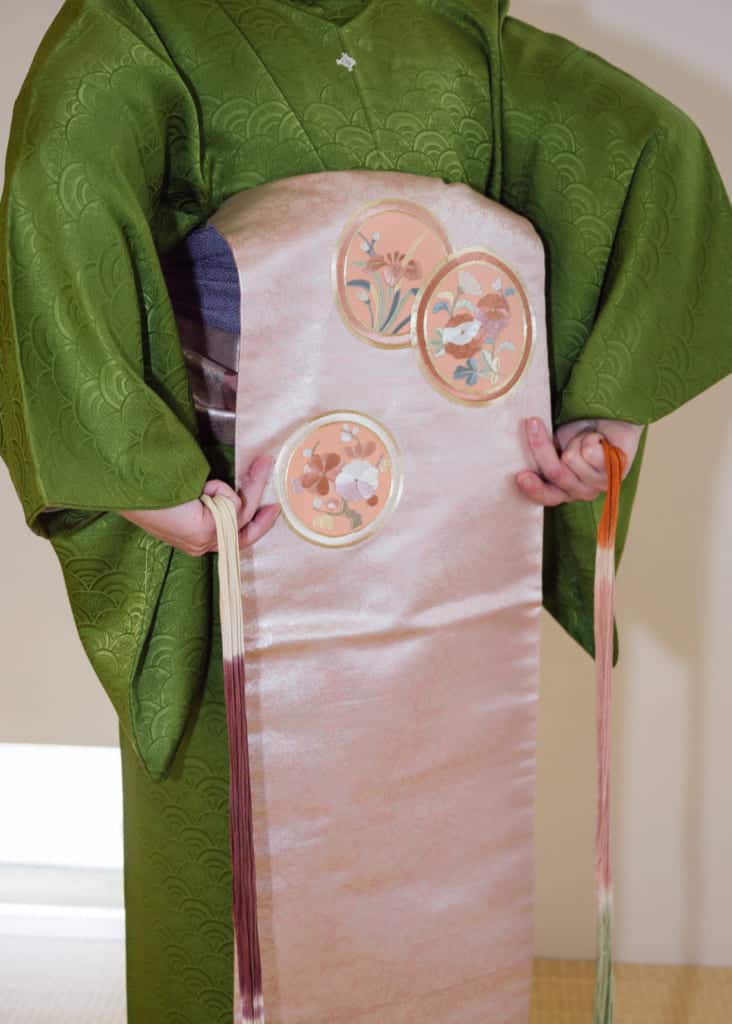
Nagoya obi can have an overall pattern or otaikogara 大太鼓柄, a decorative design or embroidery that must be centered on the taiko. This can make it a little more difficult to tie. Sheila demonstrates how to tie a Nagoya obi with otaikogara, but if you have an overall pattern, the procedure will be a little easier.
Obi-ita 帯板
The obi-ita is a stiff, flat board that slides between the obi’s layers across the abdomen to help the front of the obi maintain a flat, unwrinkled appearance. If you don’t have one, you can cut a thin piece of flexible plastic or cardboard in the shape of the obi-ita.
Obi-makura 帯枕
The obi-makura is a small pillow held in place by a sash that is tied above the obi. The pillow goes inside the “drum” of the bow, helping it to maintain its shape.
Obiage 帯揚げ
The obiage is a decorative piece of cloth, usually made of silk, tied over the obi-makura which it hides. It is a decorative accessory but essential to the overall look nonetheless.
Obijime 帯締め
The obijime is a decorative silk cord tied over the entire obi as a finish. It helps hold the shape of the obi, but it is also an important accessory, as this is what prevents the obi from falling off.
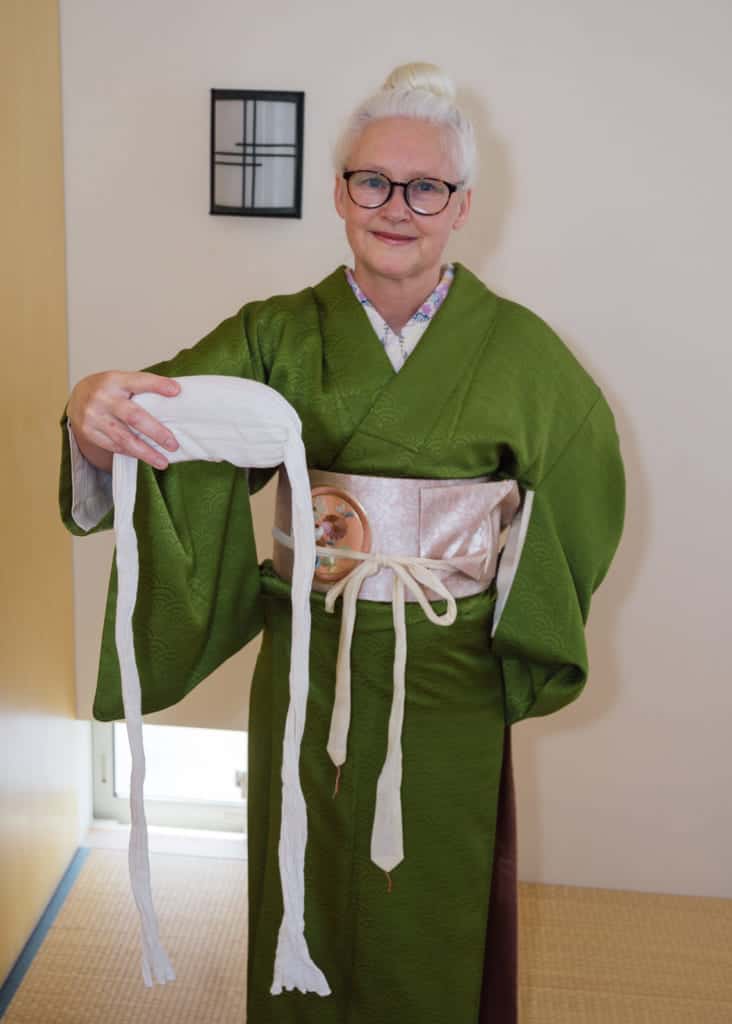
Koshi-himo (2) 腰ひも(2本)
Koshi-himo are long strips of material used as tools to temporarily hold the obi in position until the bow is secure. Any long pieces of fabric will do as they will be removed during the procedure.
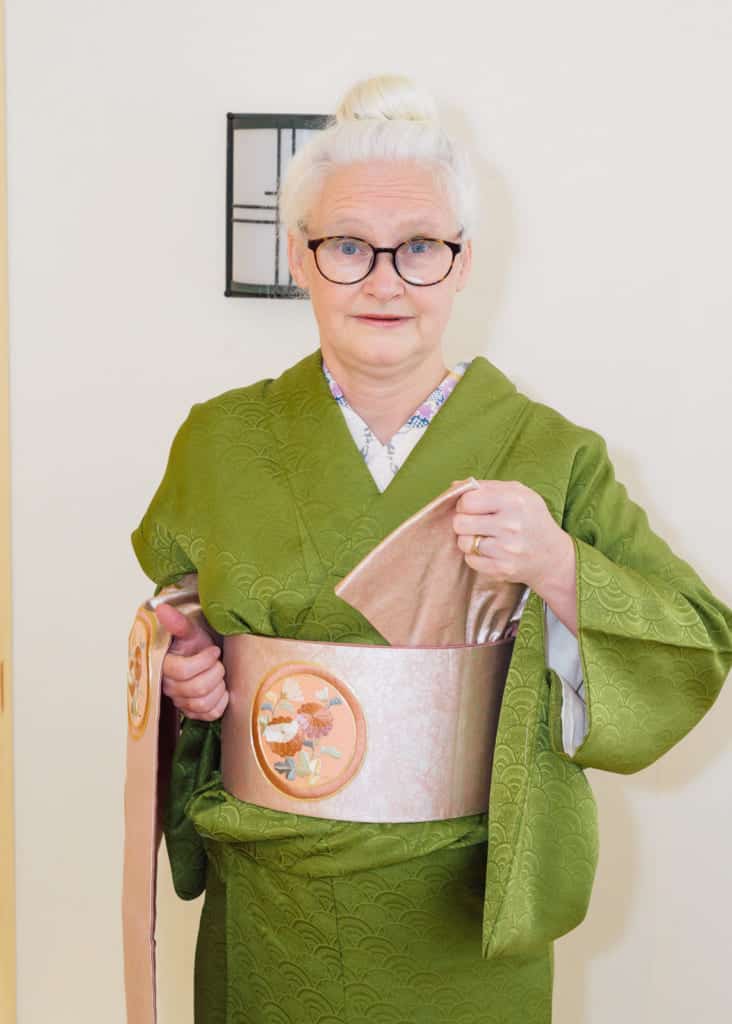
Now that we have a list of the accessories we will need, Sheila will walk us through how to put on a Nagoya obi. I realize that tying this obi is a little confusing to explain in words and photos alone, so we created a video of Sheila tying the Nagoya obi you can watch at the end of this article to help you visualize some of the harder steps.
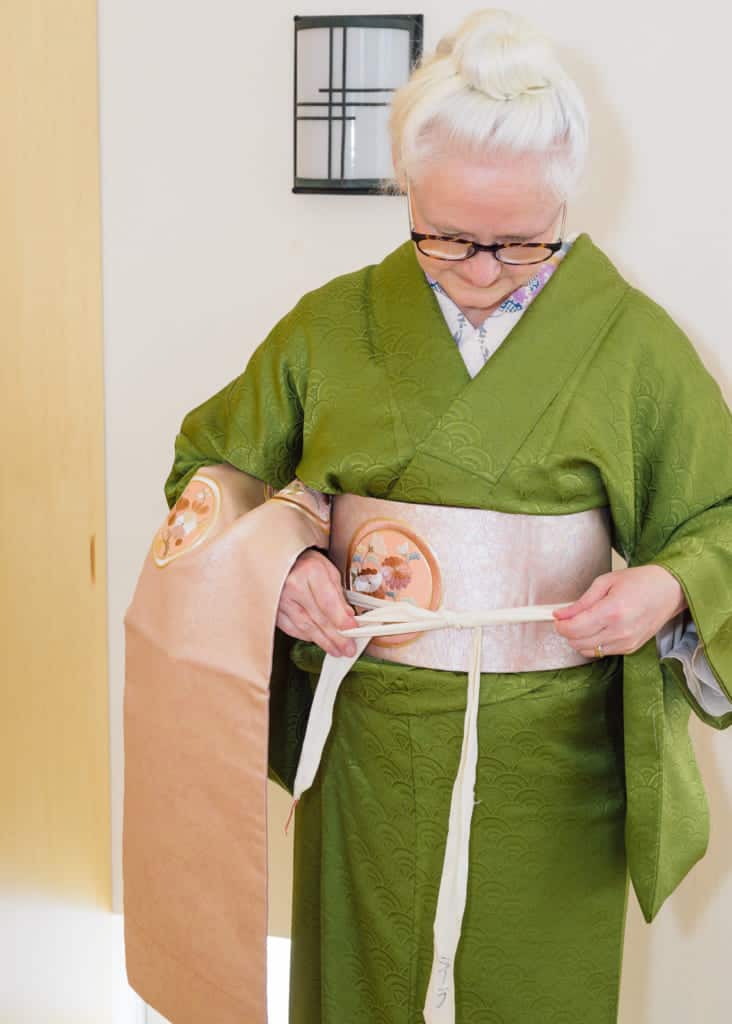
Step 1: Wrap the obi around your body
It is assumed that you have already put on your kimono at this point. If you need instructions on how to put on a kimono, Sheila has given instructions on the accessories you need and how to put it on properly.
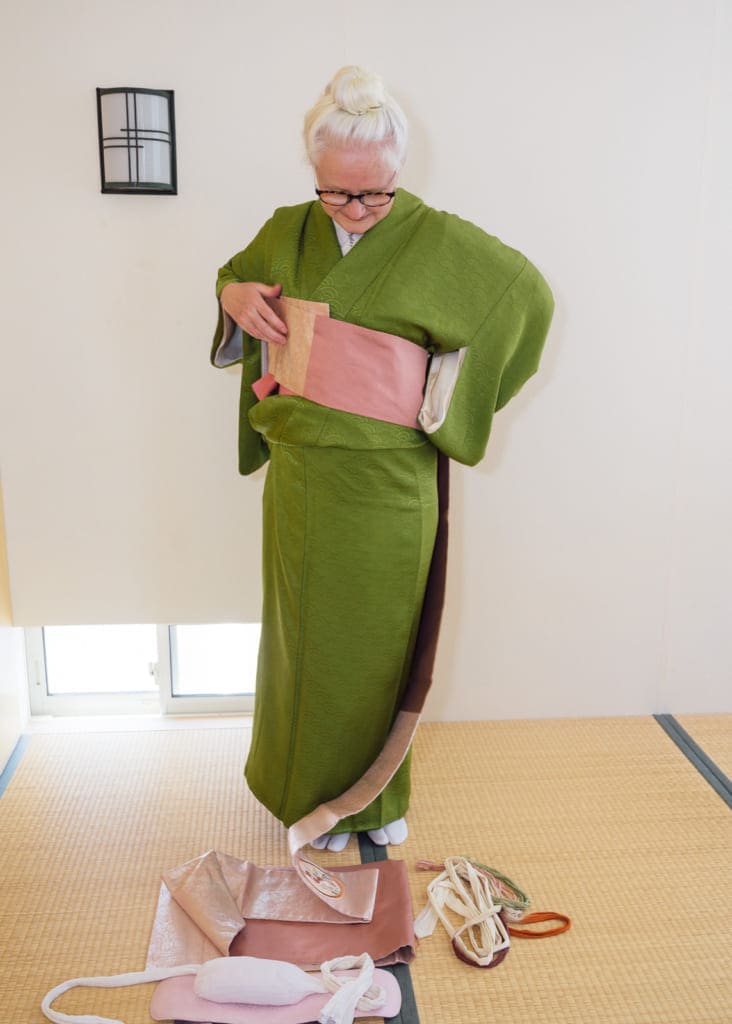
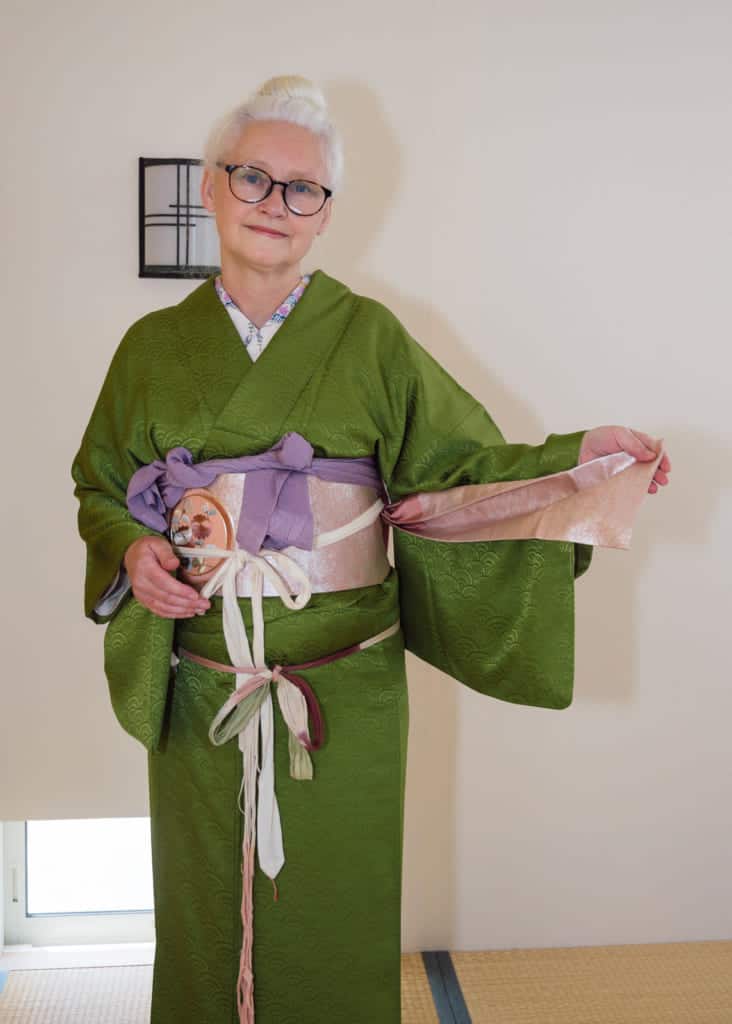
From a standing position, take the thin end of the Nagoya obi, seam side up, and make a 10-15cm fold at the end. Holding the obi with the folded end closest to your body, turn yourself one full rotation clockwise while wrapping the obi around your midsection just below the bustline. Pull the obi as tight as possible around yourself.
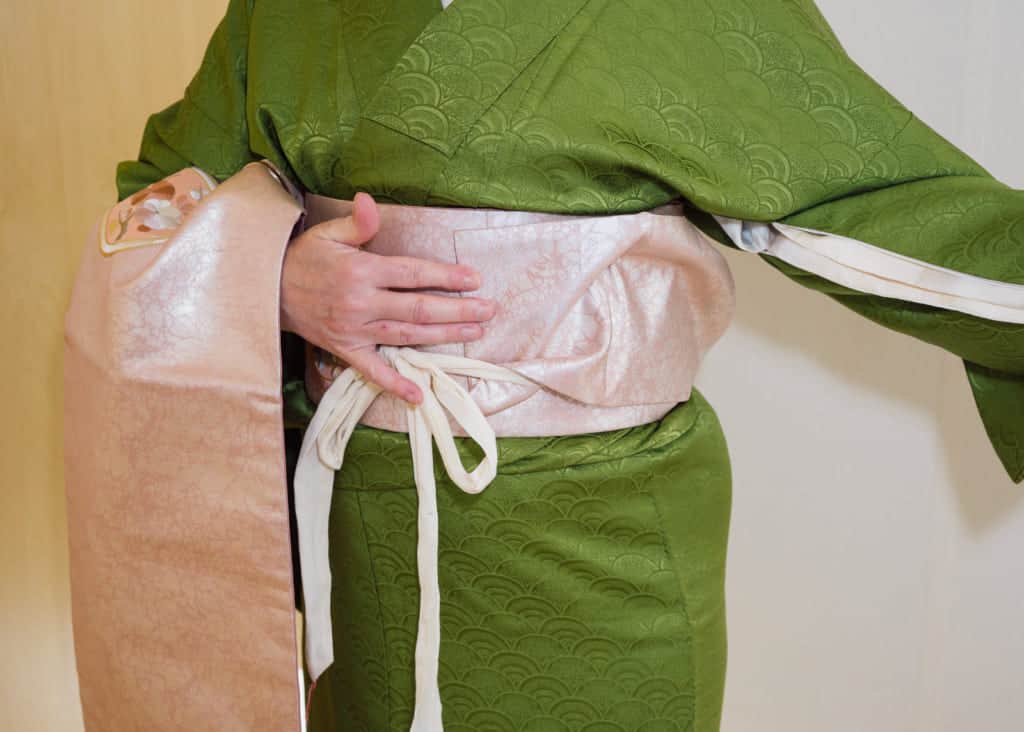
Holding the obi, make another full rotation clockwise. If you have an embroidered pattern on your obi, make sure it ends up somewhere around the center of your midsection, though it doesn’t need to be exact at this point. Take the obi-ita and slip it between the first and second layers of the obi. It should be completely hidden under the second layer of the obi. Once again, grab the end of the obi closest to your body and a section of the second layer of the obi and pull it so the obi is tightly wrapped around your body.
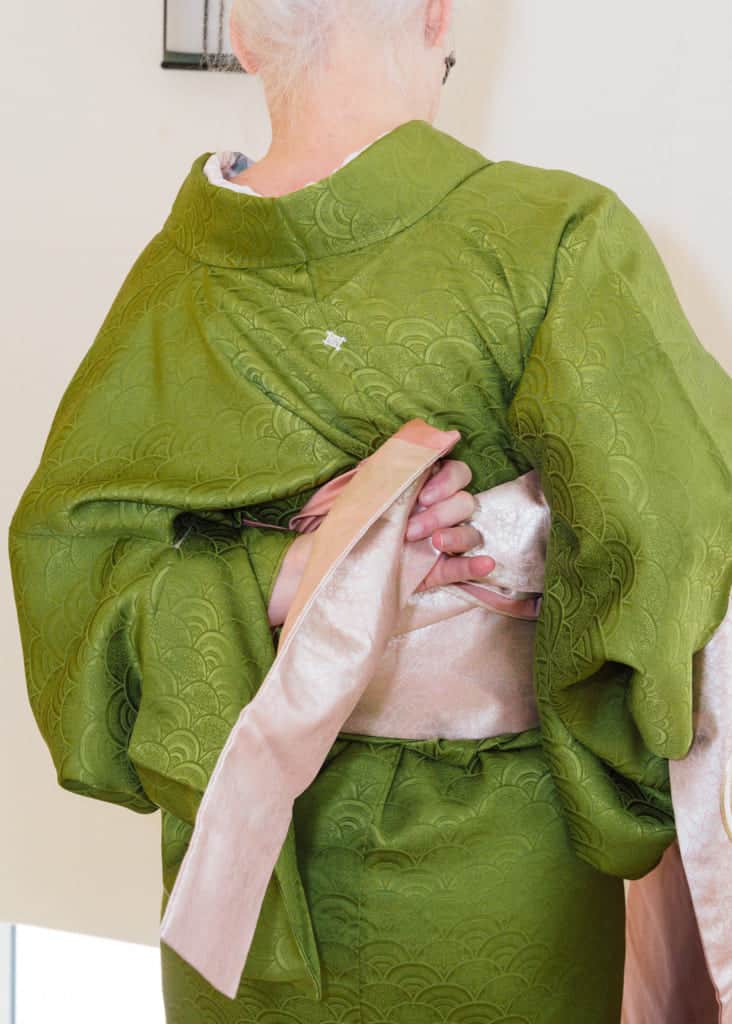
Step 2: Temporarily tie the Nagoya obi in place
Take another half a turn until the obi is wrapped around to the center of your back. Holding the obi in place with your left hand on the top of the obi and right hand on the bottom, make a fold in the obi by bringing the right hand upward and underneath the obi (see photo). Once your right hand is able to grab both the top and bottom edges of the obi, your left hand is free to help make a clean crease in the obi.
How the crease should look when done correctly
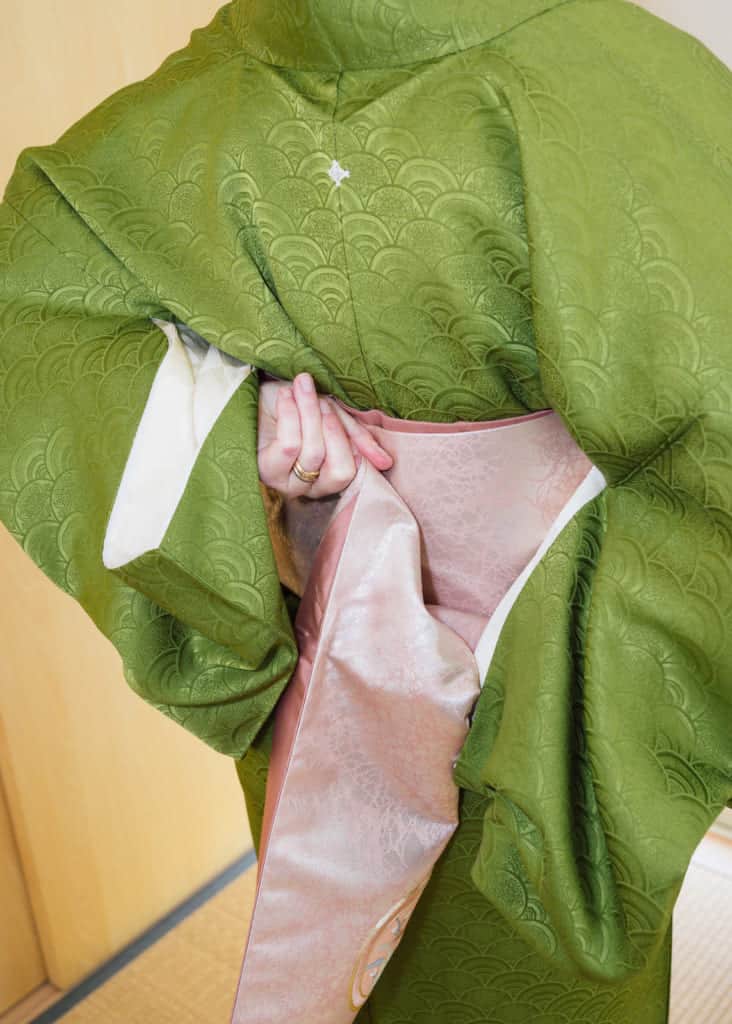
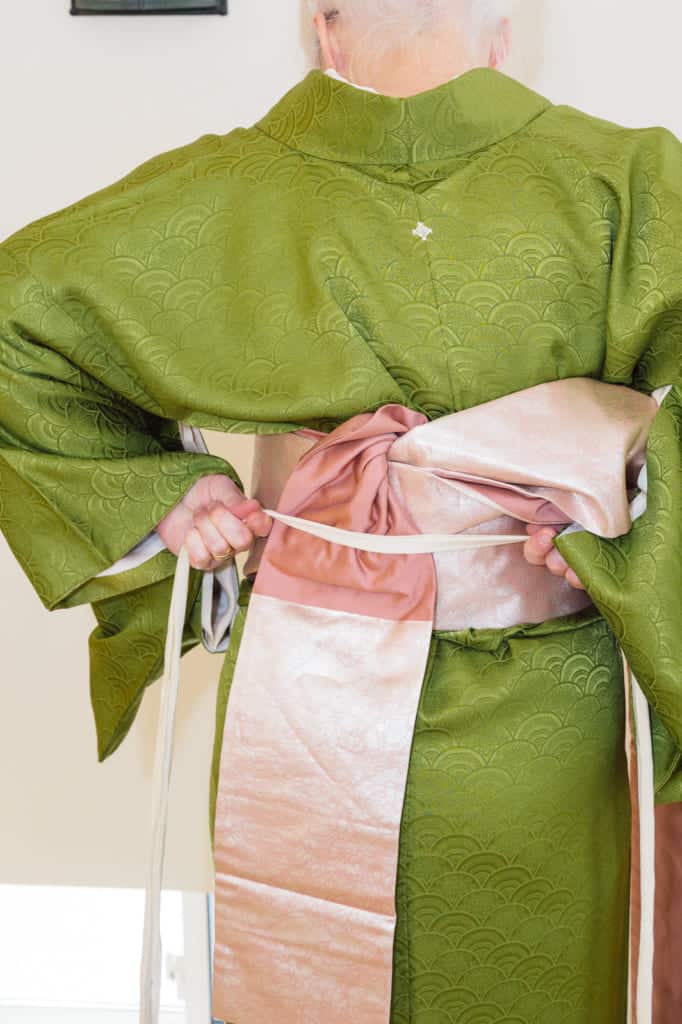
Grab the obi behind your back from underneath with your left hand so you can momentarily free your right hand, then use your right hand to hold the obi in place, again from underneath. With your left hand which is now free, tug the length of obi that was tucked in from the front of your obi upwards and toward your left side, freeing it. When you can’t pull upward any further because of the angle of your arm, let go of the obi temporarily and reach around behind your back, tugging the length of the obi upward to the center of your back.
The obi will naturally want to flip over, but hold it so it is oriented the same way it faced when you pulled it out, with the seam at the top and the fold at the bottom (this step sounds confusing but is clear if you watch the video). Put this narrow end of the obi vertically down at the center back. Hold the length of obi in place using the back of your left hand.
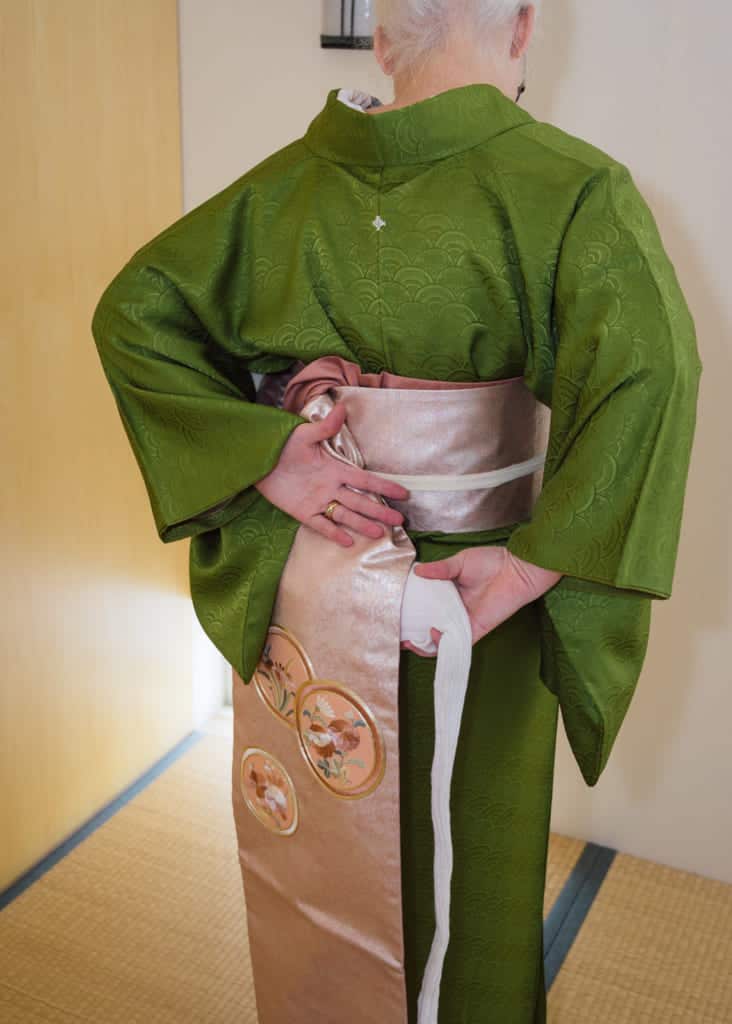
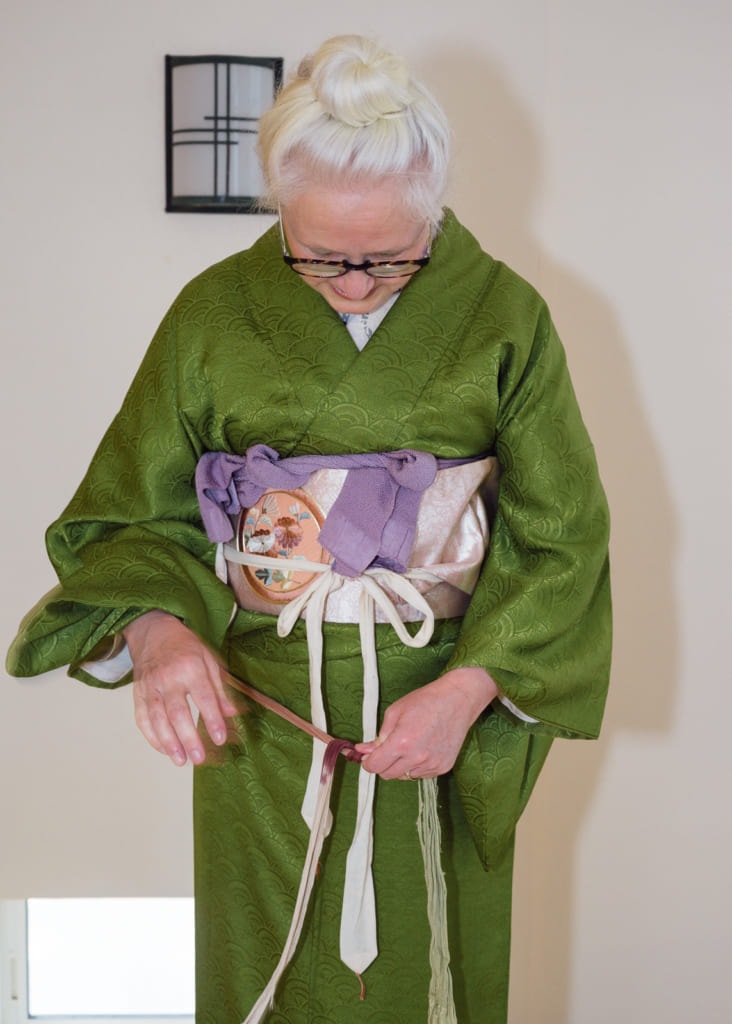
Slip the remaining length of obi (the wide end) through the crook of your right arm to get it out of your way. Grab one of the koshi-himo ties in your right hand and pass it to your left hand behind your back. Using the koshi-himo, tie the obi in place temporarily. Take the end of the narrow part of the obi, which should be hanging down behind your back, bring it around your left side to the front and tuck it under the koshi-himo, just to get it out of your way so you can work on the knot in the back with the wide end of the obi.
Tuck the narrow end of the obi under the tied himo to keep it out of your way
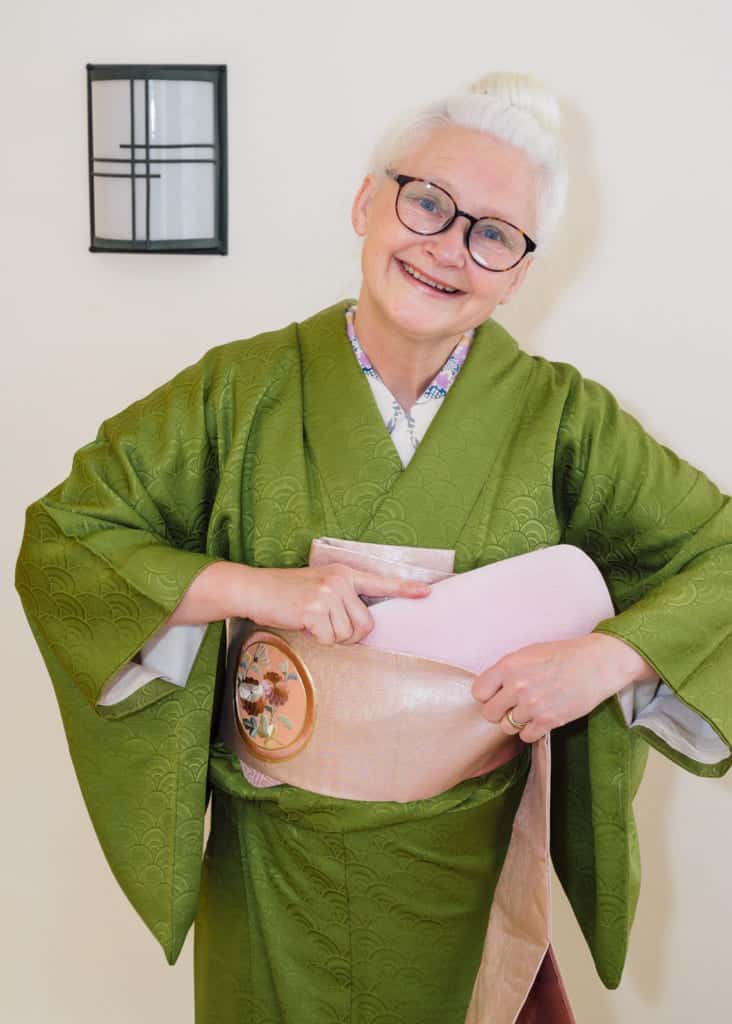
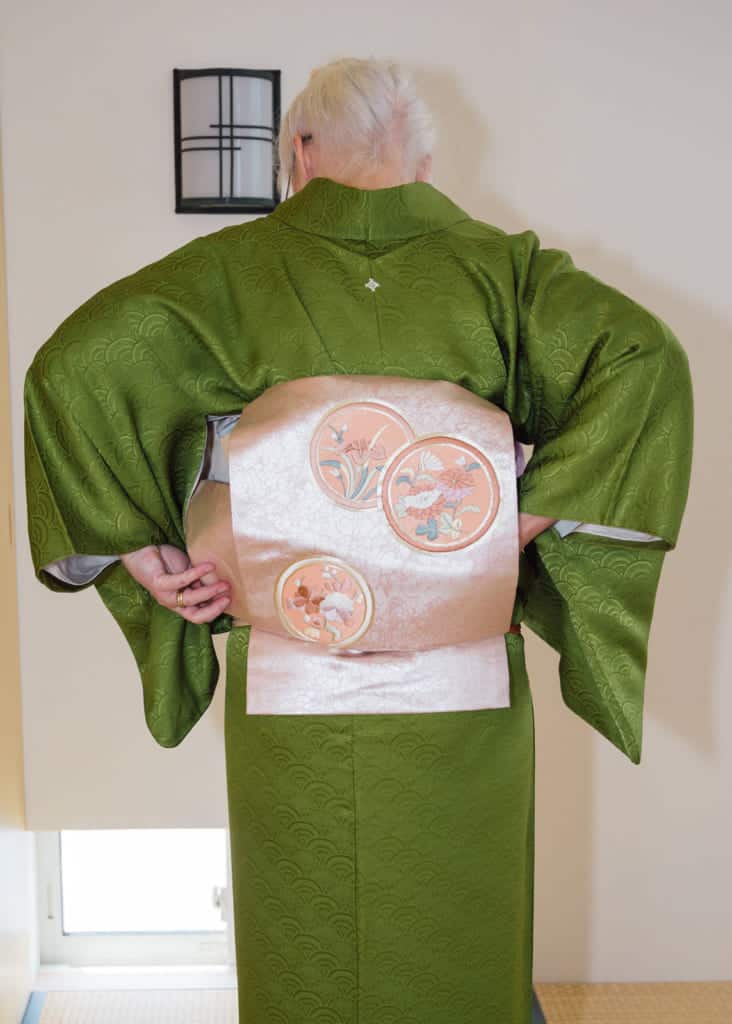
Step 3: Making the Taiko bow
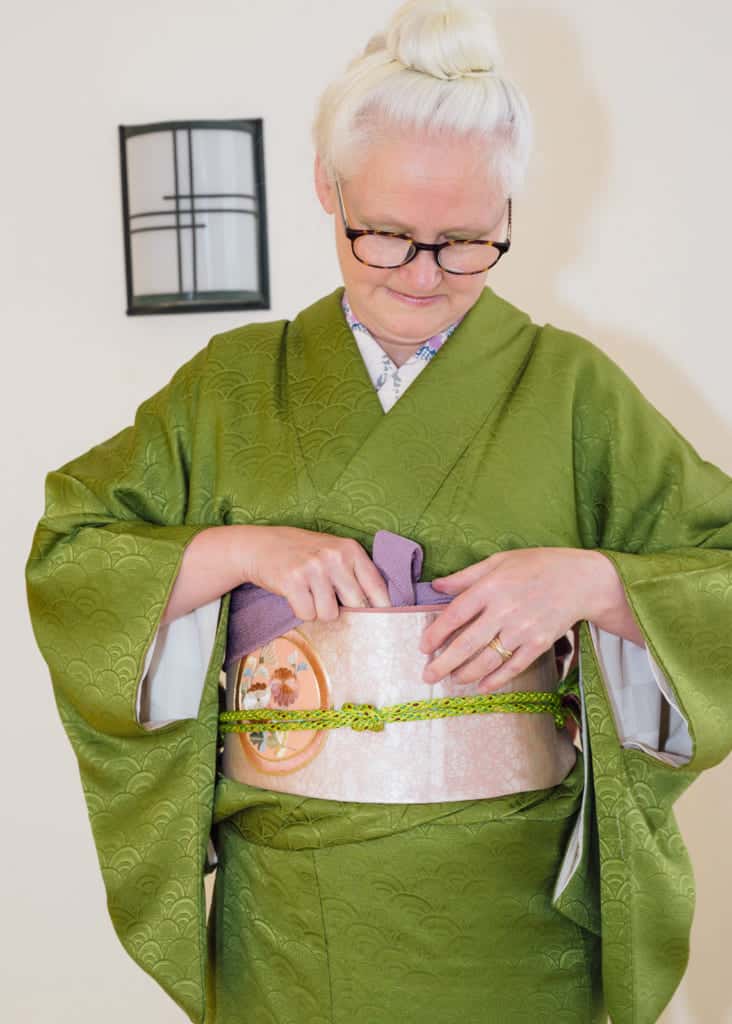
The wide end of the obi should be hanging straight down from the middle of your back. Pick up the obi-makura in your left hand and while holding the wide end of the obi in place with your right hand, bring the obi-makura underneath it. At this point, make sure you remove any creases you have in the top of the wide part of the obi, then lift it up with the obi-makura underneath. If there is an otaikogara embroidery or print, check the mirror to make sure it appears in the right place.
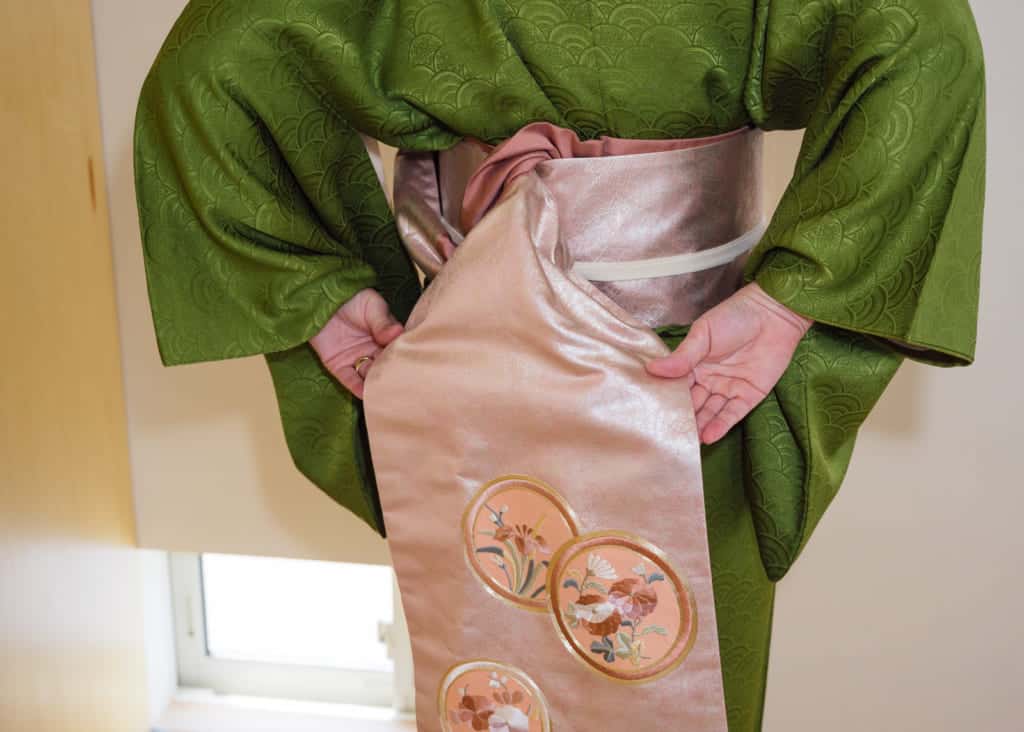
Slip the makura under the wide part of the obi and grab the sash with your opposite hand 
Adjust the makura to create a straight line across the top of the obi 
Bring the ties of the obi-makura sash around to the front, and tie the obi-makura high up on your back, making a bow or half-knot just below your bustline at the top of the obi, in the center front. Make sure you secure this knot tightly as it is responsible for helping the bow in the back maintain its correct shape. Tuck the bow and any remaining sash fabric into the top of the obi so it is not visible.

Tie the sash of the obi-makura and tuck it under the obi so it can’t be seen
Step 4: Cover the obi-makura with the obiage
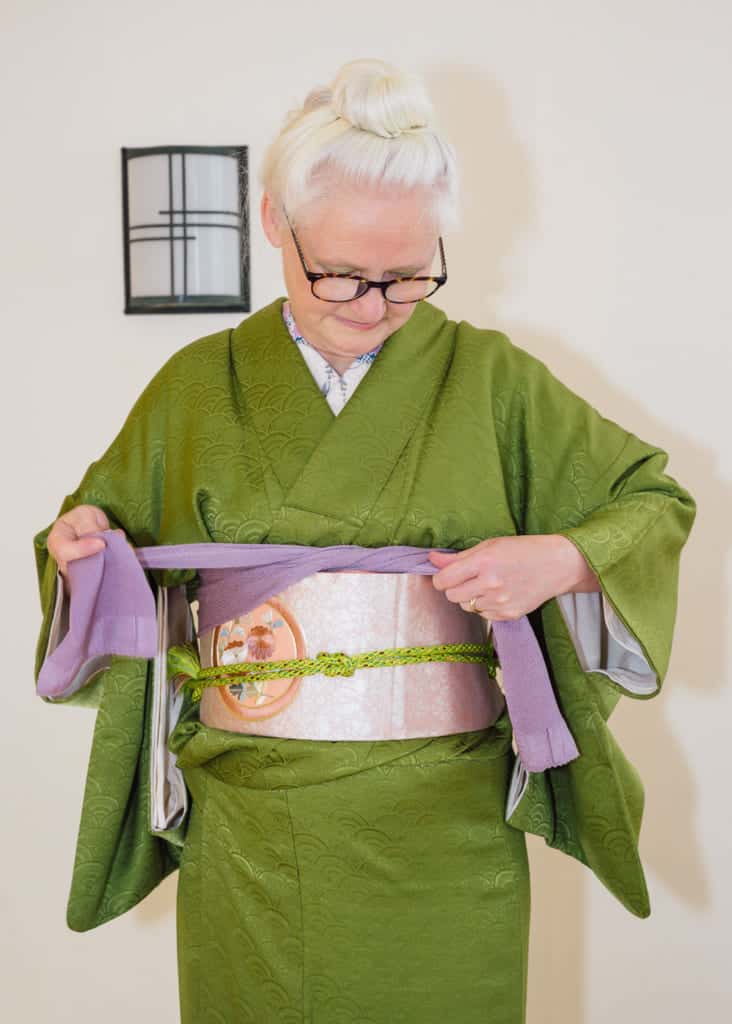
Fold the obiage in half and measure about 10cm from the center fold. Hold the obiage in this spot with one hand and pass it behind your back to your other hand, keeping a mental image of the center line so you can flip it over the middle of the obi-makura. Tie the ends of the obiage in front of you, but at this stage, it is not necessary to tie it tight or prettily.
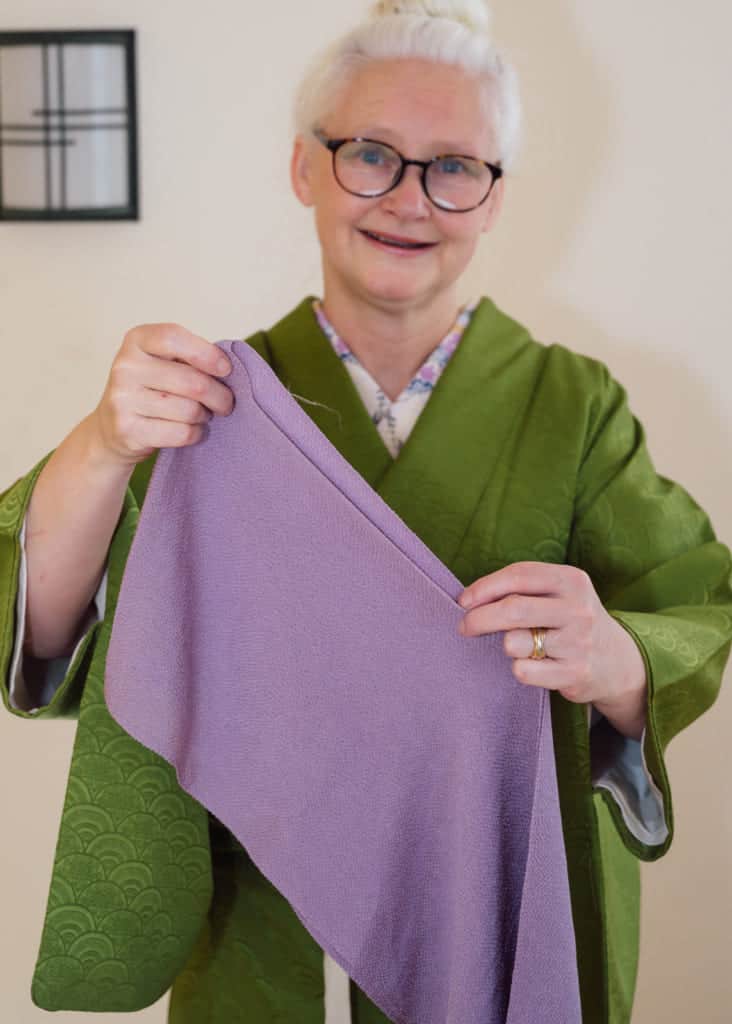
Fold obiage in half and measure 10cm from the center 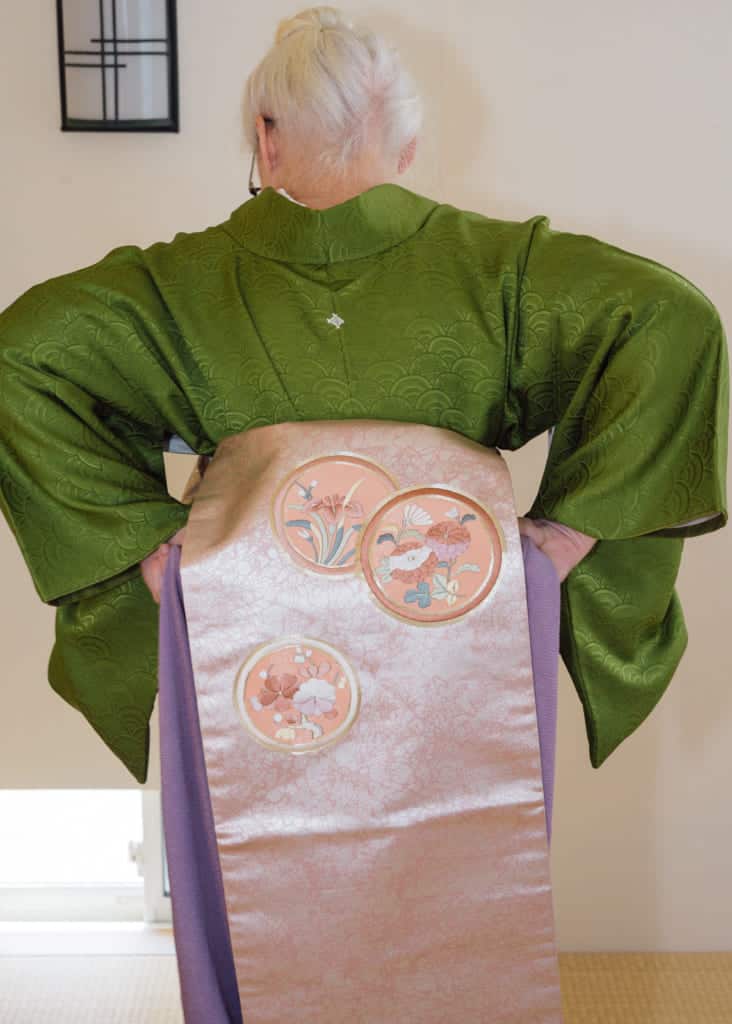
Guide the obiage through the loop and over the obi-makura 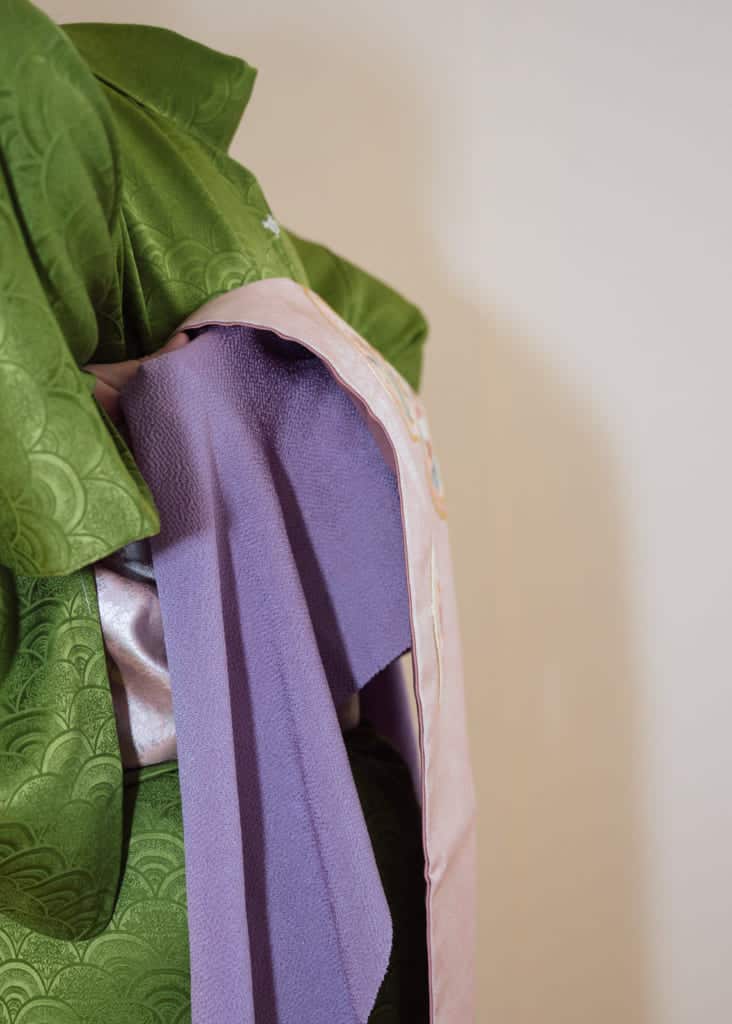
Side view of obiage over the makura 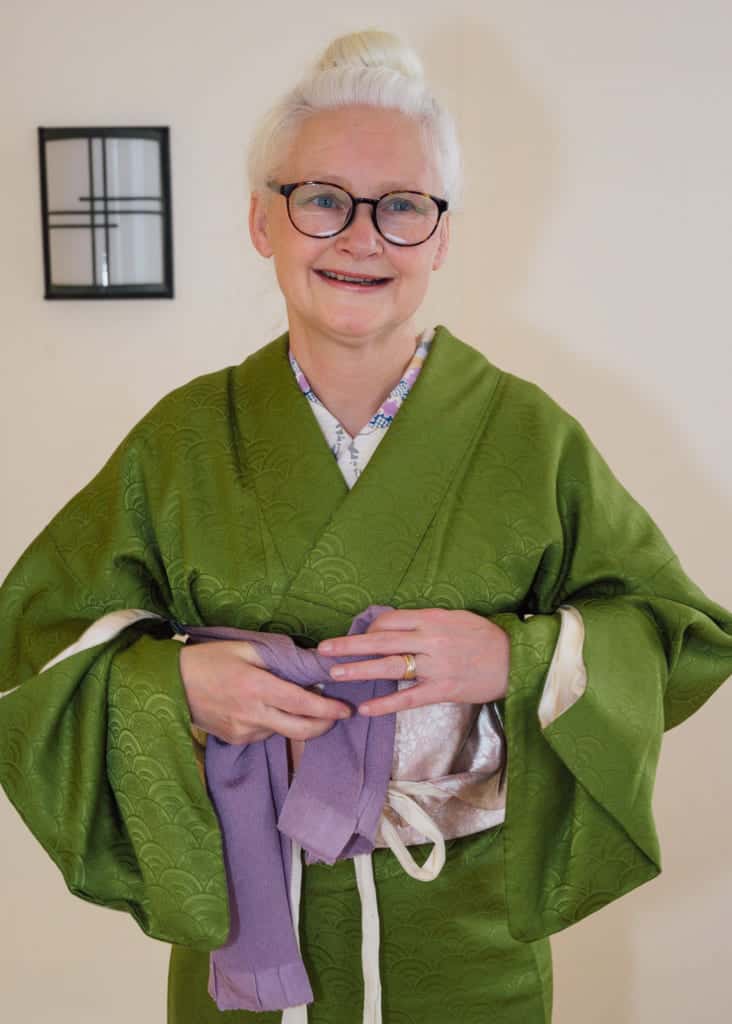
No need to tie it neatly at this point
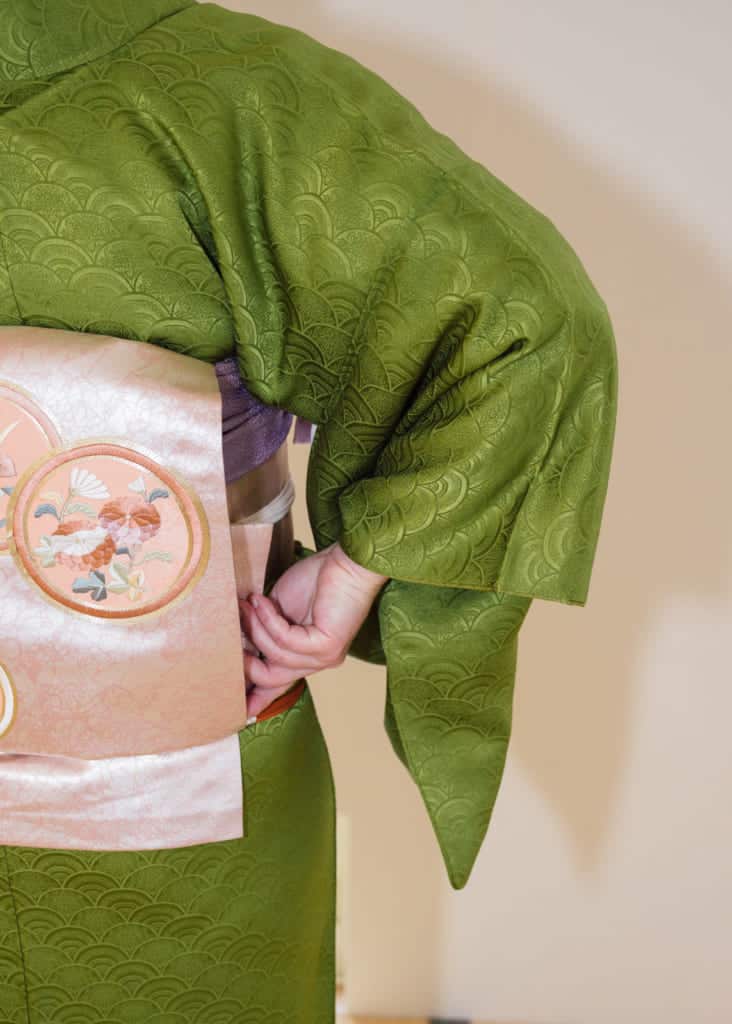
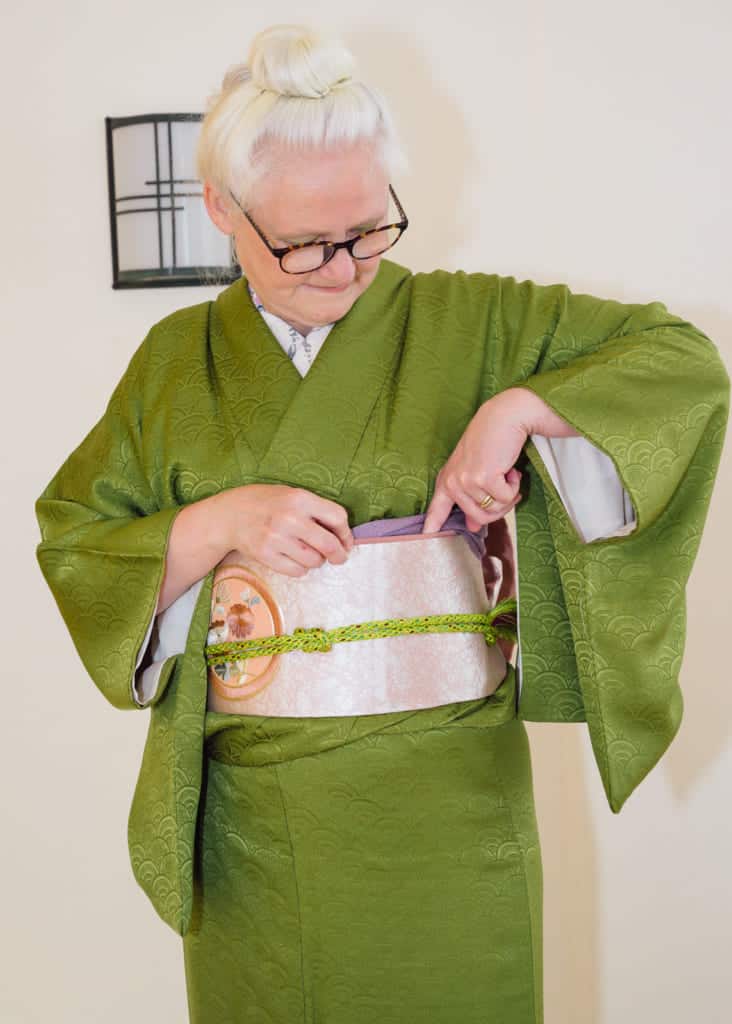
Step 5: Create the bottom edge of the Taiko bow
Using a koshi-himo, hold the tie across the back of the obi where you want to create the line, just below the bottom of the obi tied around you, then using your fingers, flip the obi inside and upwards to create a fold on the line. Slide your left hand to the middle, and grab the fold you have made. Move this slightly away from your body, without letting it go up or down, only out. With your right hand you can then push the hanging part of the obi up into the space between the obi and your back.
Use a himo to create a straight crease at the bottom of the taiko bow 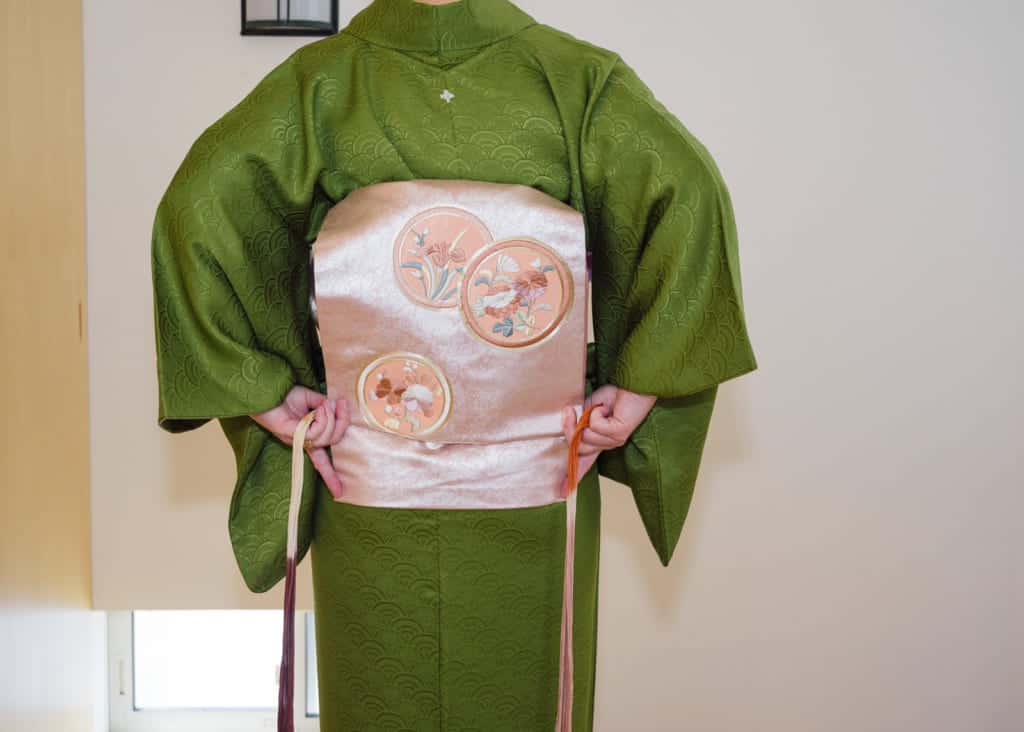
Measure an index finger’s length of obi to remain visible under the taiko bow
Using the length of your index fingers as a measurement, pull the remainder of the wide end of the obi underneath except for a finger’s length from the fold to the end of the obi. As you measure, be careful not to move the position of the tie on your back up and down. Tie the ends of ties low in front of you to keep the position of the tie low and the bow from becoming lumpy looking. Remember, this tie is only temporary and will be removed later.
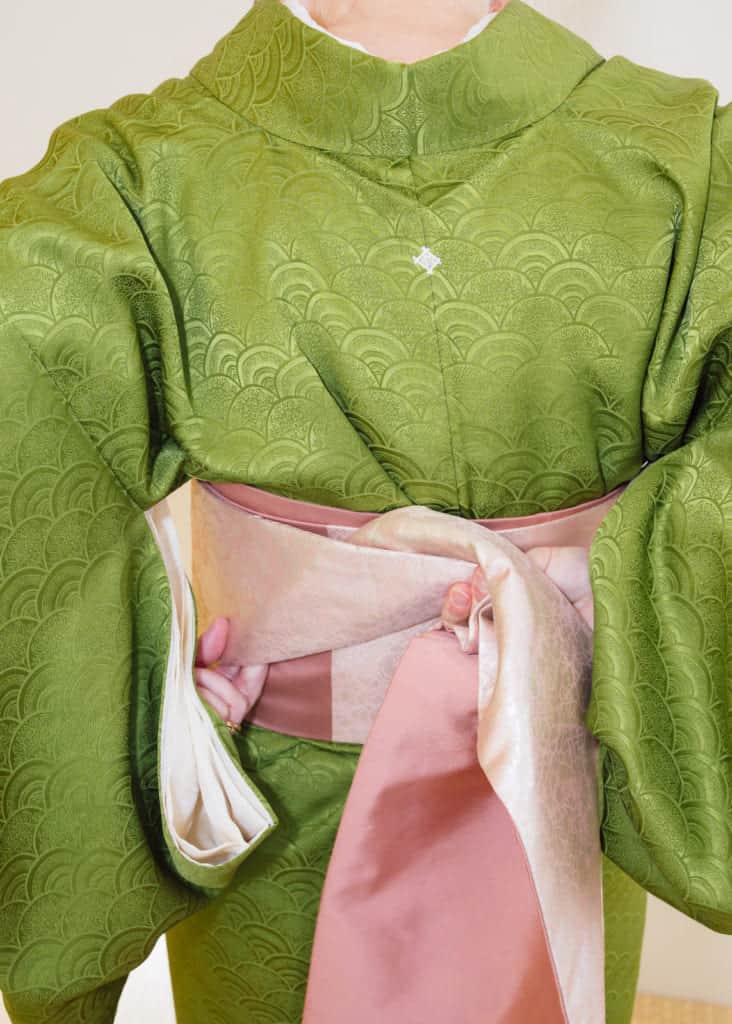
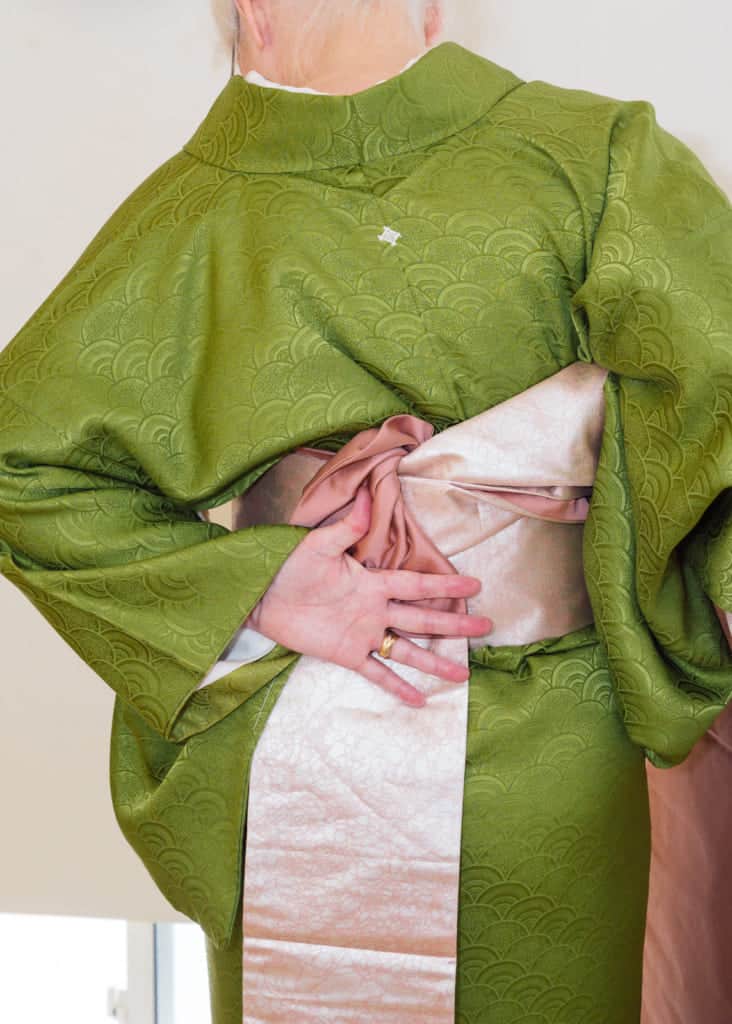
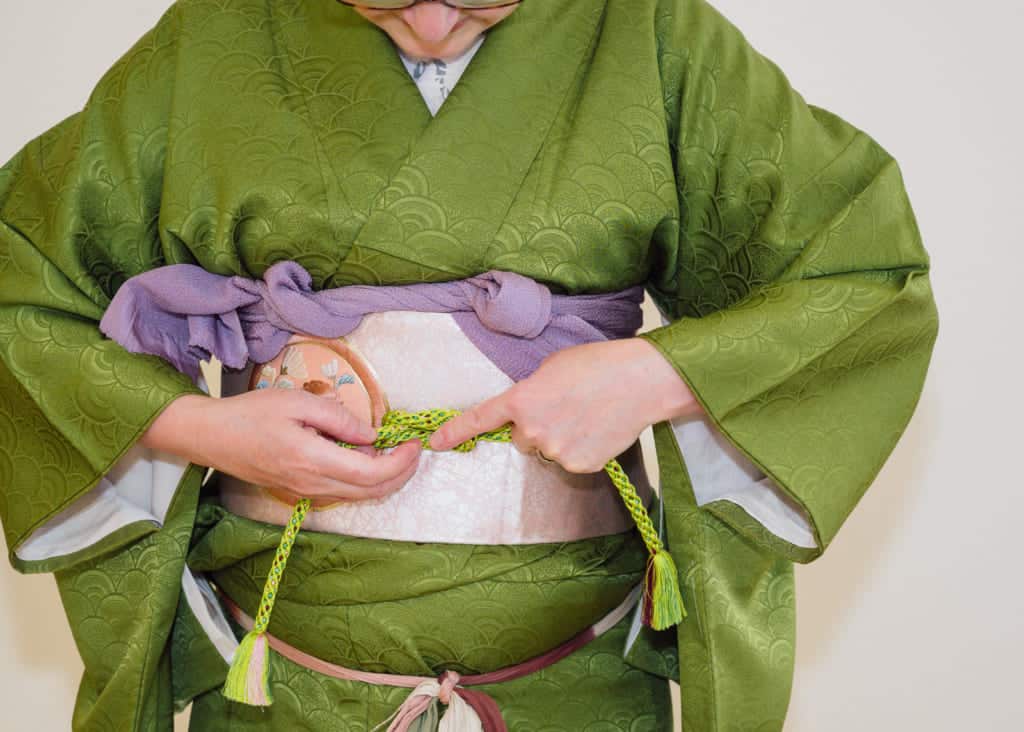
Step 6: Secure the obi with the obijime
Pull the narrow end of the obi that was tucked temporarily under the koshi-himo in step 2 out of the himo and make it as straight and flat as possible, pulling it to the left and away from your body. Turn the end toward your back, and using your right hand behind your back, pull it through the “loop” made by the Taiko bow, between the loop itself and the excess material you hid inside in step 5. Pull it through the loop until just about 1cm of the end is exposed on the right side of the loop.
If there is any excess material showing on the left side, try to smooth it out as much as possible and push it inside the bow, between the excess material and your body, creating a straight vertical crease.

About 1cm of the end of the obi should be visible on the right side of the taiko bow 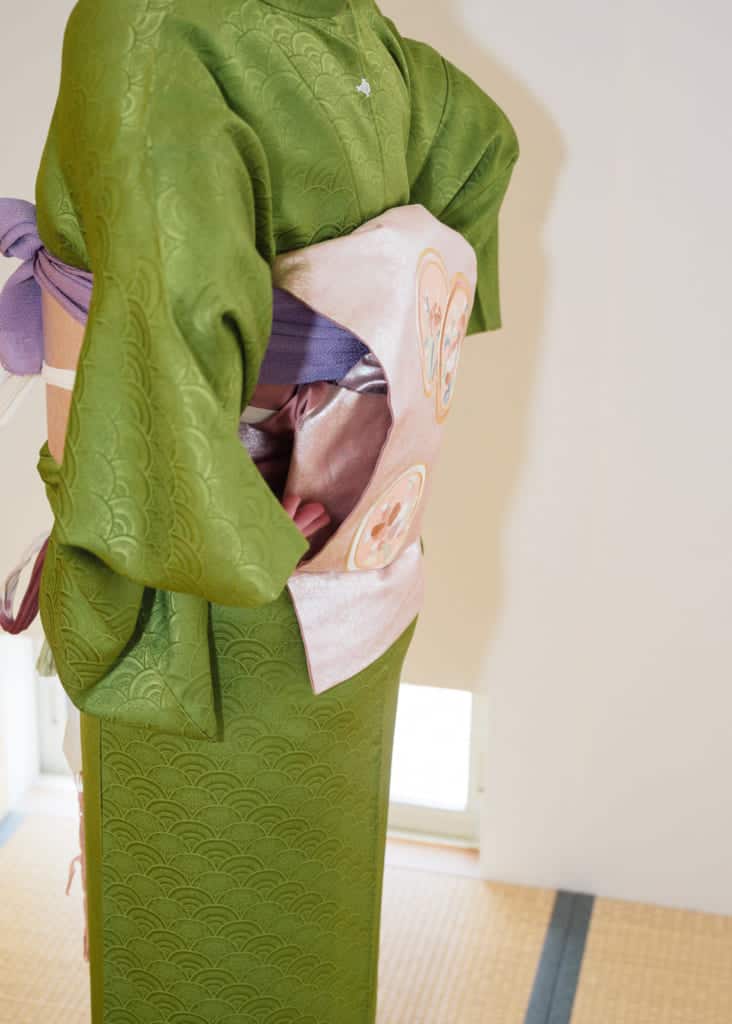
Make a straight vertical crease in the narrow end of the obi and hide any excess
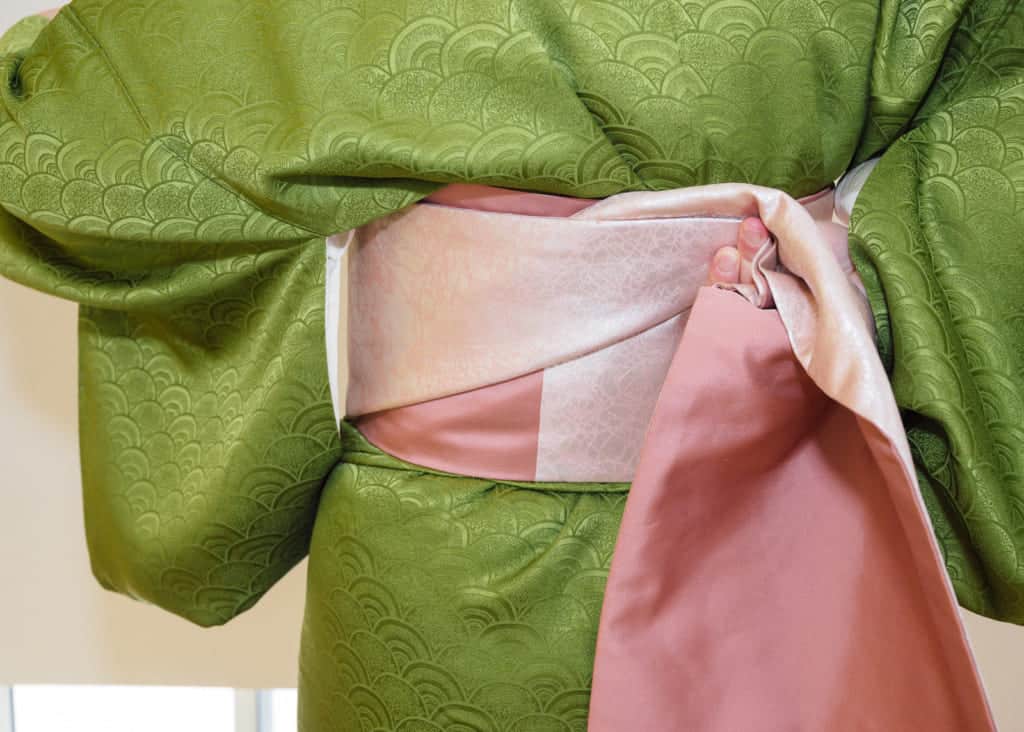
Take the obijime and fold it in half. Holding it in one hand, pass it through the loop in the bow to the other hand, binding the excess obi material to your back. Bring both ends to the front and hold them tightly in one hand. At this point, the obijime should be holding the obi in place.

With your free hand, untie the koshi-himo around your midsection and let it fall to the floor. Tightly tie the obijime around the center of the obi with a pretty reef knot, tucking the ends of the obijime back under itself in an elegant manner.
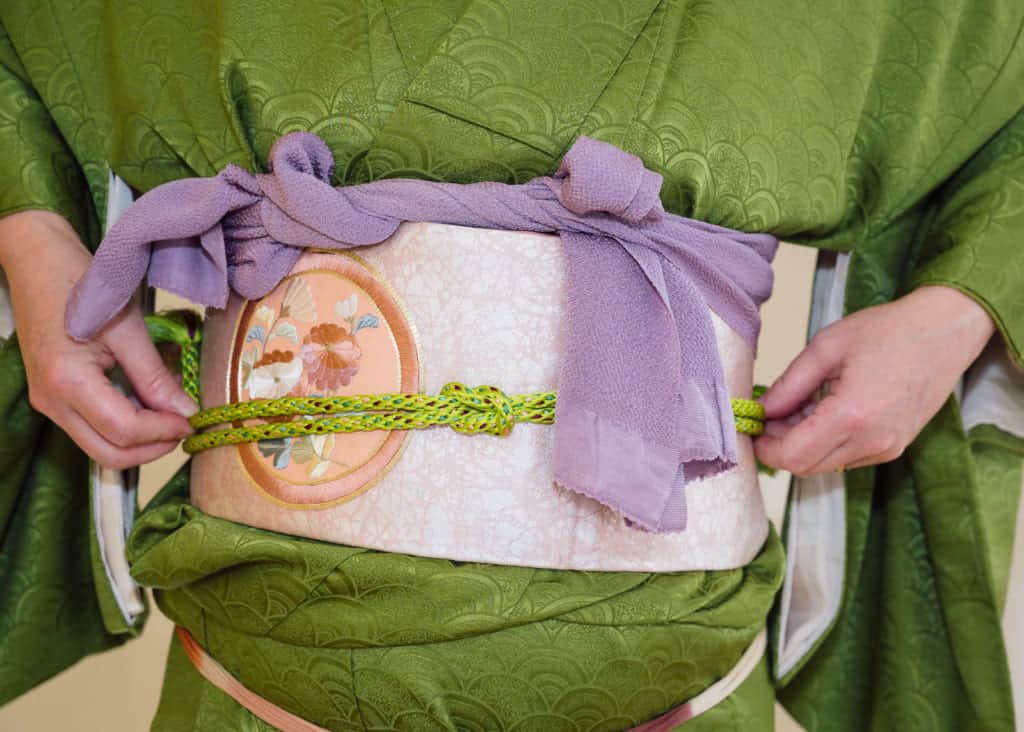
Tie the obijime tightly into a reef knot 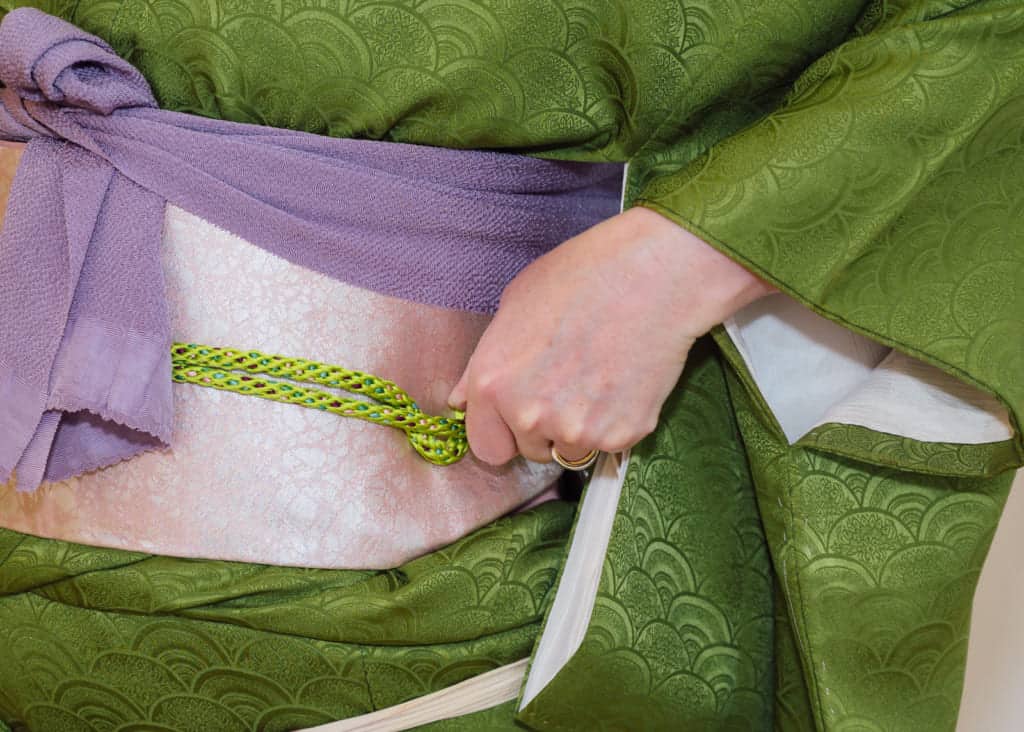
Tuck the ends of the obijime back under itself toward your sides
You can now safely remove the second koshi-himo temporary sash.
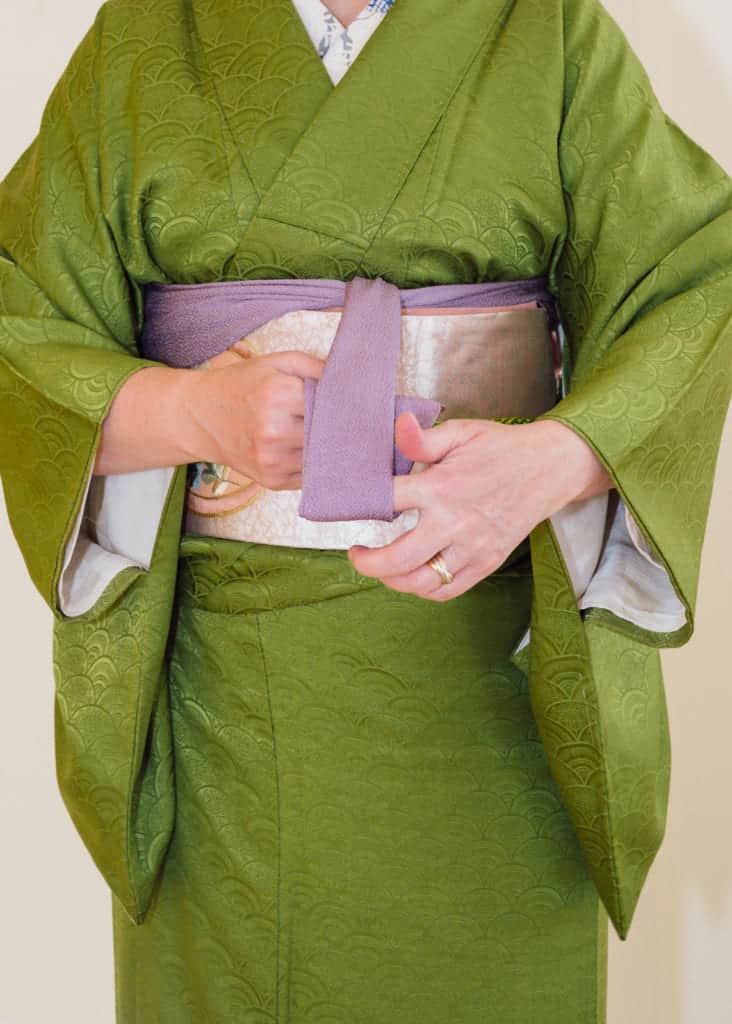
Step 7: Neatly tie the obiage
Take the obiage and fold it so the edges are hidden inside. Tie the obiage left over right. The right end, which will now be pulled to the left side of your body, should be tucked down into the obi carefully so you don’t create any lumps.
Tie the obiage left over right 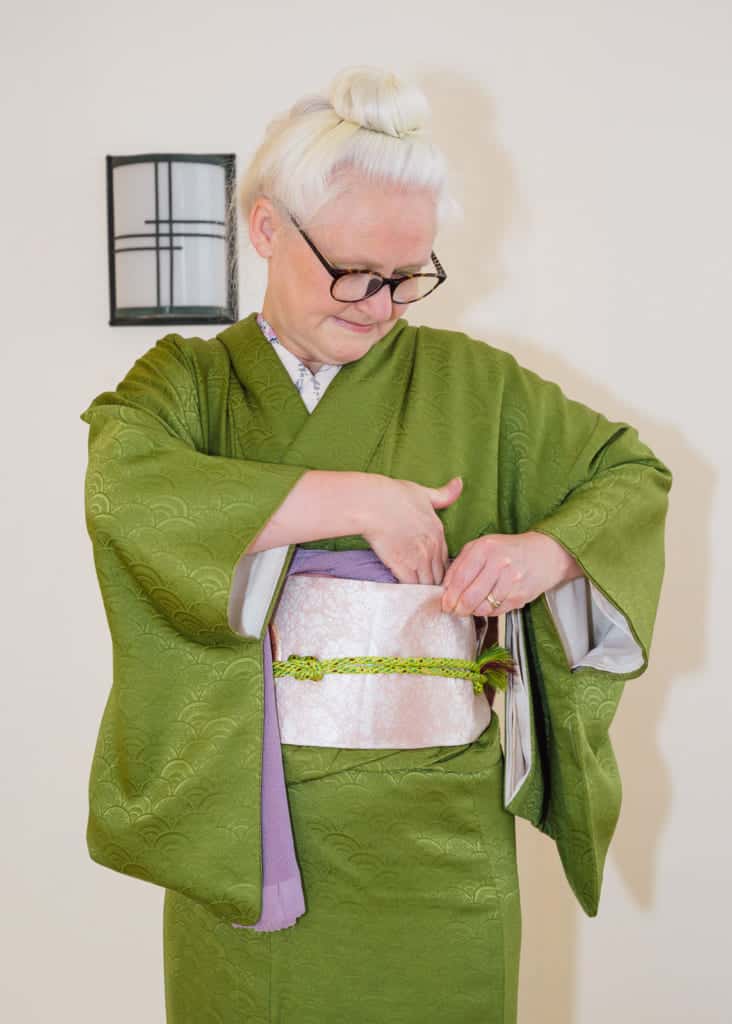
Tuck the right end (left side) of the obiage down into the top of the obi
Bring the left end to the center and roll up the excess from the end, leaving about 10cm. Tuck the rolled portion up outside of the knot you made and folding the remaining 10cm in half, tuck the other end inside the knot. Again, this is easier to understand if you watch the video starting at 14:18.
Draw your fingers along the top of the obi over the obiage from the center of your midsection to your sides to tuck it in properly.
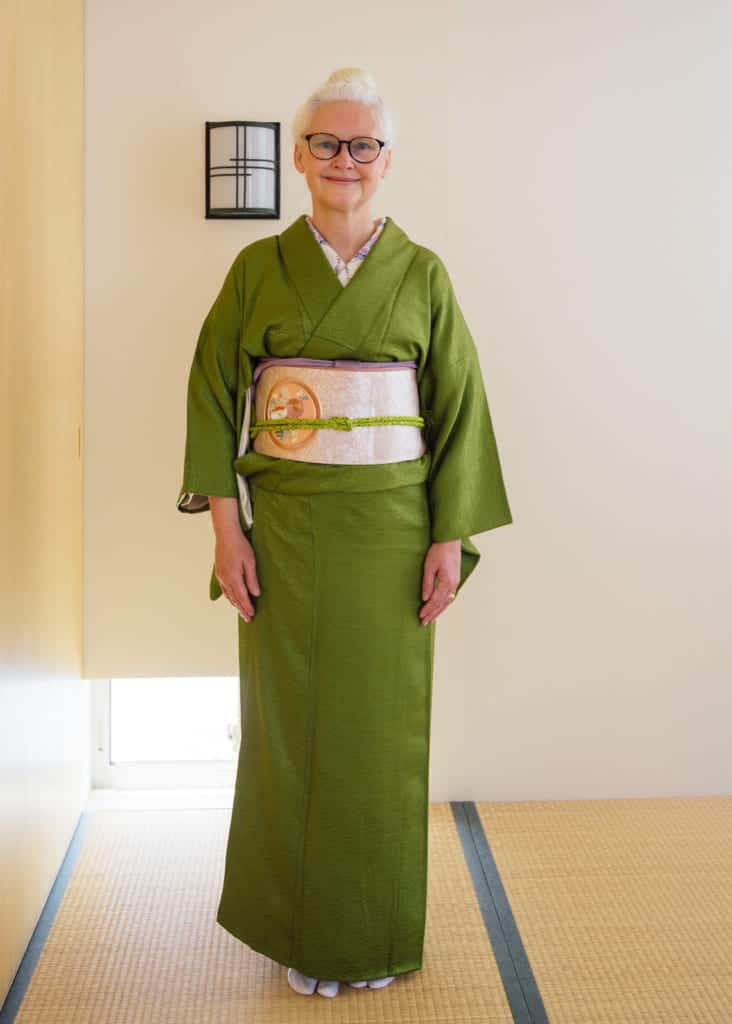
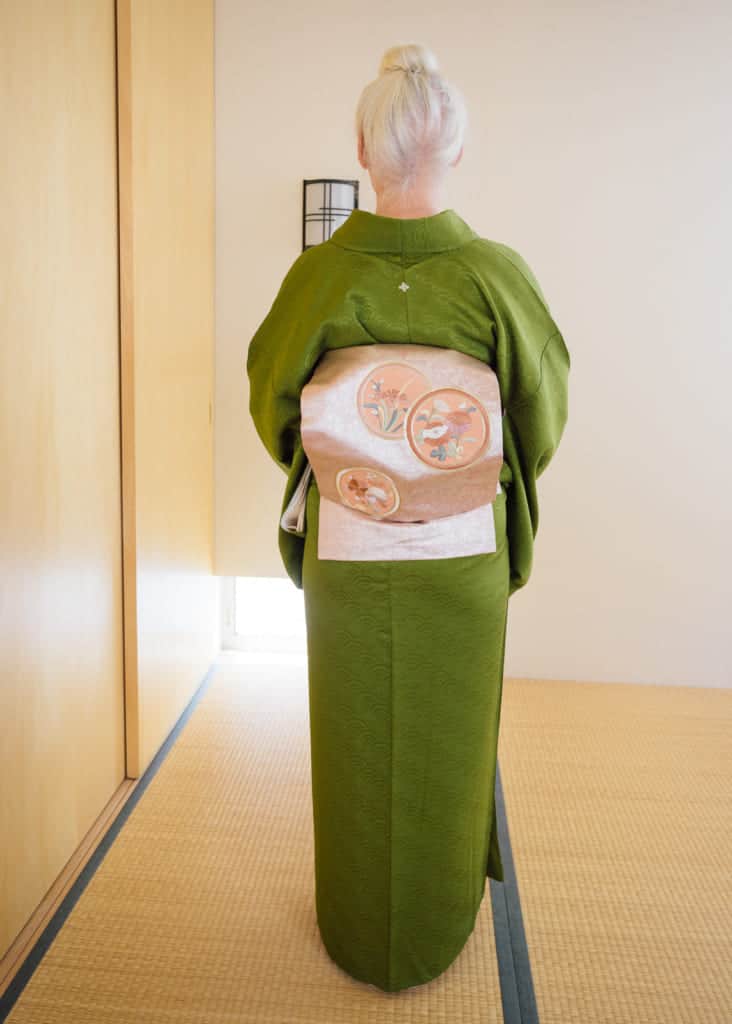
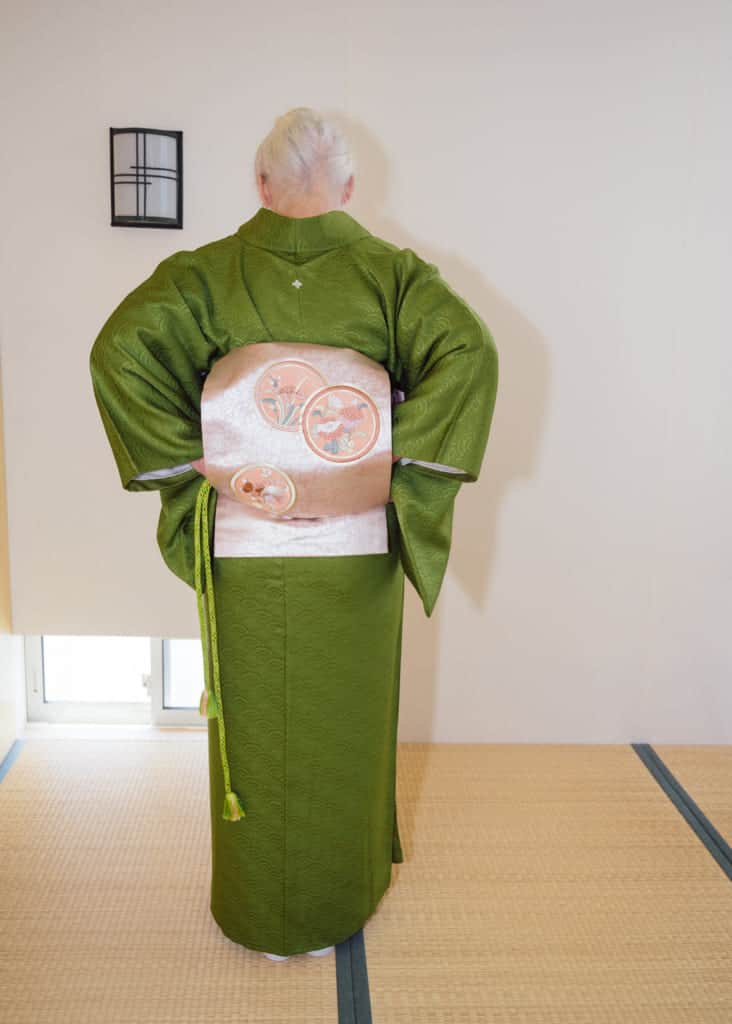
And that’s it; you can now tie the Nagoya obi in Taiko style! Don’t worry if you have trouble the first few times. Practice makes perfect!
View the video if you need a more detailed explanation of the steps from Sheila.
Sheila Cliffe
Dr. Sheila Cliffe has lived in Japan for over 30 years and is a noted expert on kimono history and fashion. She is the author of “The Social Life of Kimono” as well as author and subject of the photo book “Sheila Kimono Style“. She is also an ambassador for Kyo Tango chirimen textiles on their union’s 300th year anniversary. As a professor she has extensive experience teaching kimono in a variety of settings, but the art and joy of dressing is her greatest pleasure.


No Comments yet!