The kimono 着物 is one of Japan’s most iconic traditional garments, worn by both men and women for centuries. Unique to Japan and deeply rooted in its cultural heritage, the kimono is more than just clothing — it’s a symbol of elegance, artistry, and tradition. And while it holds a special place in Japanese culture, wearing a kimono is an experience that people from around the world are warmly invited to enjoy.
For many, however, putting on a kimono can seem complicated and even intimidating. That’s why we’ve teamed up with kimono expert Sheila Cliffe and kimono enthusiast Nichole to walk you through the process. In a previous article, they showed how to dress in a kimono by yourself; now, we’ll take it a step further and demonstrate one of the easiest and most stylish obi knots: the hanhaba obi 半幅帯 tied in the bunko style 半幅文庫.


Hanhaba Obi: An Obi for Yukata and Kimono
What is a hanhaba obi? There are many different types of obi, ranging from formal obi embroidered with metallic silk thread to casual obi made from cotton with simple patterns or designs. A hanhaba obi is a casual obi, half the width of a standard or formal obi. It is not uncommon for a hanhaba obi to have a different pattern on the front and back, making it a versatile and inexpensive complement to your kimono wardrobe.
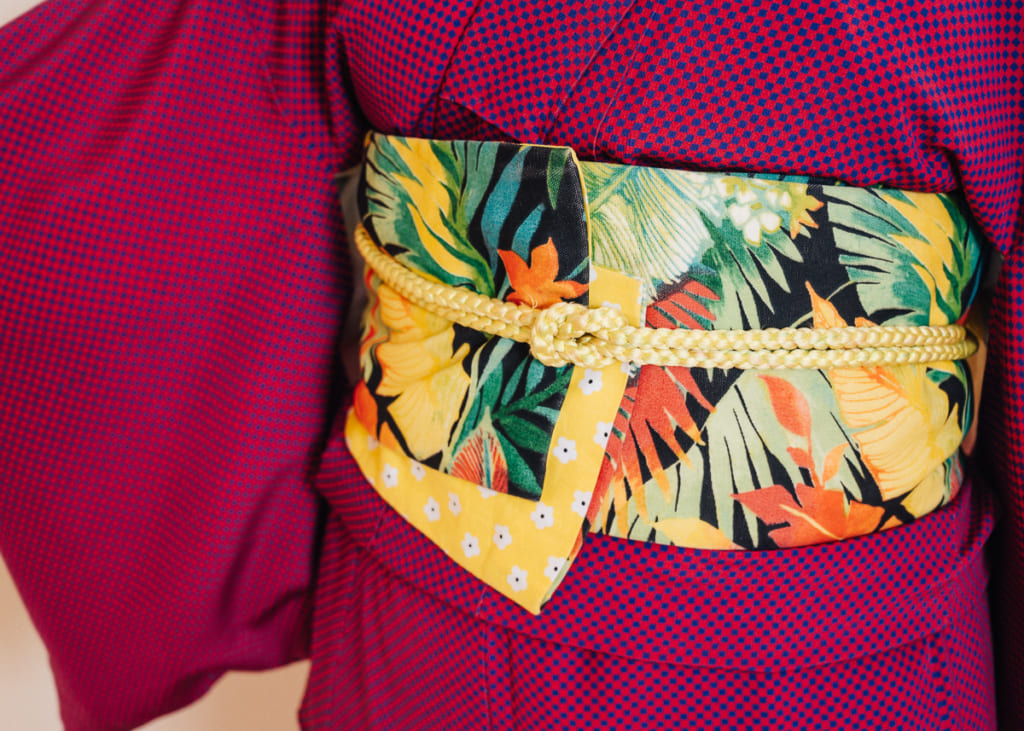
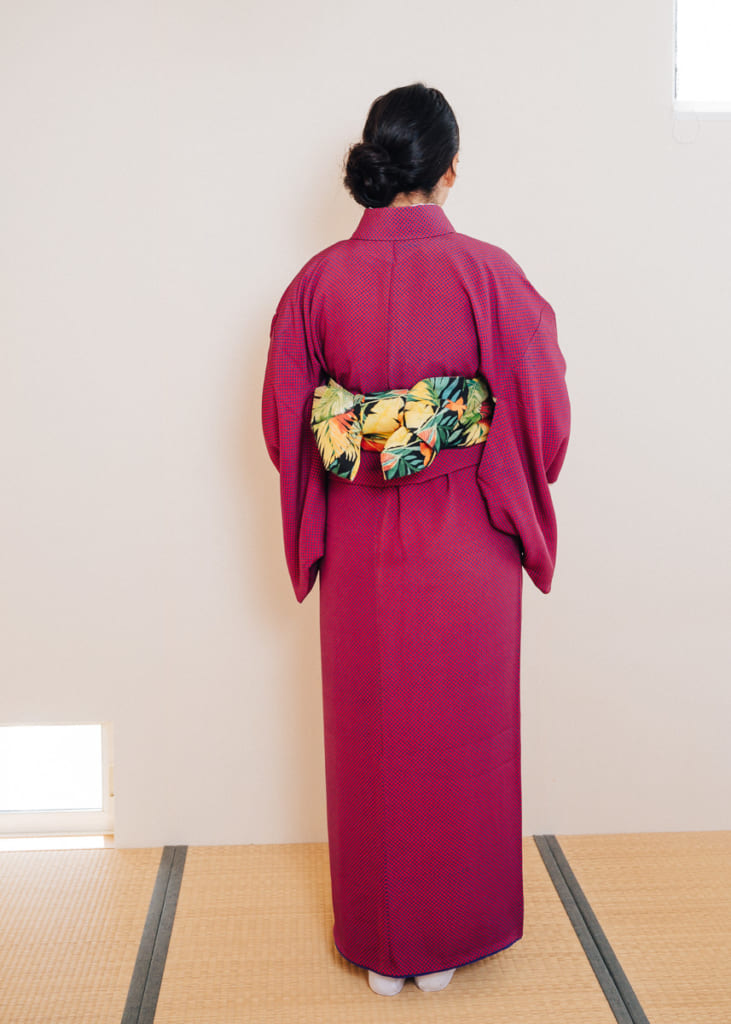
The hanhaba bunko style is useful as both a tie for casual kimono like the pink and blue komon kimono Nichole is wearing and also for summer yukata, the informal cotton form of kimono worn during Japan’s hot summers, usually to attend festivals. If you learn to tie this obi style, you’ll be ready to go out in kimono or yukata year-round.
How to Tie an Obi: Step-by-Step
Nichole has selected a hanhaba obi with two patterns, and she decided the design she wants to show is one of jungle flora.
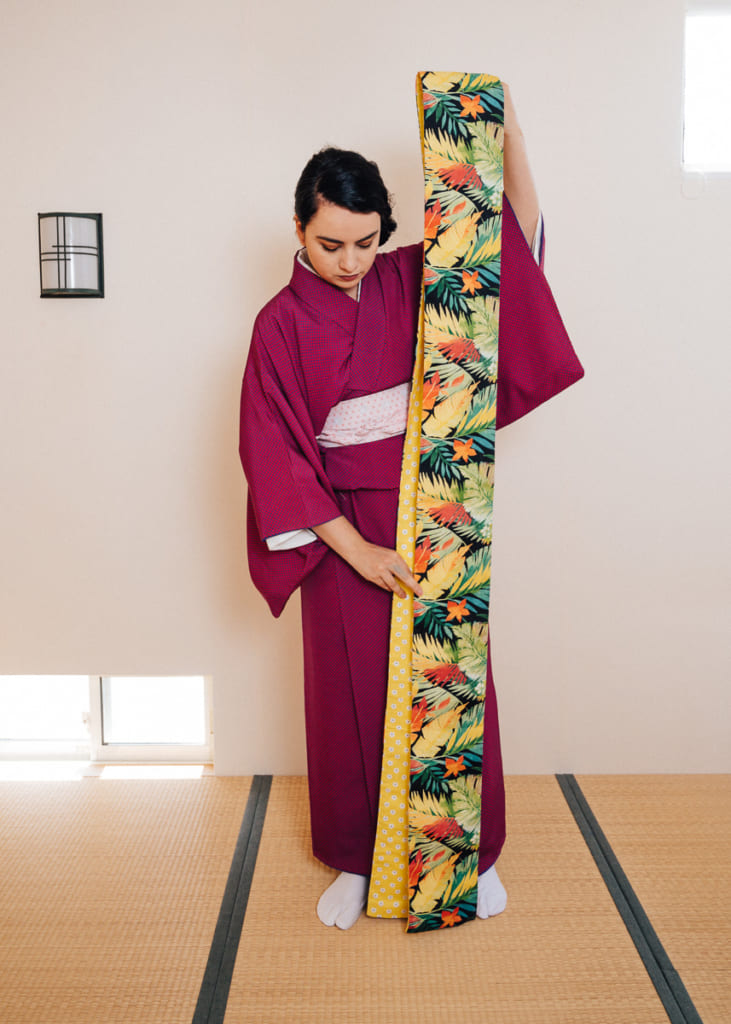
The first step is to measure about 45cm in length from one of the ends of the obi. You can estimate the length by using the distance from your shoulder to your hand.
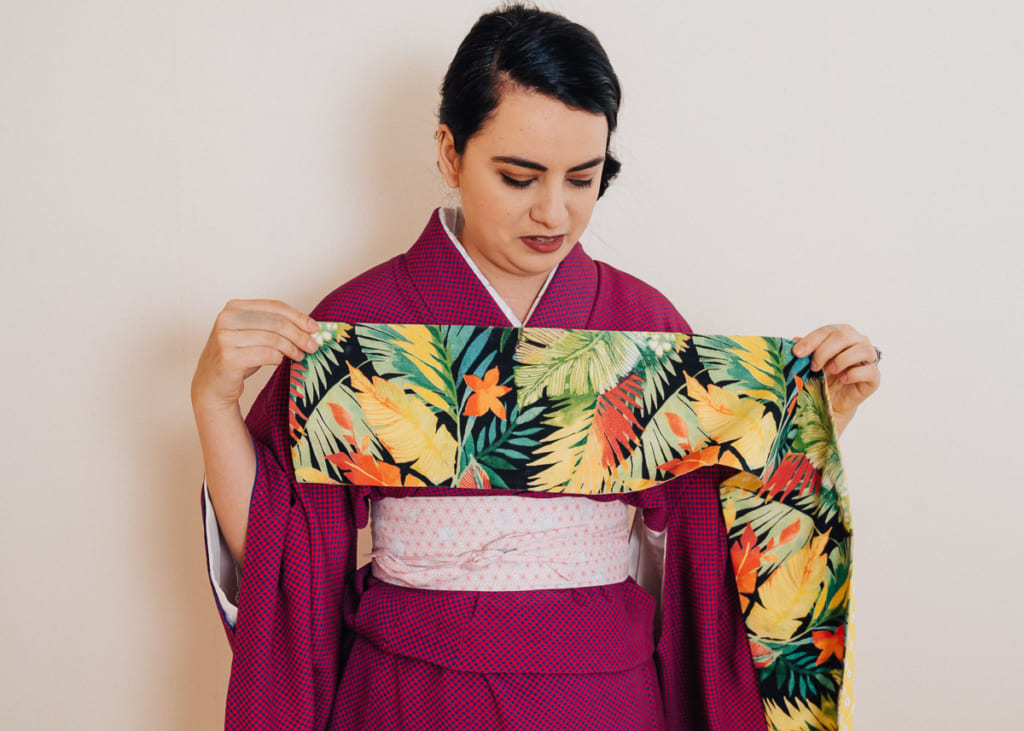
Taking the length you measured, drape it over your right shoulder with the pattern you are using face down. In this case, the back of Nichole’s obi is yellow with white flowers, and you will see that it is the side facing up. At this point, some people would also fold this length in half horizontally with the main pattern showing on the outside, but this step can be done closer to the end as well.
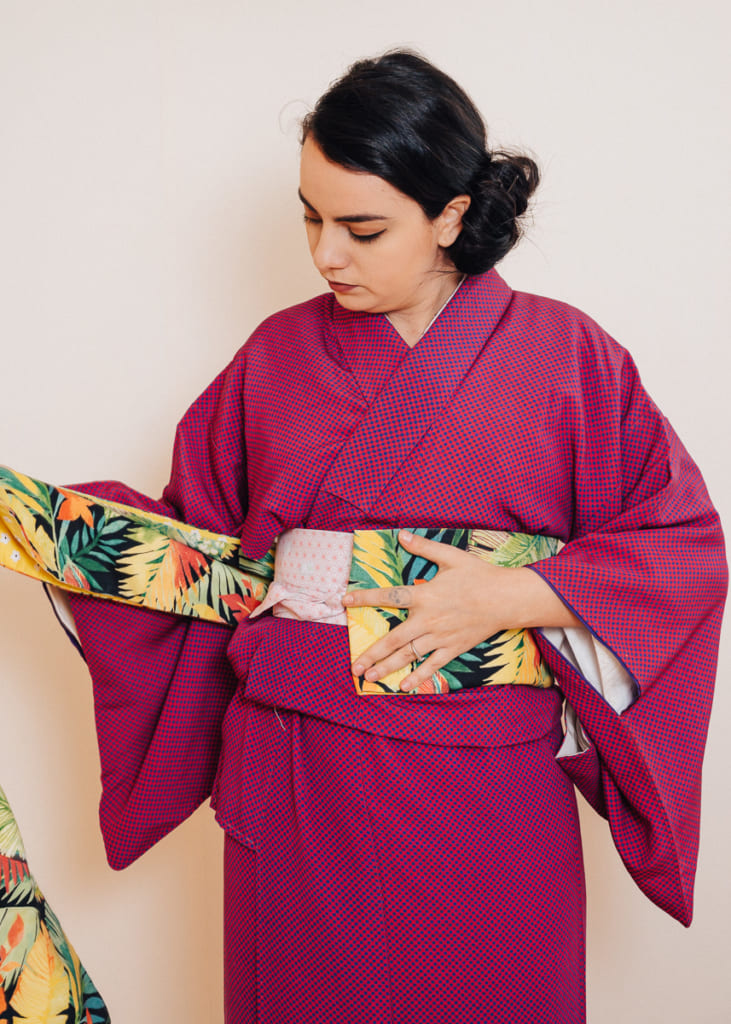
Make a 45 degree fold in the obi so it is oriented horizontally across your midsection below the bustline, completely covering the date-jime sash 伊達締め.
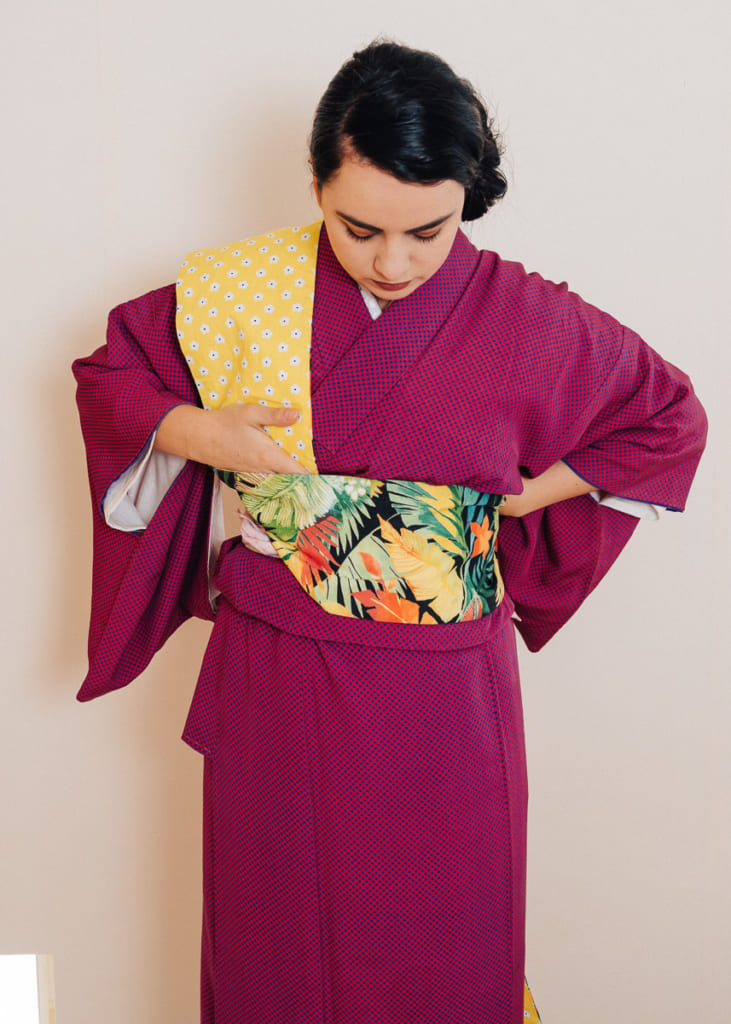
Wrap the obi around yourself once by turning clockwise in place one full rotation. Adjust the obi so that it is tightly around you, then repeat the action, another full rotation and tighten the obi around you.
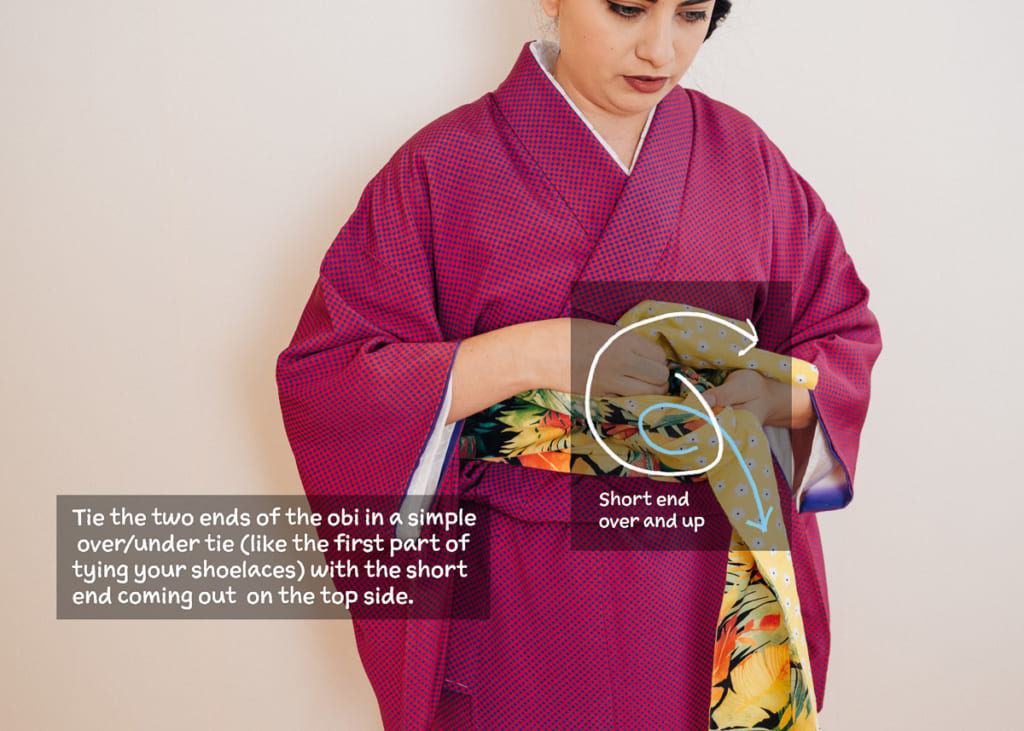
Holding both sides of the loose fabric of the obi, make a crossover tie (like the first part of tying your shoelaces), making sure the short end of the obi that was draped over your shoulder ends up coming out the top of the tie. As before, you can drape it over your shoulder until you are ready to use it later.
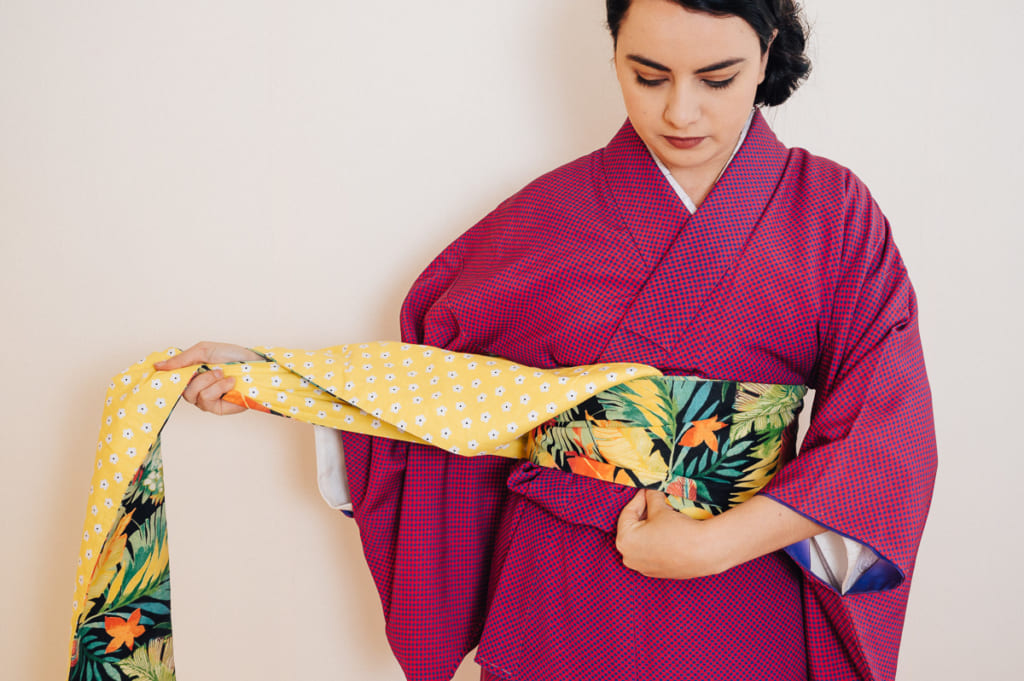
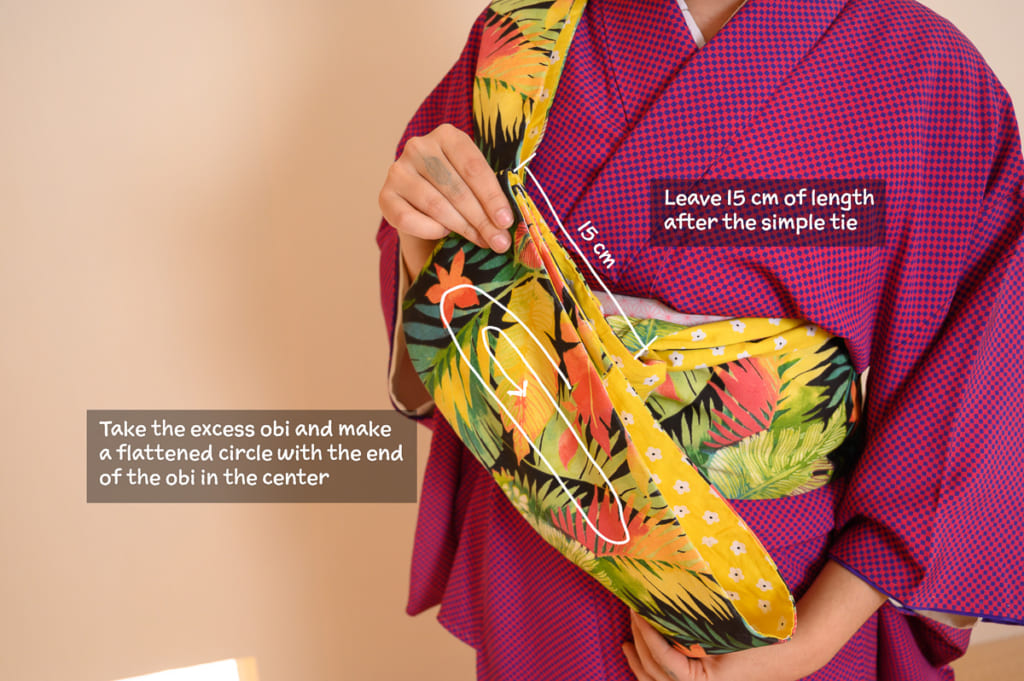
Holding the long end of the remaining obi, measure off about 15-20cm of width from where the end is tied and fold the obi back toward the tie. The remaining length of the obi will be used to make a bow.
To make the bow, gather the remaining length up in a circle, with the end of the obi ending up on the inside. The width of the flattened circle of obi should be about the width of your torso, so adjust the circle as necessary to make it this width. You should have enough spare length to double back on itself 2.5 to 3 times.
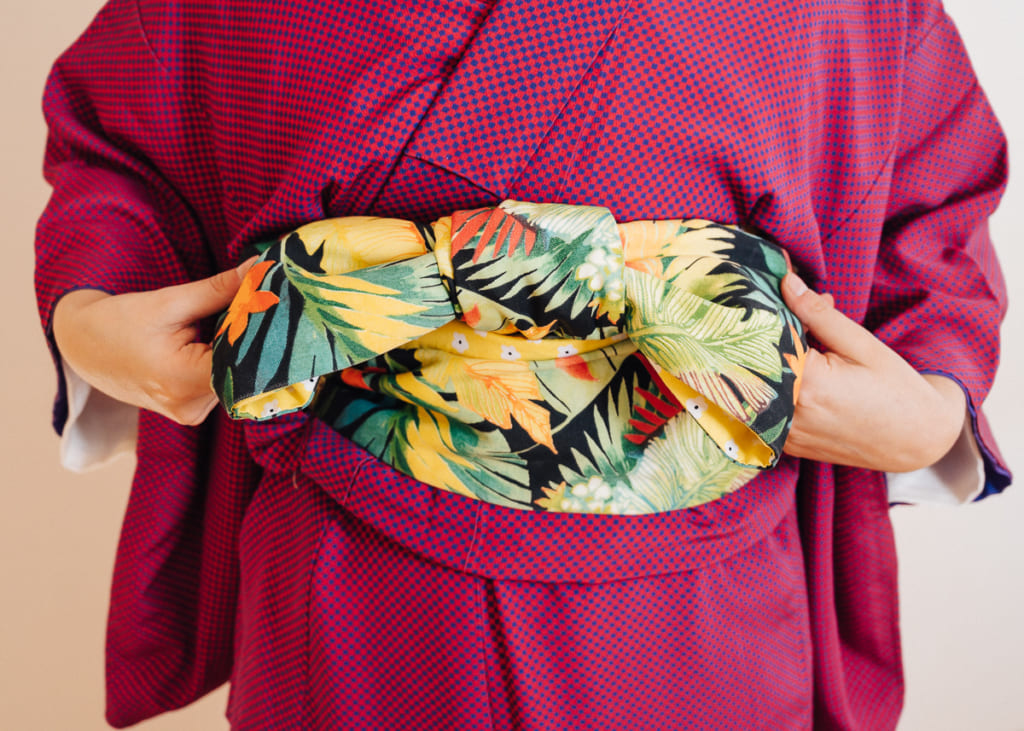
Holding the circle of cloth, pinch one to three folds into the center of it. The number of folds you are able to make depends on the thickness and stiffness of your obi. Hold the folds in place with one hand. If you had not already folded the short end of the obi in half horizontally, do this now, then use it to wrap around the folds you created, holding it in place and creating the bow shape. If you have too much obi length at the short end, you might have to wrap it around twice. Carefully hide any remaining length by tucking it into the part of the obi wrapped around your waist.


The bow should be sitting at the top of the obi tied at your waist. Rotate the bow so that it is facing upward, like it was on top of a present, not outward. Adjust the “wings” of the bow to give it a nice shape.
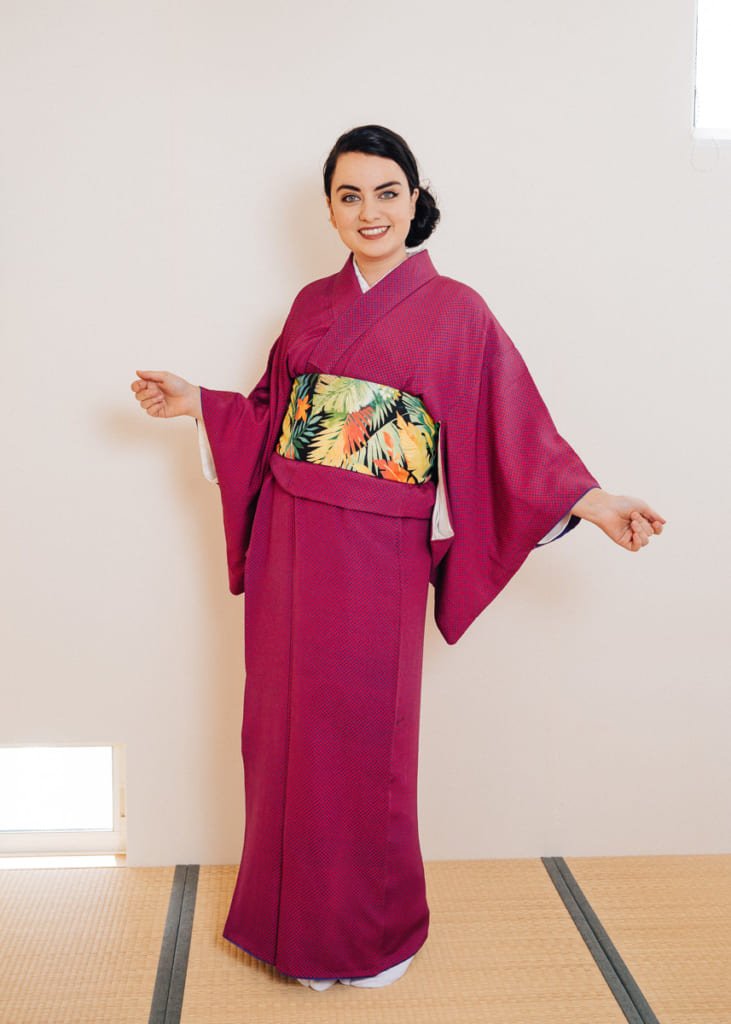
Finally, it is time to move the bow to its proper place — on your back. Grabbing the obi at the point where the bow is “attached” and the other hand on the obi in the middle of your back, gently rotate the whole structure clockwise until the bow is in the middle of your back. You must go clockwise only, or you will loosen your kimono inadvertently and make a mess. If you rotate the bow too far, keep going clockwise until you get it around again.
And there you have it, a simple and wonderful obi to complement your casual kimono. Practice makes perfect, so if you already have an obi, you can practice tying it while watching yourself in the mirror. You don’t even need to put on a kimono first!
Bonus: The Easiest Way to Tie an Obi, No Tie!
In a modern twist by Instagrammer @ayaayaskimono, she demonstrates a beautiful and creative way to wear an obi without the need to tie it! With practice, you can put on an obi in a minute or less. This style has become very popular in Japan, especially among young women, so Sheila thought it would good to demonstrate this style as well.
You will need an additional accessory, an obi-jime 帯締め, which is a braided decorative cord tied over an obi. In most cases, it is purely for decoration, but in this style, it is responsible for holding the obi in place.
Take your hanhaba obi and fold it in half lengthwise. Put the end which is folded in half against your body and wrap the obi around yourself until you have used up the entire length. Using a bit of trial and error, wrap the obi around your waist until the outer end of the obi ends up in the proximity of the center of your torso. If it is off-center a little bit, that is also good.
The simplest way to wear this style is to take the two folded ends of the obi and spread them apart, giving you two different patterns (front and back patterns) if you are using a two-sided hanhaba obi. Alternatively, you can make creative little folds in the fabric to create a design.
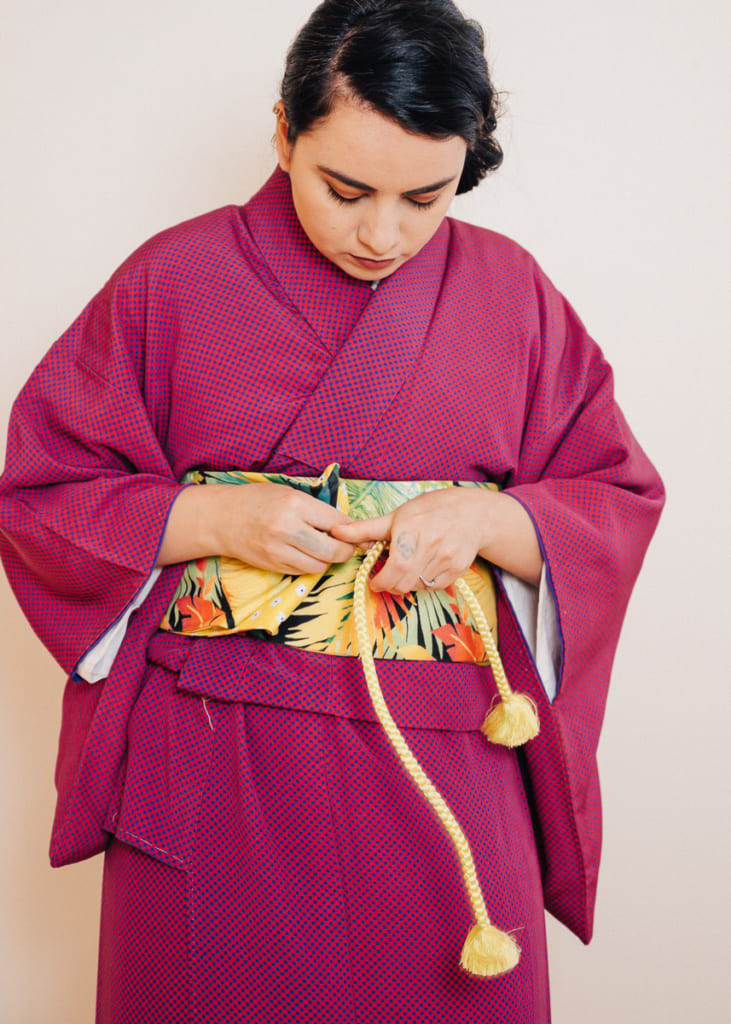

Taking your obijime, tie the end of the obi in place as you have designed it. Make a square knot in the middle and hide the ends of obijime by tucking them in on itself behind your back.
Ready to Go Out in Your Kimono
So now you are armed with two ways to tie an obi and, along with the instructions on how to put on a kimono, you are ready to dress yourself in traditional Japanese style. Stay tuned for future articles, where Sheila will demonstrate how to tie a more formal Nagoya obi by yourself, along with some other surprises.


No Comments yet!